Here you can find the instructions on how to add a new blog post in Magento 2.
Add New Post
1. Navigate to the TEMPLATEMONSTER section.
2. Find Blog and click Posts.
3. To create a new post, you need to click the Add New Post button at the top.
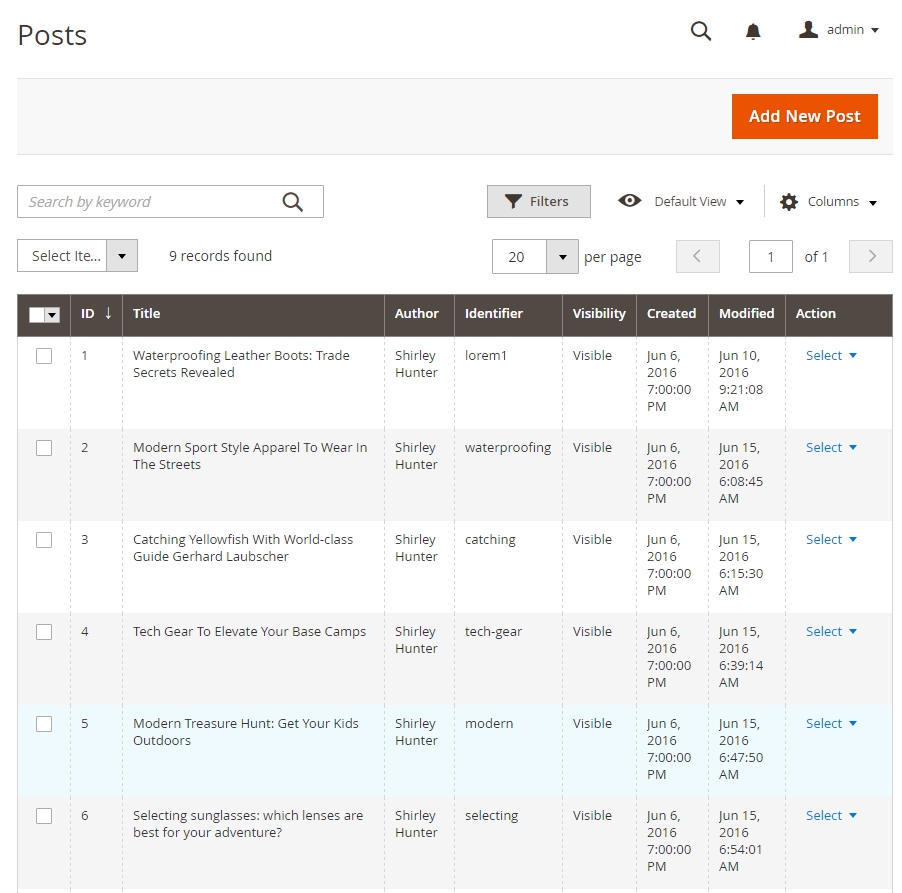
Post information
In this section, you need to specify all information regarding new post.
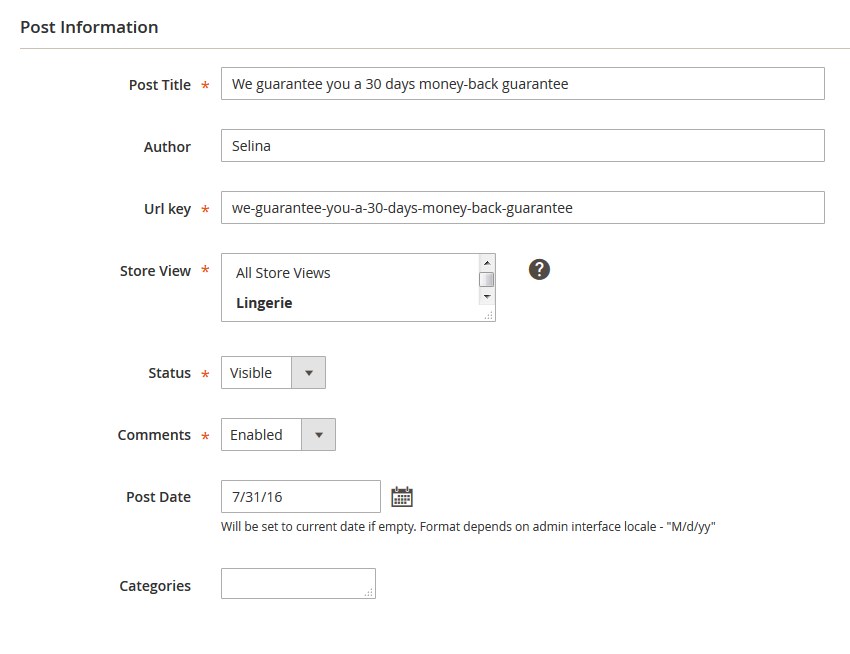
Let’s review the available options:
- Post Title — specify the post title.
- Author — specify the author name.
- Url key — enter the URL key for the post.
- Store View — specify the store view.
- Status — show/hide the post.
- Comments — enable/disable comments.
- Post Date — choose the post date.
- Categories — choose the category for your post. Create the category at TemplateMoster > Blog > Categories.
Content
Articles supported formats: WYSIWYG editor, inserting Widget, Insert Image.
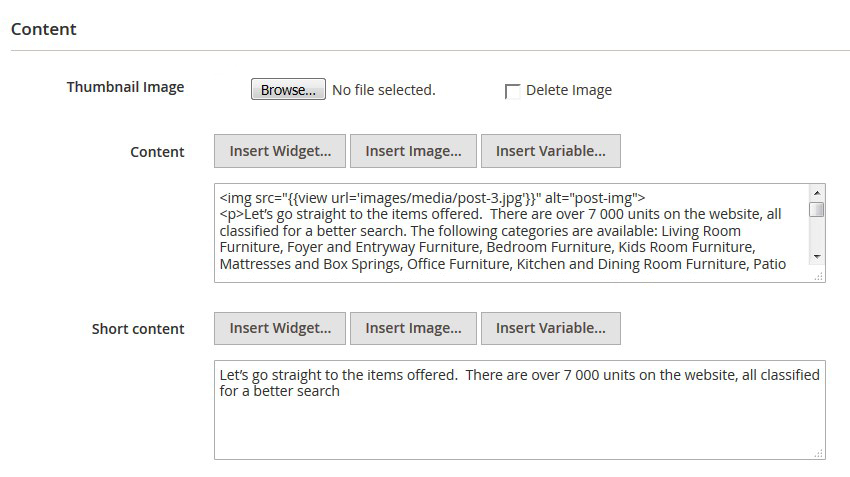
- Thumbnail Image — upload the featured image for the post.
- Content — add the content.
- Short content — add short content that will be displayed on the blog page.
Meta Data
This section contains metadata for your post. You need to specify keywords and short description here.
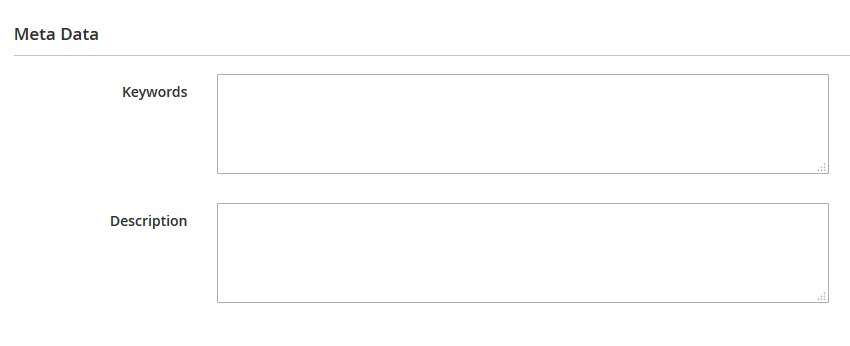
- Keywords — add proper keywords.
- Description — add short description.
Related Products
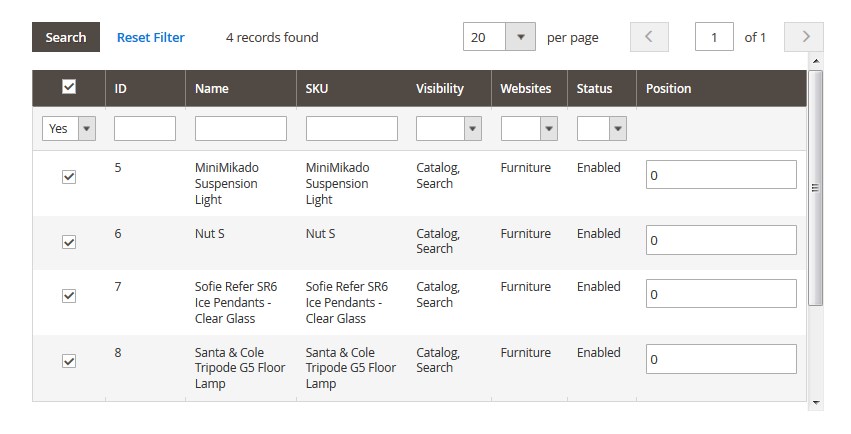
Here you can choose related products that will be displayed on the post page. Check the products you need to add and specify position of the products
Related Posts
This section works the same way as the Related Products section.

Post Comments
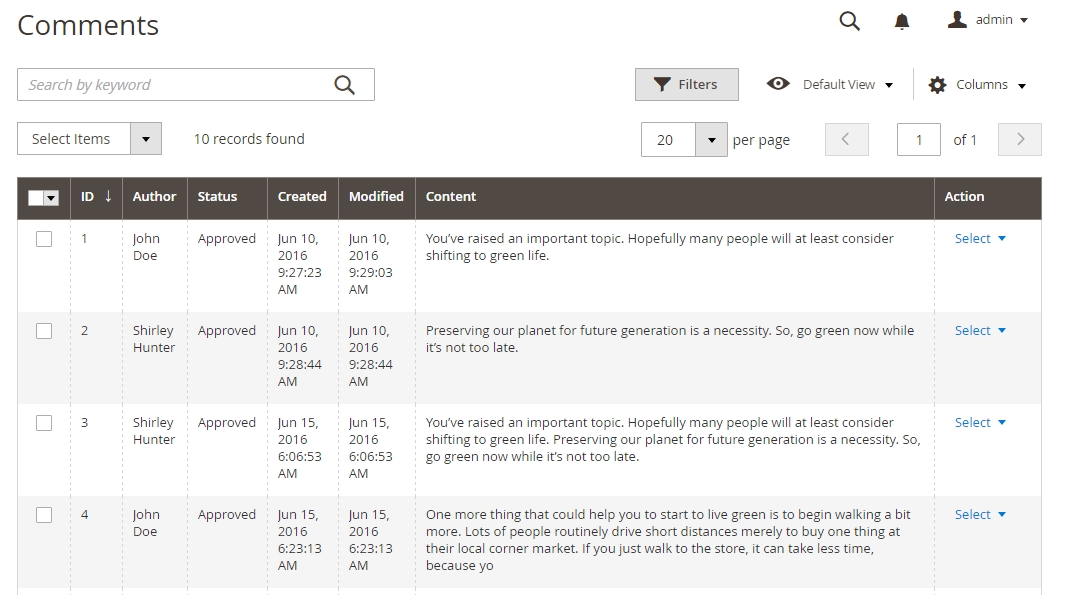
Navigate to the TEMPLATEMONSTER section in the left sidebar. Find Blog and click Comments.
In this section, you can see all the comments for a particular post. You can edit and display each of them. To do this, you need to click the Edit button in the right column.
In the popup window you will see the following information:
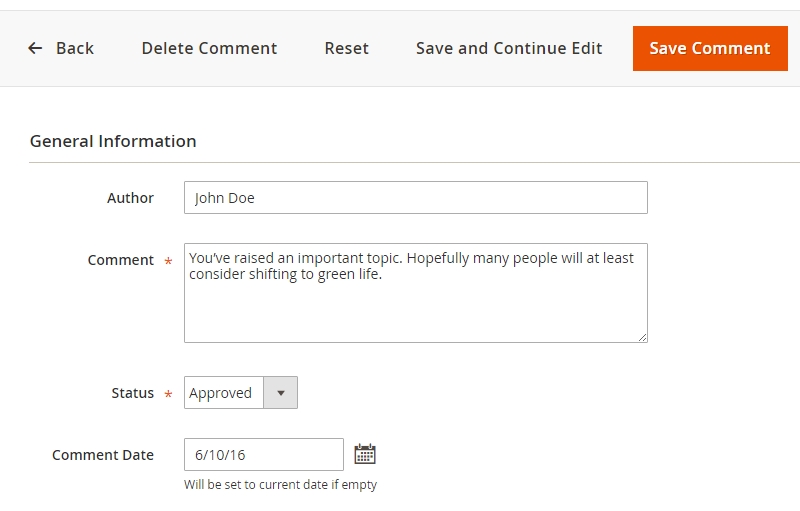
- Author — the author name.
- Comment — the comment text.
- Status — show or hide the comment.
- Comment Date — change the comment publish date; Will be set to current date if empty.
✓ Click on the “Save Post” button.


