In this tutorial, we will learn how to install Joomla engine and template using fullpackage to make your look like theme live demo.
- First, you should upload the fullpackage.zip file located in the template package joomla folder to your server.
- After that, please, unzip the archive on your server using your hosting filemanager unzipper tool, the unzip.php script provided with the template or WinZip software in case you are installing the template on a localhost.

- Create a new database in your database management tool for Joomla installation.
- Open your website address using the browser now.
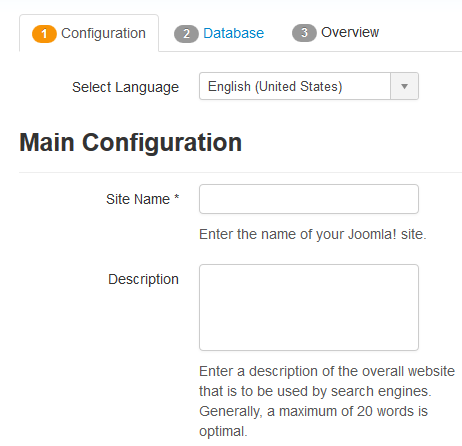
- On the first installation step, you should put your desired Site Name and description (optional).

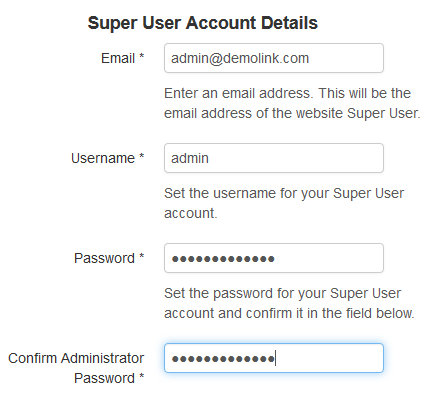
- You need to fill your admin e-mail, desired username and password to access admin panel as well.

- Choose the preferred language and click the Next button.
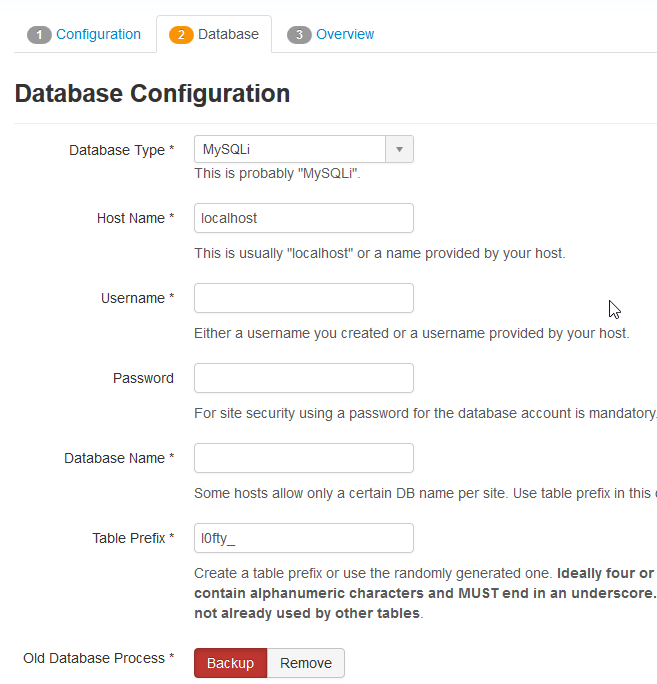
- On the second step, you need to fill the database connection details. If you are not sure about them, please, contact your hosting provider.
 Below you can see Old Database Process section. If you have any existing database tables, choose what to do with them. The options are to remove or backup any existing data that’s about to be replaced. We recommend that you leave this option set to Backup since it is the safest choice.
 - Click the Next button after that.
- Choose the sample_themeXXXX from the list of “Install Sample Data” options and click the Next button.
- The installing process should start. Wait until it is completed.
- After you got the “Congratulations! Joomla! is now installed” message you should rename or remove the folder “installation” on your server. Simply click the orange button “Remove installation folder” or rename this folder on your server whatever you wish.
Check your website after the installation.
We hope this article helped you learn how to easily install engine and template using fullpackage and make it look like the live demo.


