


In PrestaShop templates, you have an opportunity to add and edit the administrative units (states, provinces, regions, etc.) of any of the existing countries.
By default, PrestaShop already has the states/regions for some countries, which you can edit, remove and, add new ones if needed.

In order to manage states/regions, perform the following steps:
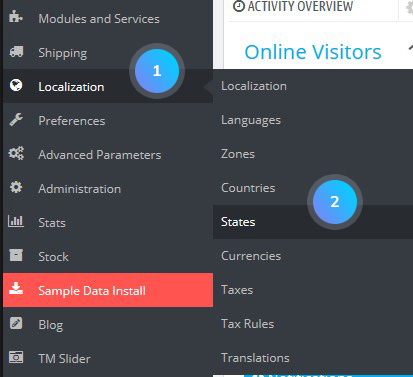
- Login to your PrestaShop admin panel and go there to the Localization -> States section:
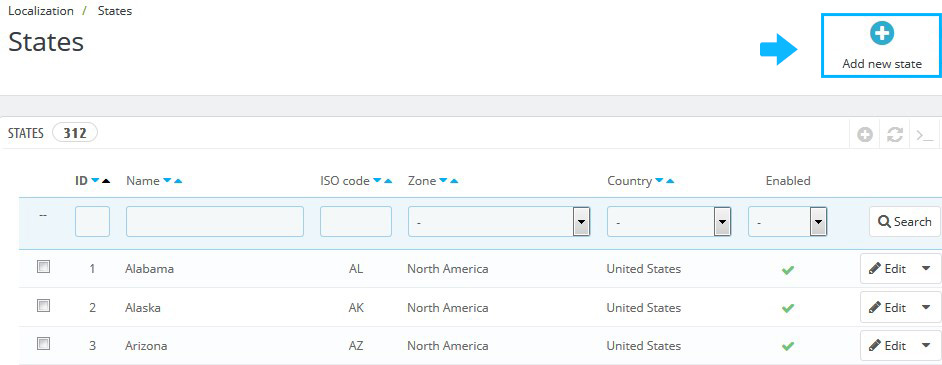
- Click the Add new button, located at the top right corner:
- Type the name of the state, select the needed country and zone the state belongs to.
- Type the ISO code for the new state/region.You can locate the needed ISO codes here.
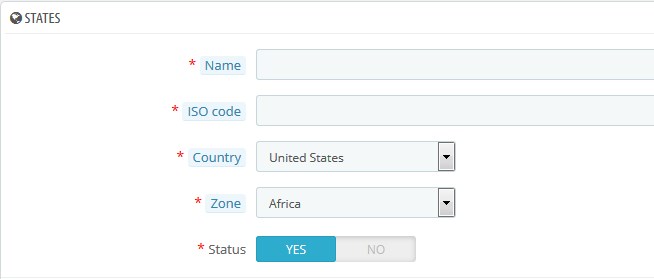
- Confirm the action by pressing the Save button
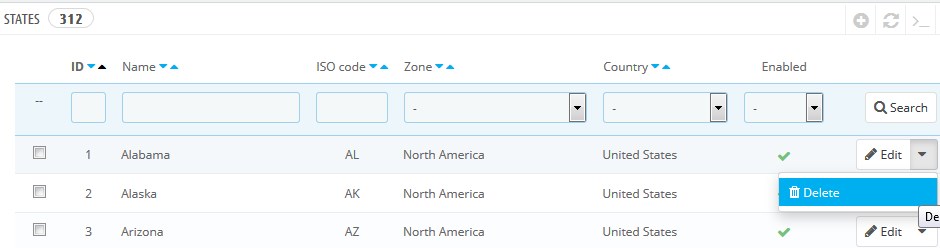
- You can edit or delete the states that were already created by clicking the Edit button if you want to change state details, or Delete button if you want to remove the state:
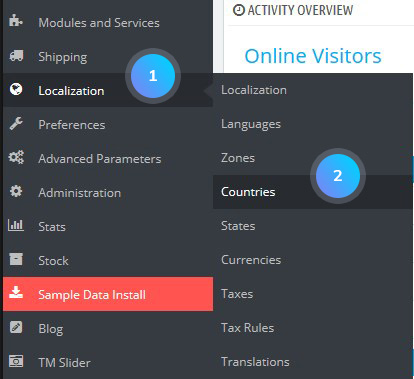
- If you add new states and choose which country the state should belong to, you can select only from those countries that have their Contains states option enabled. To enable this option, go to the Localization -> Countries:
- Click Edit button to edit the country and set its Contains states option to Yes:
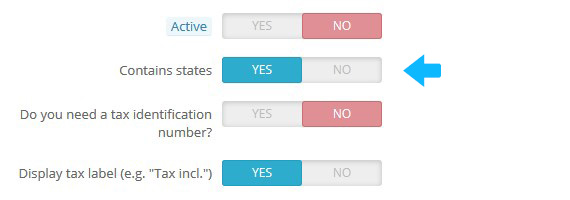
- Confirm the action by pressing the Save button.
Hopefully, this tutorial was helpful for you.
