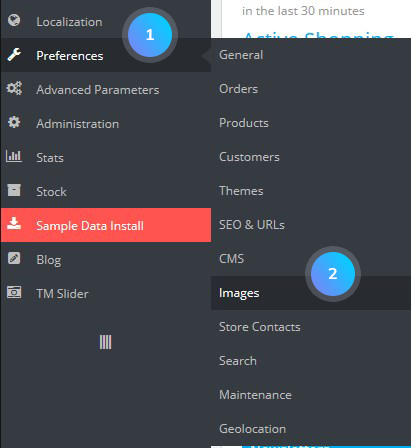
- In your PrestaShop admin panel go to Preferences -> Images section:
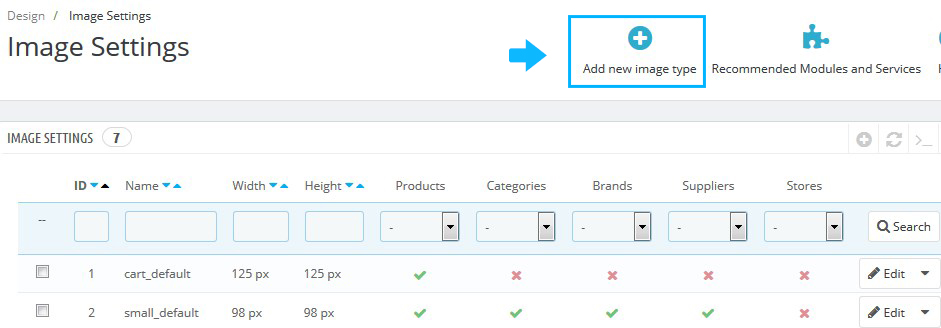
- Click Add new image type button:
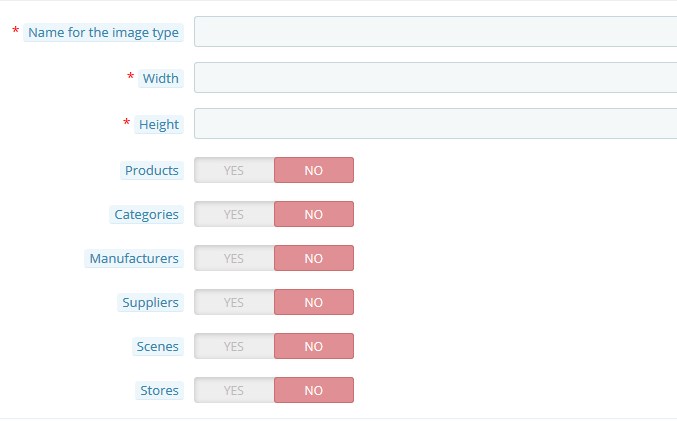
- Fill in the required fields. Make sure to set the Products option to Yes while having other options set to No. Click the Save button:
Apply some products group
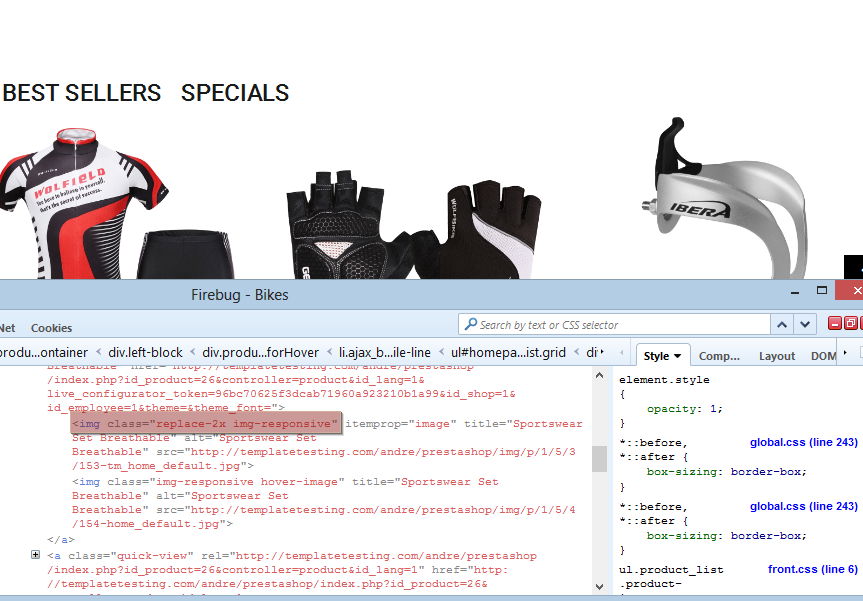
- To apply newly created image type to New Arrivals block on the Home page, you need to find out the products image class using Firebug tool. It can be enabled with the right click on the screen and selecting Inspect Element from the drop-down menu:
- Use Total Commander or another FTP client that allows searching through files and search for specific class text. Find blocknewproducts.tpl file. Open it for editing and find the following line of code there:
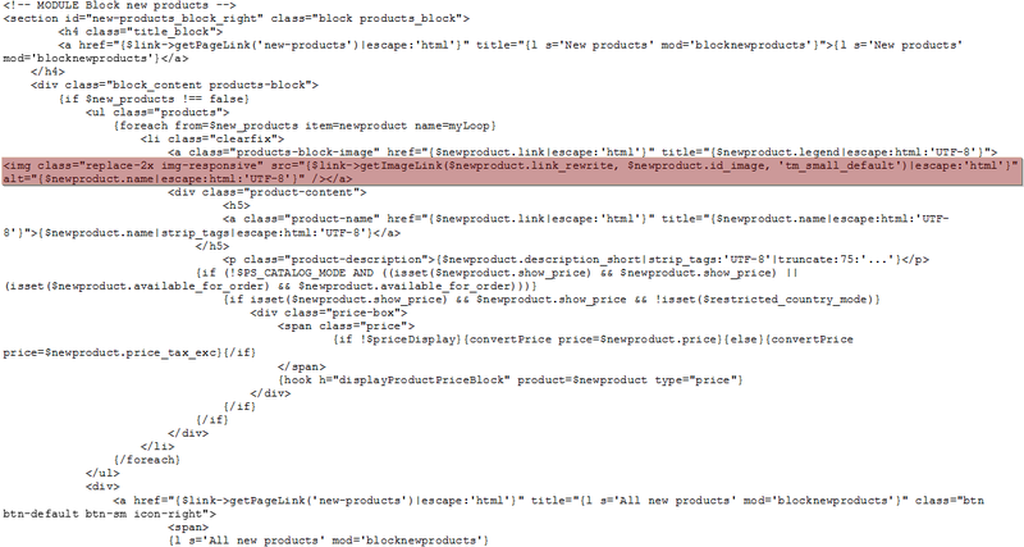 Pay attention to the “src” attribute:

Replace the tm_small_default text with previously created image type name – custom_default: 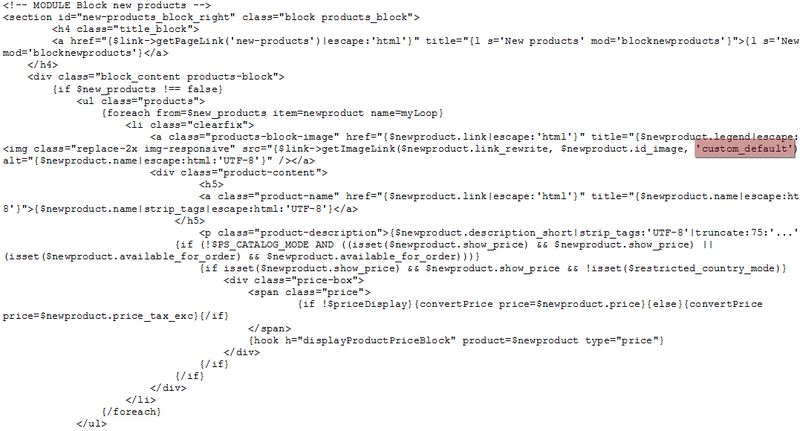 Save changes.
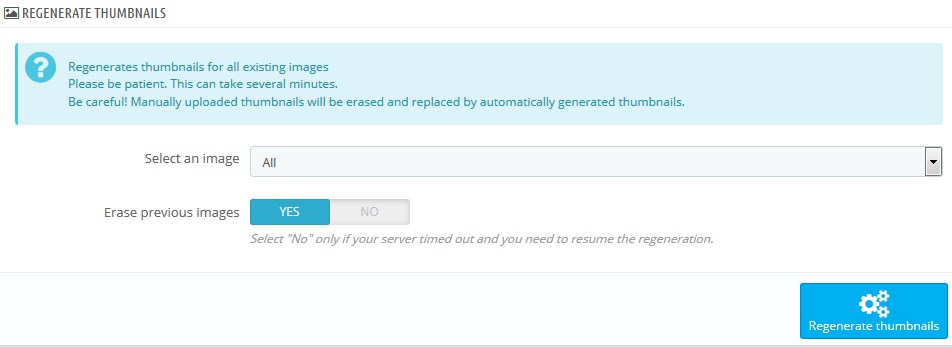
Perform thumbnails regeneration
- Go back to Preferences -> Images. Find the Regenerate thumbnails section at the bottom of the page and click the Regenerate thumbnails button:
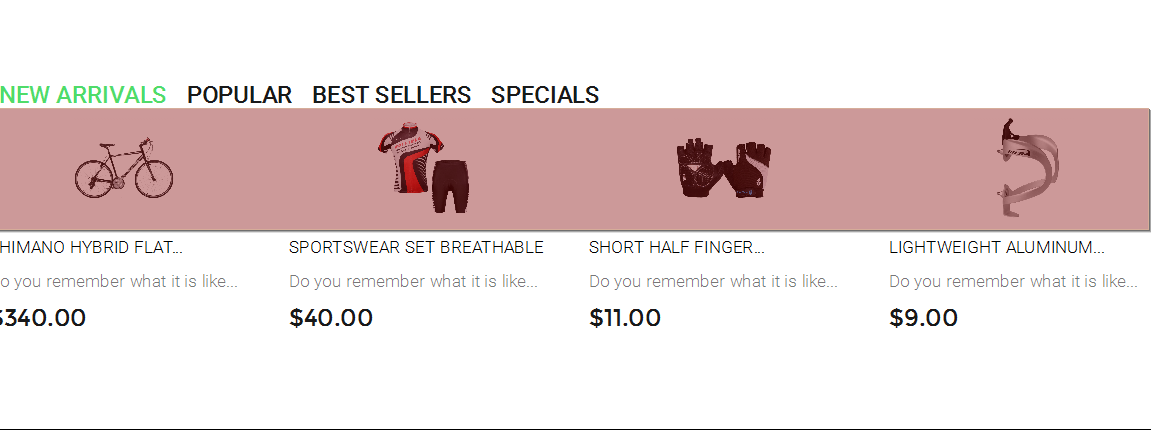
- Your custom image type is successfully applied to the New Arrivals block products:
Hopefully, this tutorial was helpful for you.