
The concept of ownership is evolving, and rental services are becoming increasingly popular. If you’re looking to capitalize on this growing trend of online business, creating a car booking marketplace can be a great idea.
This comprehensive guide is designed to assist you in building your very own car booking platform, all within the user-friendly environment of WordPress. No coding skills are required as we take you through each step, from plugin installation to advanced customization, to ensure your marketplace thrives in the competitive market.
So, let’s get it rolling!
What is a car booking marketplace?
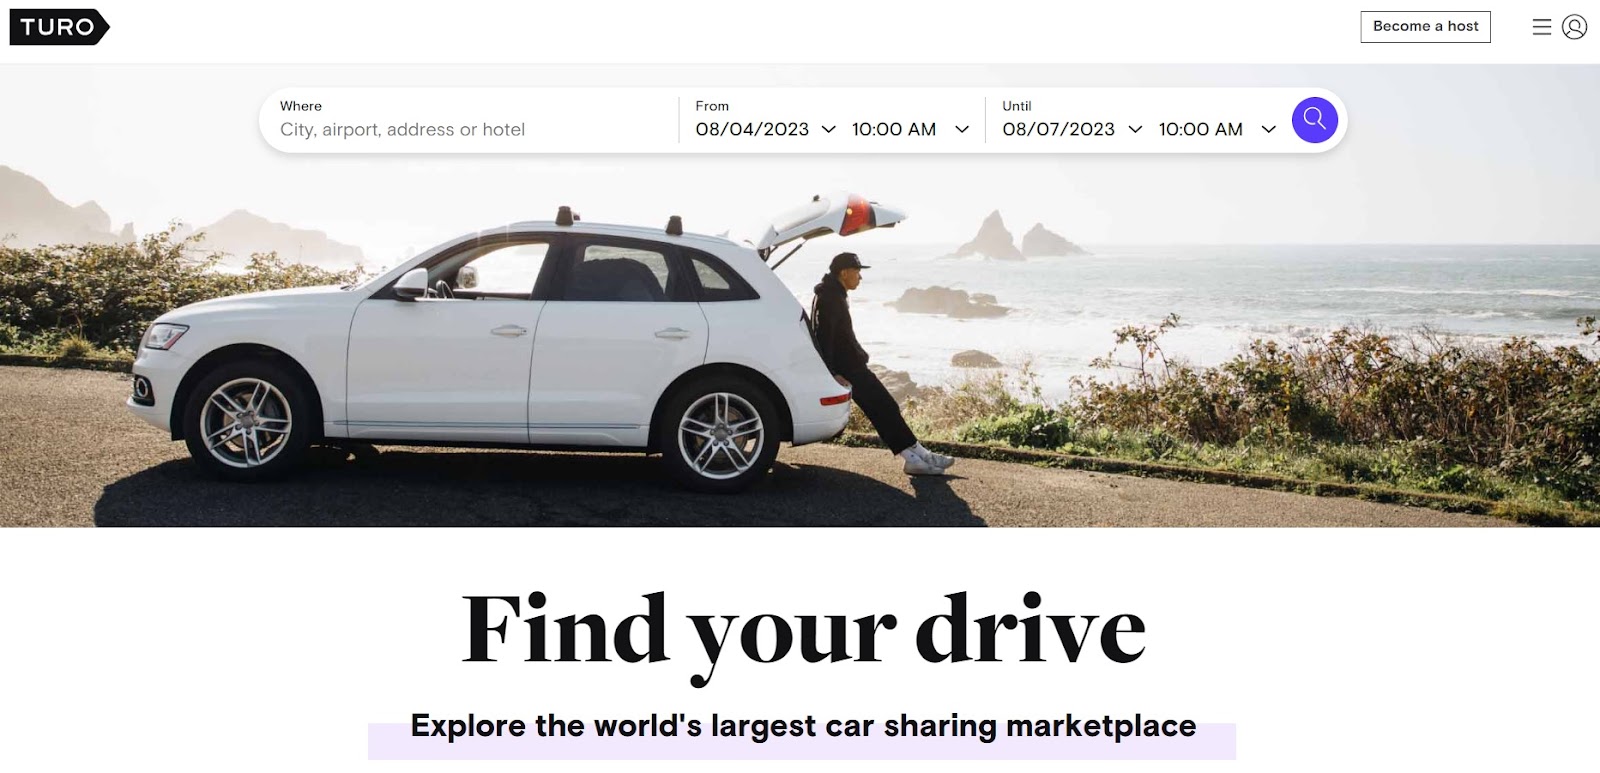
A car booking marketplace is a platform that connects vehicle owners with individuals looking to rent cars for various purposes. Whether it’s for daily commuting, weekend getaways, special occasions, or even booking RV rentals for cross-country trips, these platforms offer a hassle-free way to access various types of vehicles. Some popular examples include Turo, Getaround, and Zipcar – well-known platforms that provide car rentals, making it easy to rent transport for both urban dwellers and travelers.
Prerequisites for Creating a Car Booking Marketplace
Before diving into building your car rental marketplace with WordPress, make sure you have these prerequisites in place:
- Domain name
- Hosting plan
- WordPress installation
- Rental marketplace WordPress theme
- WordPress plugin that will power marketplace features
Taking the first steps in creating your car rental marketplace, it’s crucial to analyze and secure a domain name and WordPress hosting plan carefully. Once that’s done, your focus should be on selecting the perfect theme and plugin pairing for your platform. In this tutorial, we’ll use RentalHive, an all-in-one rental marketplace WordPress theme, combined with HivePress, a free and versatile WordPress directory plugin providing all the essential features to build a robust and feature-rich car rental marketplace with ease.
Steps to Create a Car Booking Marketplace
By following these steps, you’ll be able to launch your car rental marketplace website swiftly. Let’s proceed to the first step – the theme installation.
Installing RentalHive & Recommended Plugins
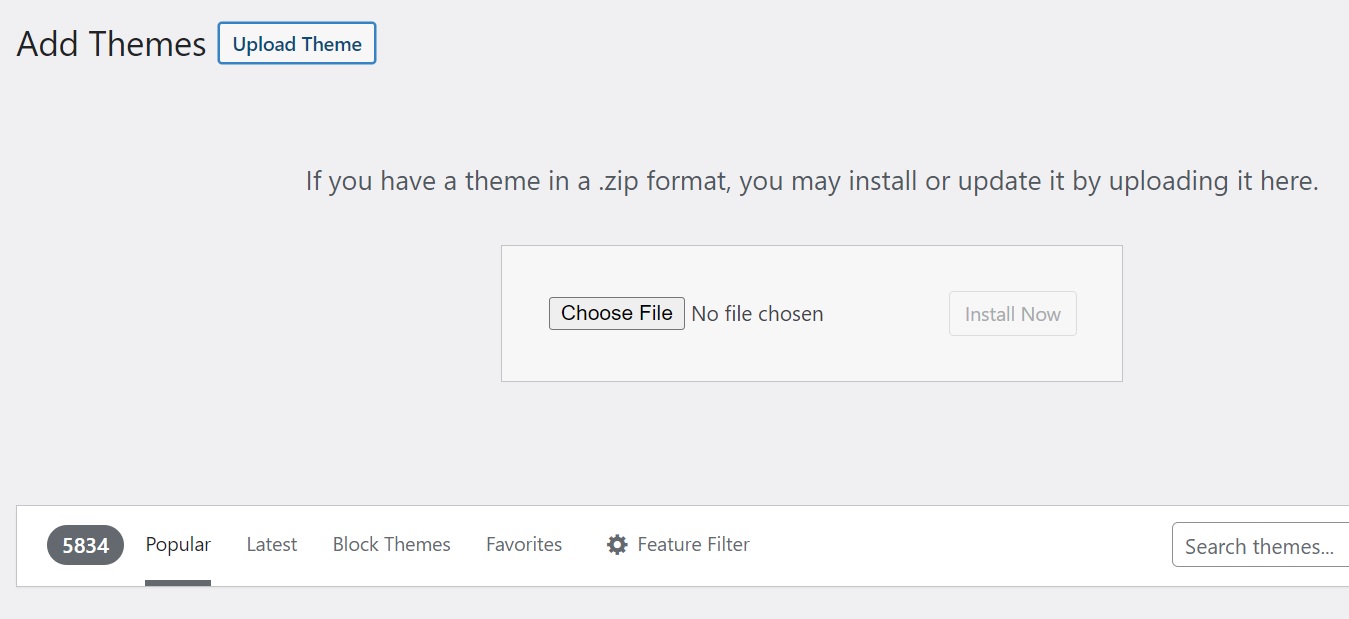
To begin setting up your car rental marketplace website, the first step is to install the RentalHive theme. In your WordPress dashboard, go to Appearance > Themes, click on “Add New,” and then select “Upload Theme”. Upload the RentalHive theme ZIP file, proceed with the installation, and then activate it.
Upon activating RentalHive, you’ll receive a prompt to install the recommended plugins, including HivePress. Simply click on the provided link to install and activate all the necessary plugins at once. These plugins will provide your car rental marketplace with essential features.
To power your marketplace with crucial e-commerce capabilities, you’ll also need to install WooCommerce, a popular and reputable e-commerce plugin that is seamlessly integrated with HivePress. To do this, go to Dashboard > Plugins > Add New, search for WooCommerce, and install it.
Creating Listing Categories
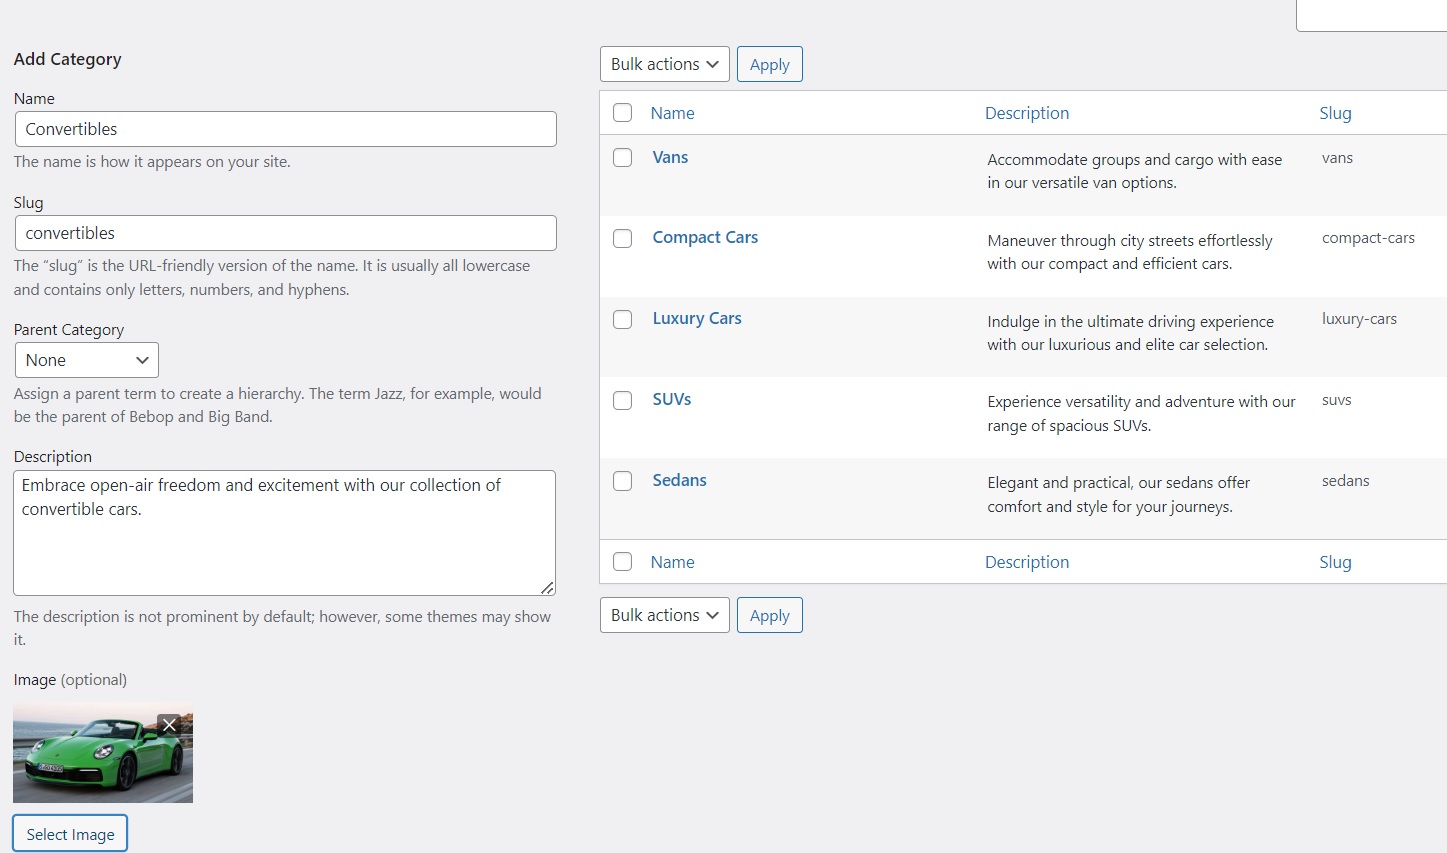
After installing the theme and necessary plugins, the next task is to create categories for listings. These categories help to organize and structure the rental cars, making it easy for users to find their desired options.
You can create categories based on the types of cars available for rental, such as “Sedans”, “SUVs”, “Luxury Cars”, “Compact Cars”, “Vans”, “Convertible Cars”, and more. Each category caters to different user preferences and simplifies the rental process.
To add listing categories to your platform, go to the Listings > Categories section in your WordPress dashboard. Enter the name of the category, add a description if desired, and include a related image if necessary. Click “Add Category” to save the category.
Furthermore, you can establish parent categories by choosing from the current list if you want to create a more organized structure. This hierarchical arrangement guarantees that users can navigate the platform effortlessly, finding different cars available for rent.
Adding Listing Fields
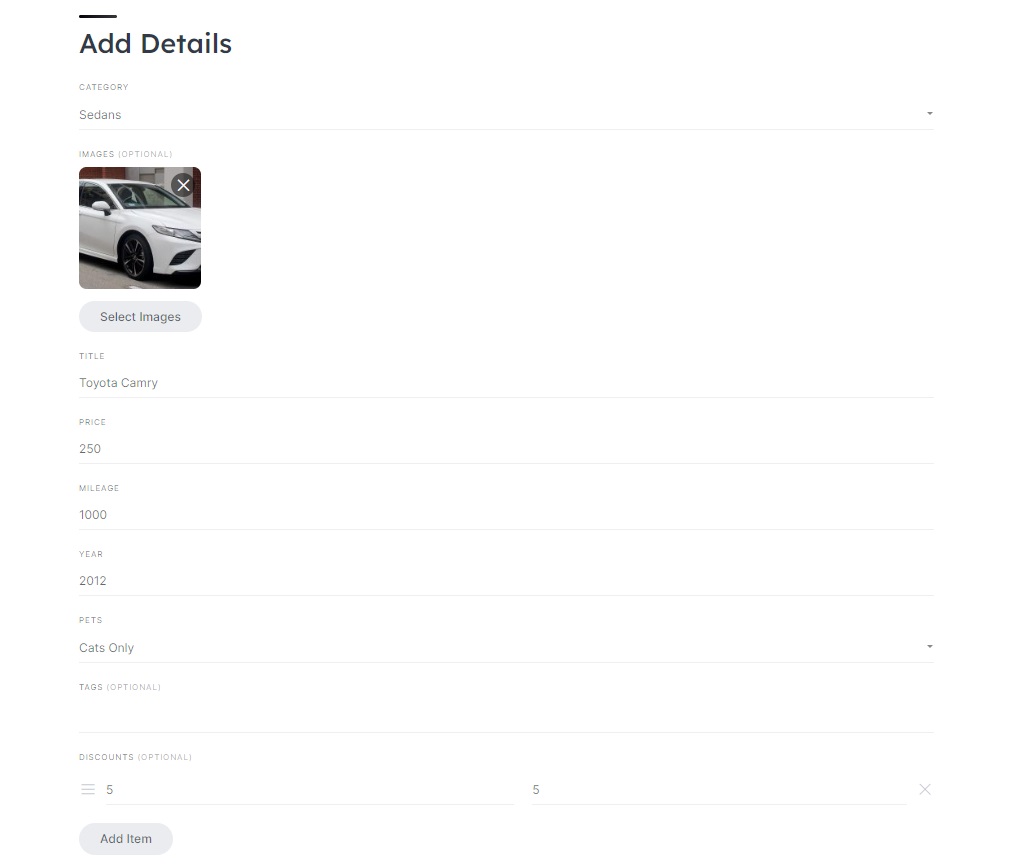
Once you have arranged the categories for your rental marketplace, the next important step is to add custom listing fields. For instance, we can create a basic “Price” field. To do this, go to the Listings > Attributes section and click “Add New”, then give the field a title. The custom field creation process takes place in three steps:
- The Editing section, where we’ll select the “Number” field type, and enable front-end editing so that users can input prices while creating listings. Additionally, make sure that the “Price” field is required.
- The Search section – here we’ll adjust the search options for this field, by making it “Filterable” and “Sortable”, and choosing the “Number Range” field type.
- The Display section, where you need to assign this attribute to the appropriate areas. We’ll choose Block (primary) and Page (primary) placement, then pick a suitable layout for showing price information. For instance, a layout such as $%value% / day.
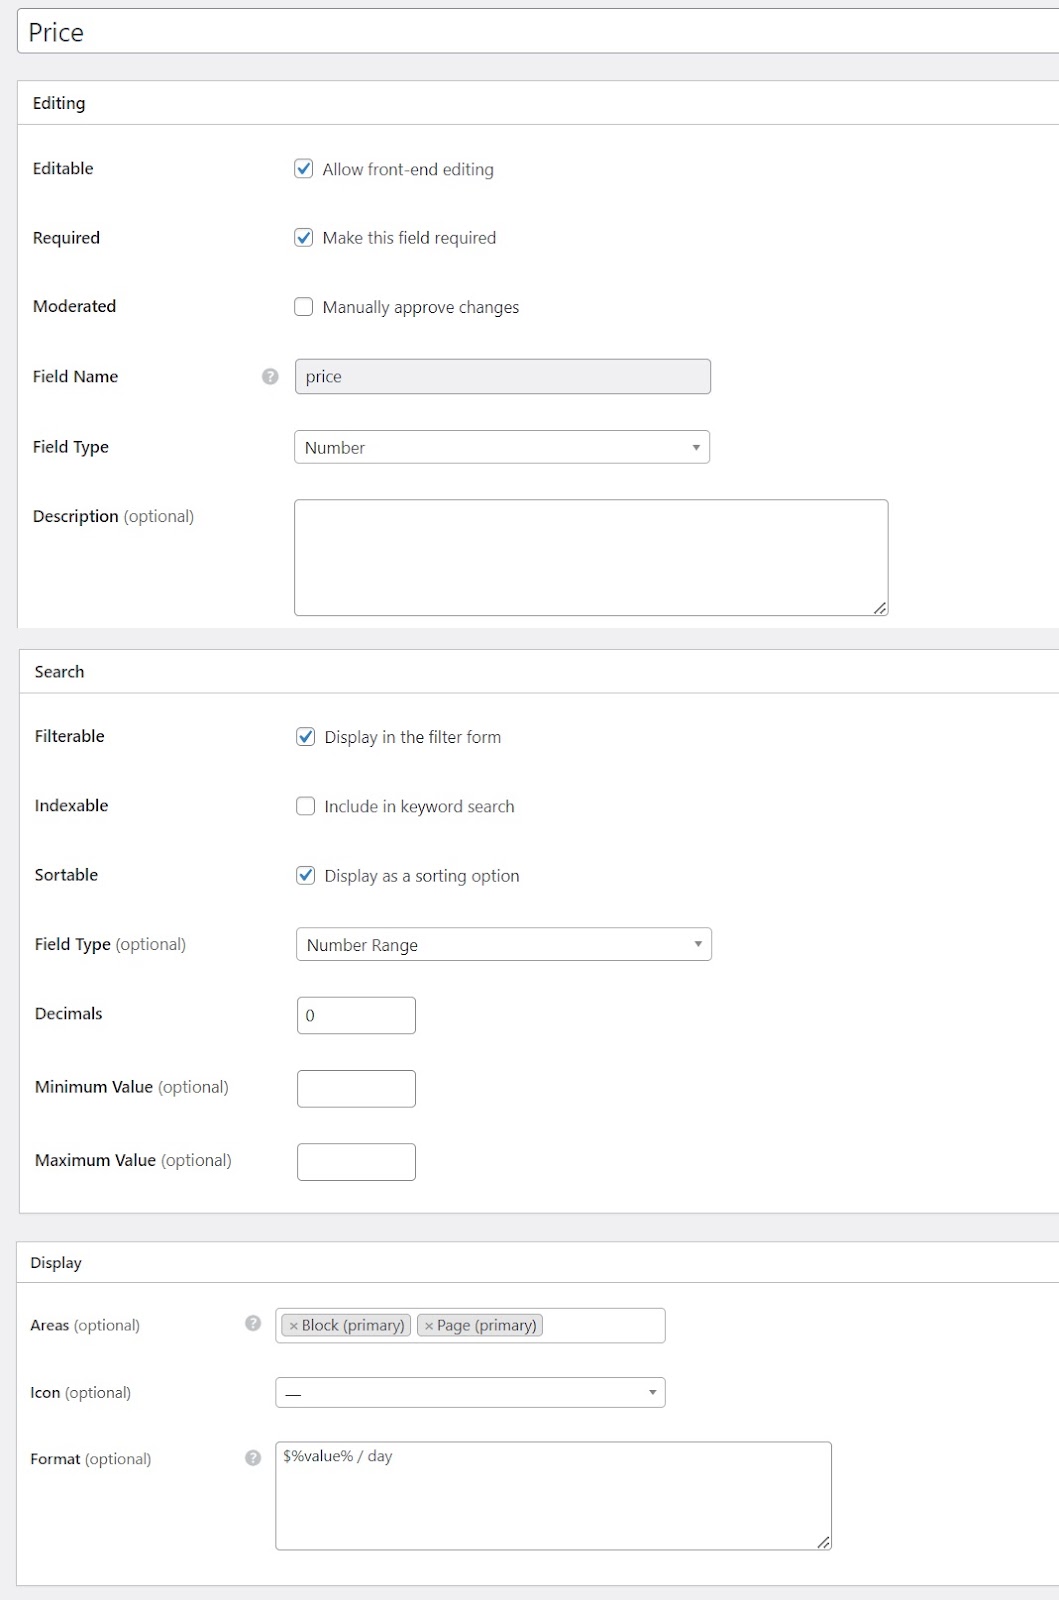
Upon completion, finalize the process by clicking the “Publish” button. Keep in mind that you have the flexibility to generate as many custom fields as you require.
Setting Up
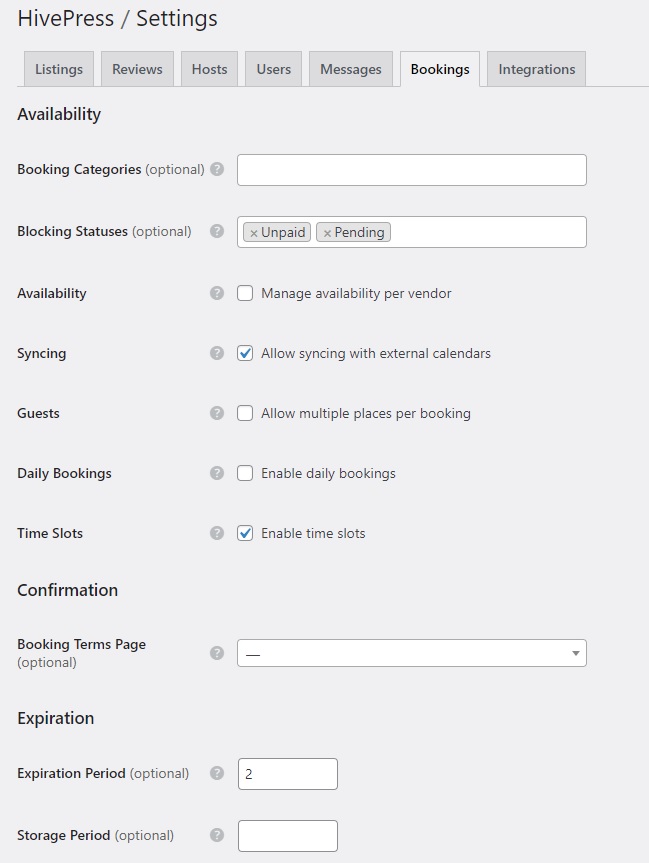
Now let’s ensure that our car booking website is configured properly. Go to HivePress > Settings, where a wide list of settings can be found. We’ll emphasize some of the most important:
- You can turn on the quantity-based discounts option in the Listings tab.
- Also, if you want hosts to register directly on your rental platform, check this option in the Hosts tab.
- Furthermore, the Bookings tab allows you to choose categories available for booking and enable sync with external calendars. Time-based bookings can also be enabled here – users can rent items for specific hours instead of days or nights, thanks to this useful feature.
Creating Pages and Customizing
Creating a great online image for your rental marketplace depends on making attractive and well-organized pages, starting with an impressive homepage. To create a new page, go to Dashboard > Pages, and click the ‘Add New’ button. Select a fitting title, for example, ‘Home’, and then add layout blocks.
For example, add the listing search form by choosing this block from the “Plus” icon options. Likewise, you can make your categories look good by including the “Listing Categories” block. Just type “HivePress” in the block search and navigate through a variety of HivePress blocks to use on your page. Customize page content to fit your desired style and preferences. When you are satisfied with the design, make it available to your audience by publishing it.
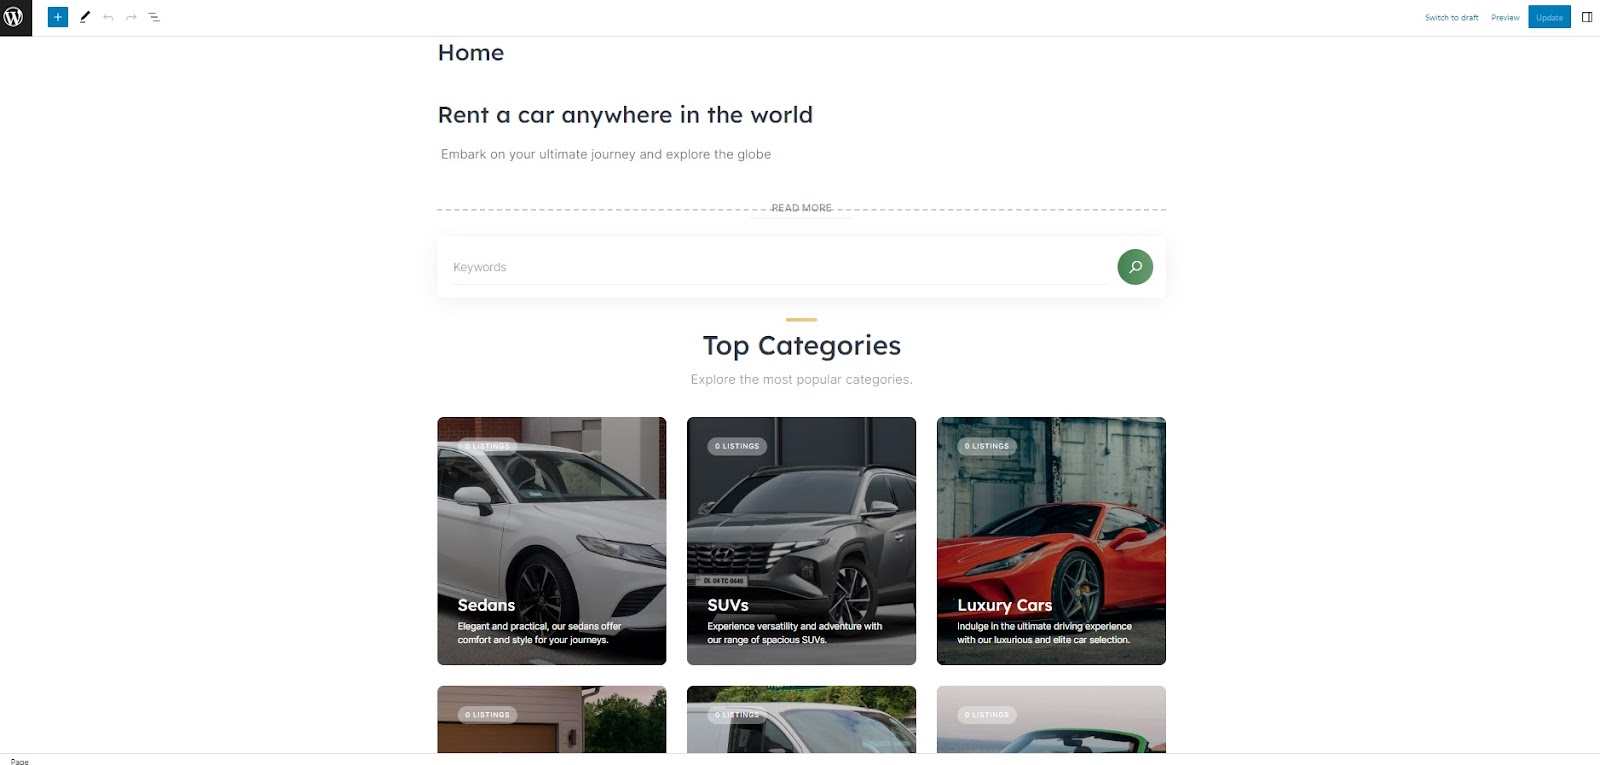
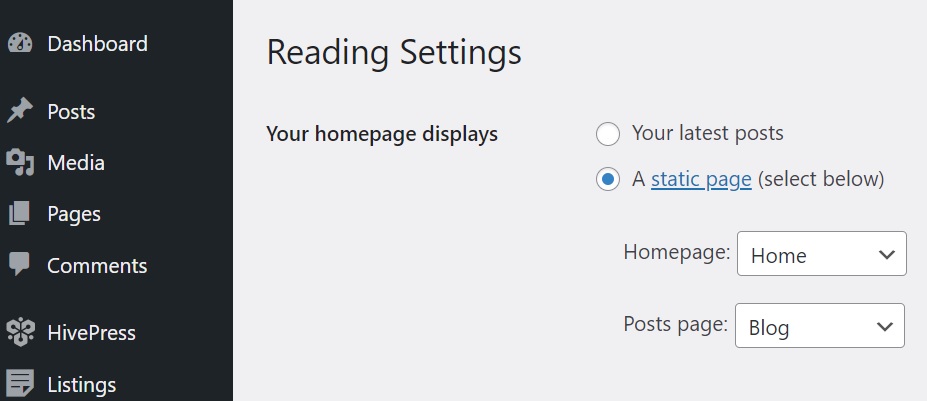
To set this new page as your homepage, go to the Dashboard > Settings > Reading section, and choose this page from the drop-down menu, then save the changes.
Now that you have set the foundation, you can give the page a unique look. To get a step-by-step guide to customize, please watch the helpful video tutorial below:
Adding a Listing
Let’s now test the process of adding a listing. With the RentalHive theme, you can add listings using both the back-end and the front-end. Let’s add a listing using the front-end interface. To start, go to your website’s homepage and find the “List a Property” button. You will then be directed to the submission form, where you can enter the necessary information, including the custom fields you created. After providing all the necessary information, just click the “Submit Listing” button to finish the process.
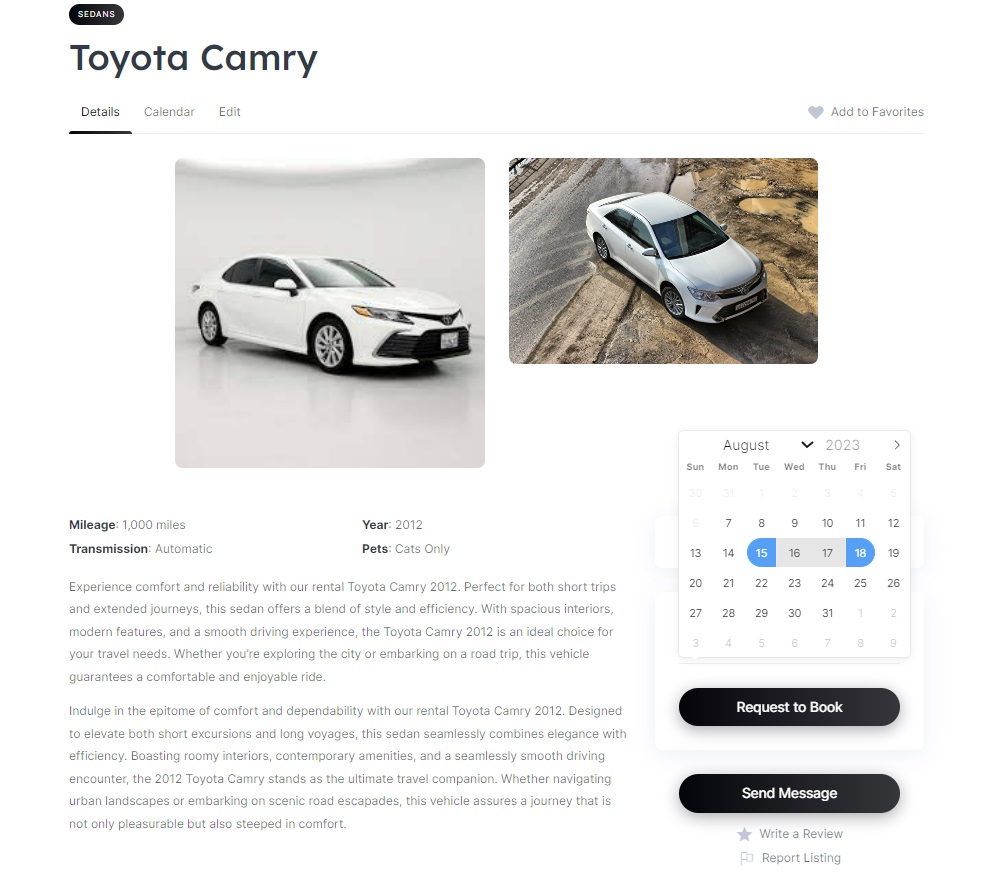
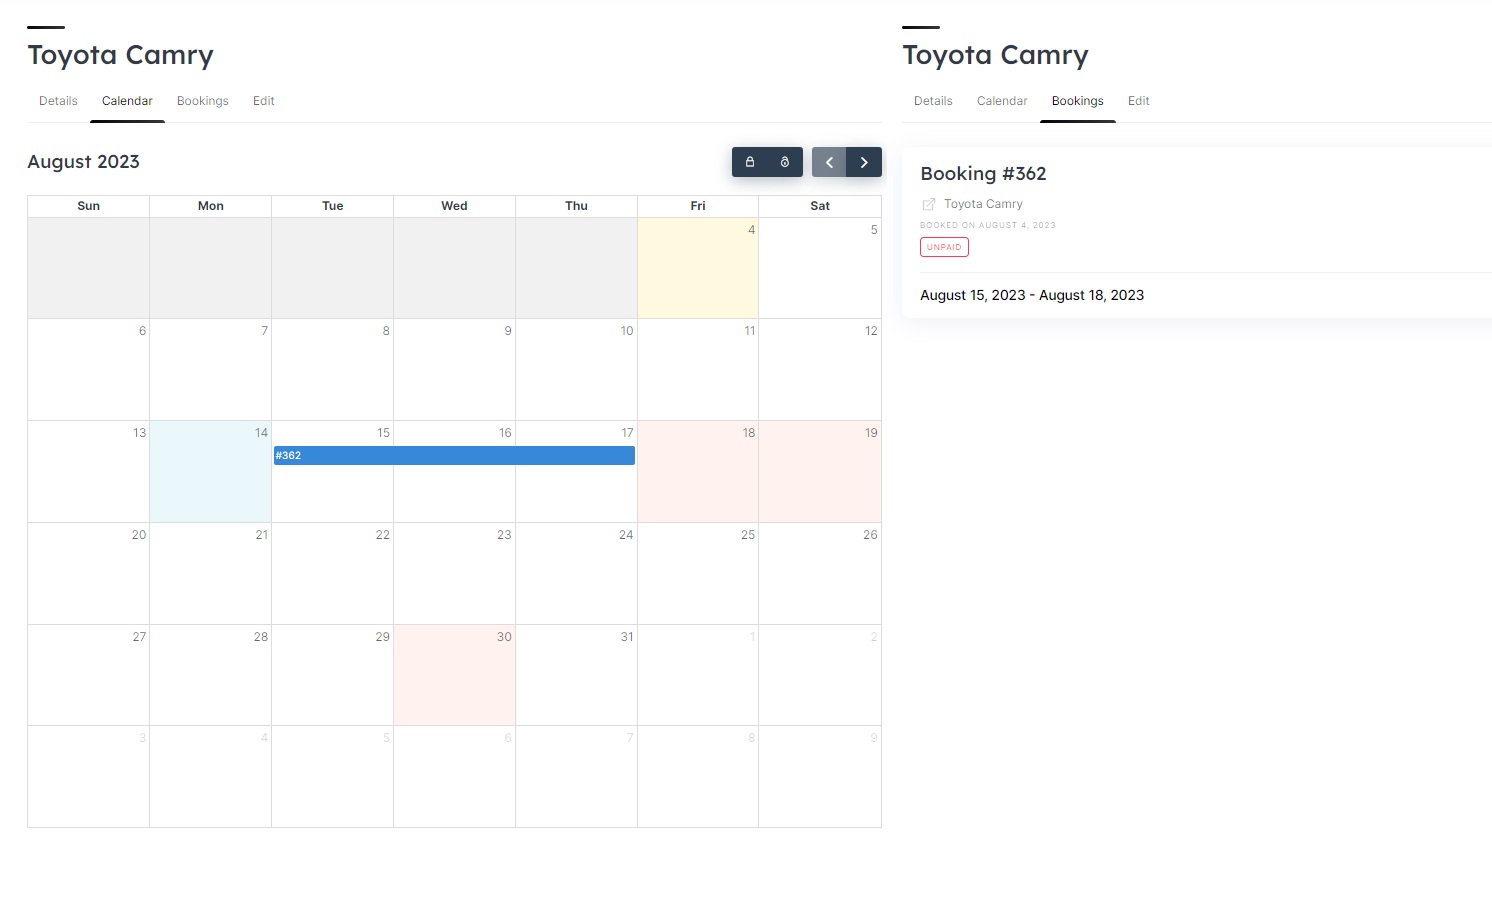
If the moderation feature is on, each newly submitted listing goes through a review process. The administrator of the website is responsible for reviewing the listing in the Listings section of the Dashboard and deciding to either approve or decline it. You can turn off manual moderation in the Listings section of the HivePress settings. When the listing is approved, it becomes visible on the front-end, making it possible for users to make bookings, as shown in the provided image.
Booking a Listing
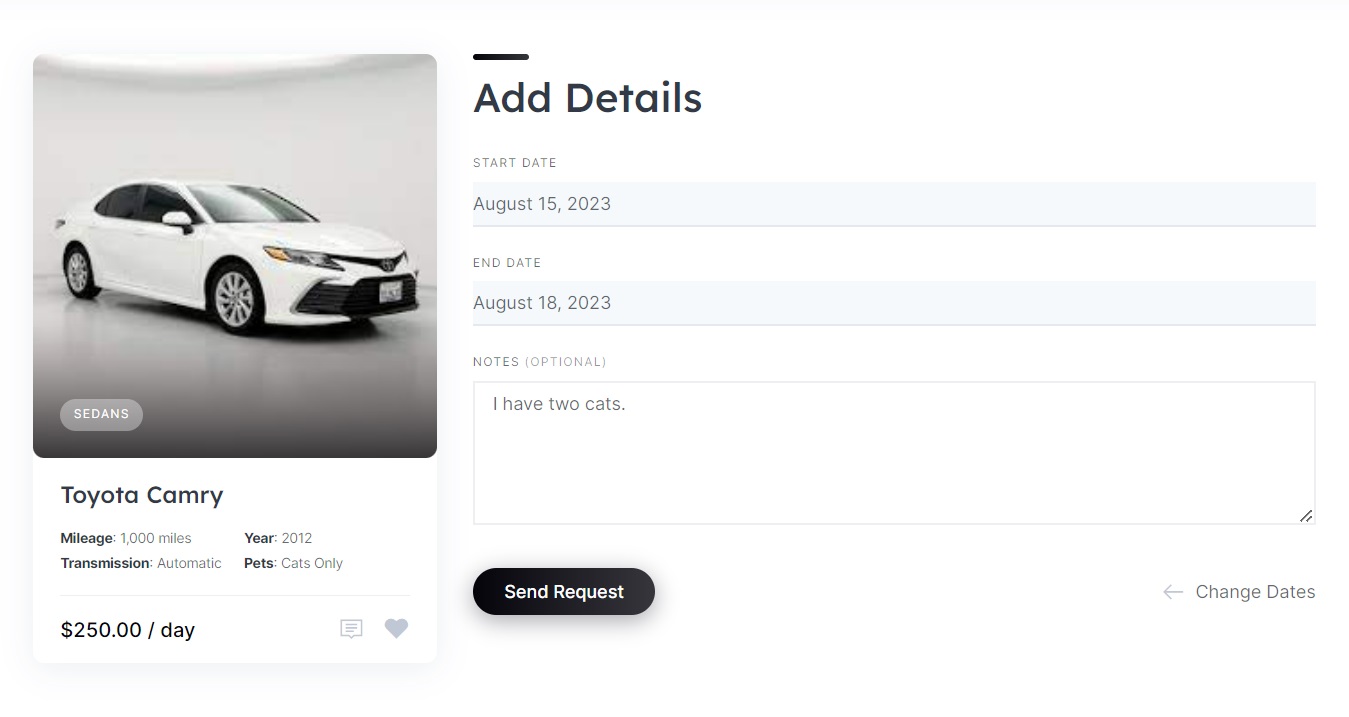
Let’s now see how booking works. Once you select the desired dates and click the “Book Now” button, the system will take you to the confirmation page. On this page, you can check all the provided details and even add extra notes if needed. After clicking “Send Request”, the vendor will be able to review it. Users can make the payment right away or choose to pay later using their cache, depending on how your website is set up.
Moreover, the website provides an easy-to-use calendar tool, which helps hosts to manage their availability effectively – they can easily close or open specific dates to either accept or reject new bookings. This feature enables hosts to have an organized and clear outline of their bookings, making it easier to manage their rental schedules and provide better booking experiences to their customers.
Car Booking Marketplace Monetization
Now, let’s explore how to generate revenue for your car booking website. Creating effective ways to make money is extremely important to maintain the long-term success and profitability of your platform. In this section, we will go over three important ways through which you can take advantage of your platform’s potential and turn it into a successful business:
Commissions
You can make money from successful bookings by using a commission structure, which pays you a percentage of each sale, whether it’s from vendors, customers, or both parties involved. You can use a commission structure in two ways: by setting a percentage rate (such as 10% of each sale), or by charging a fixed commission fee (such as $10 for each sale).
Paid Listings
By introducing paid listings, you can charge users for creating new listings. You can provide different options to users, including a free package that allows them to post a limited number of listings, but if they want to post more and reach a larger audience, they can opt for a premium package.
Featured Listings
You can charge users for highlighting their listings. The featured listings are shown at the top of the search results, making them more visible and attracting more potential customers. By opting for this premium option, hosts can increase the visibility of their listings and make it more likely to attract bookings while you make money as well.
Conclusion
And that’s it! Now you know how to create your own car rental website using WordPress quickly and easily, without knowledge of coding.
If you’re unsure about the best tools for your car rental business, consider the combination of the HivePress plugin and the RentalHive theme. This combination offers various features, ensuring all the vital components are readily available to jumpstart your website’s success.