


From this tutorial you’ll learn how to use TM WooCommerce Compare & Wishlist settings, enable wishlist and compare list, add the text for buttons, select Compare and Wishlist pages.
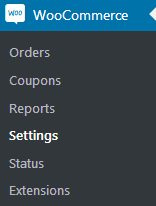
To access TM WooCommerce Compare& Wishlist settings navigate to Woocommerce > Settings tab on the left of the Dashboard. Here switch to the TM Compare List or TM Wishlist tab to view all the available settings.


TM WooCommerce Compare List Settings
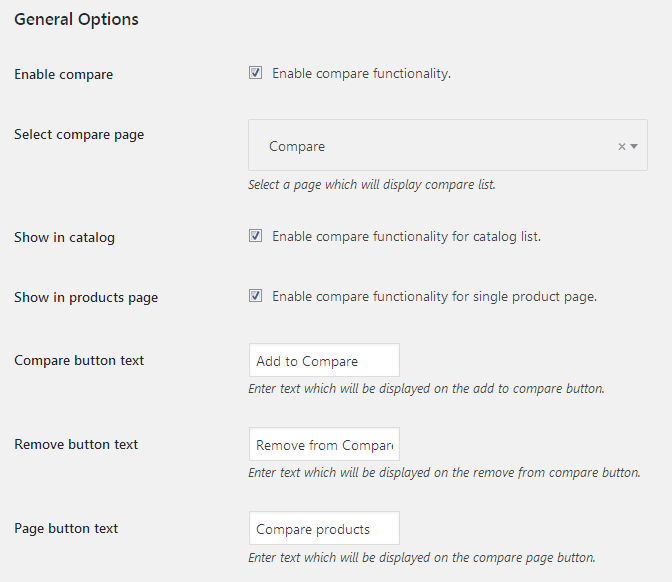
- Enable compare – here you can enable the compare functionality.
- Select compare page – here you can choose the page on which the products added to Compare list will appear.
- Show in catalog – check this option in order to enable Compare option for the catalog list.
- Show in Products page – check this option if you need to add the Compare option to the single product page.
- Compare button text – type in the Compare button text in this field.
- Remove button text – here you can define the text to be shown on Remove button.
- Page button text – add the text to display it on Compare page button.
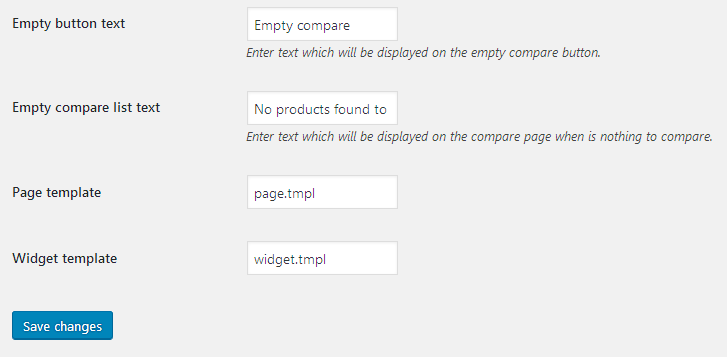
- Empty button text – here you can set the text to display it for the Empty button.
- Empty compare list text – here you need to enter the text to show it when there are no items in the Compare list.
- Page template – here you can define the Compare page template (if you don’t know how to create templates, please, leave the default template here).
- Widget template – here you can set the widget template to use it for the Compare widget. If you don’t know about widget templates and don’t have the one you want to use, please, leave the default value in this field.
Click on Save changes button to save all the changes.
TM WooCommerce Wishlist Settings
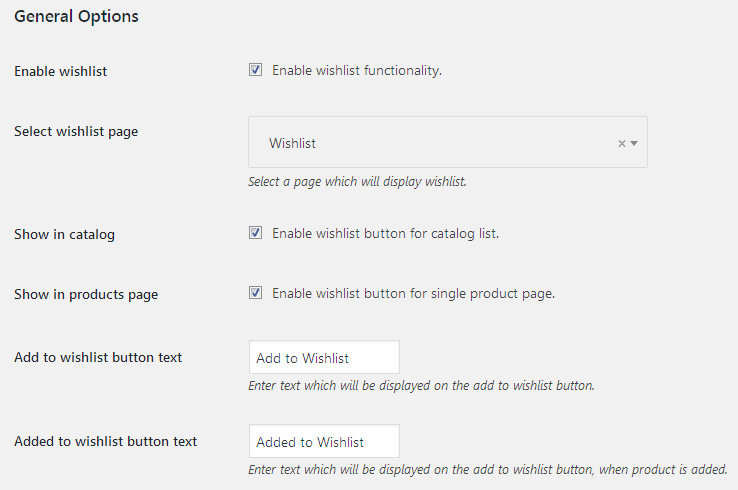
- Enable wishlist – here you can enable Wishlist option.
- Select Wishlist page – choose the page to use it as the Wishlist page from the list of your theme’s pages.
- Show in catalog – check this option if you want to add the Wishlist button to the catalog.
- Show in Products page – check this option to add Wishlist button to the Products page.
- Add to Wishlist button text – here you can input the text to use it for the Add to Wishlist button.
- Added to Wishlist button text – set the text to show it on the button when the product is successfully added.
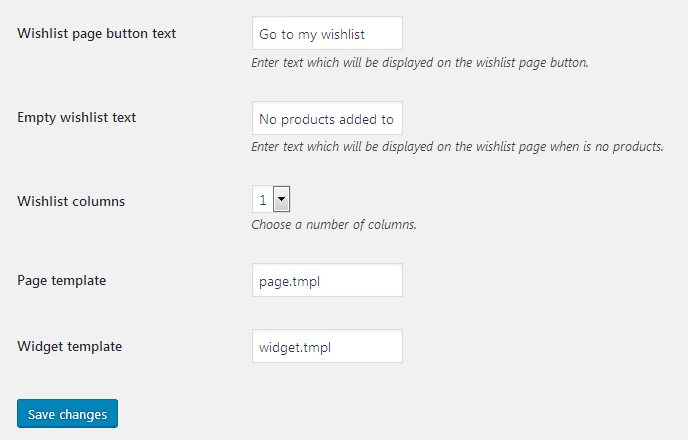
- Wishlist page button text – here you should fill in the text to use it for the Wishlist page button.
- Empty wishlist text – here you can add the text to show up when there are no products in the wishlist.
- Wishlist columns – here you can select the number of columns for the wishlist.
- Page template – here you can define the Wishlist page template (if you don’t know how to create templates, please, leave the default template here).
- Widget template – here you can set the widget template to use it for the Wishlist widget. If you don’t know about widget templates and don’t have the one you want to use, please, leave the default value in this field.
Click on Save changes button to save all the changes.

