


From this tutorial you’ll learn how to use TMPL files in Cherry Team Members plugin.

Working with TMPL Files
- First, let’s find out what are the .tmpl files. These are the files which contain templates you can apply for the single team member page and team listing page. The default templates are: default.tmpl, grid-boxes.tmpl, single.tmpl.
- You can also create your own template using the same .tmpl extension.To open a template and see its content, please, go to your hosting server cPanel and navigate to wp-content/plugins/cherry-team-members/templates/shortcodes/cherry_team folder.

Here you can see the templates you can use for different Team Members pages. - Open one of the templates for editing to see its content (in our case, we’ve opened default.tmpl file). Here you can see the content blocks, which are placed in the specific order.

- If you want to override the existing template with your own one, please, create cherry-team folder in your active theme directory (the folder where all theme files are contained) and copy the needed templates there.
TMPL Macros
Now let’s overview the macros codes, available to use in the templates.
- %%PHOTO%% – displays the featured image.
You can use these arguments with it: wrap, class, size, link.%%PHOTO wrap="div" class="team-listing_photo" size="thumbnail" link="false"%%
- %%NAME%% – displays the post title.
You can use these arguments with it: wrap, class, link.%%NAME wrap="h4" class="team-listing_name" link="true"%%
- %%POSITION%% – use the macros to display the team member’s working responsibilities.
You can use these arguments with it: wrap, class.%%POSITION wrap="small" class="team-listing_position"%%
- %%CONTENT%% – use this macros to add the full content of the post to the page. Usually the macros can be used for the single team member page.
- %%EXCERPT%% – the macros helps to show the short description of the team member.
You can use these arguments with it: wrap, class.%%EXCERPT wrap="div" class="team-listing_desc"%%
- %%LOCATION%% – the macros helps to display the person’s address. Usually is used for displaying single team member’s location.
You can use these arguments with it: wrap, class. - %%PHONE%% – add this macros to show the team’s contact phone. You can use these arguments with it: wrap, class.
- %%SOCIALS%% – the macros can add person’s social networks links. You can use these arguments with it: wrap, class.
%%SOCIALS wrap="div" class="team-listing_socials"%%
- %%SKIlLLS%% – this macros allows adding team member’s skills with a progress bar.
- %%LINK%% – with this macros you can add a link to the corresponding post.
Applying Templates to Certain Pages
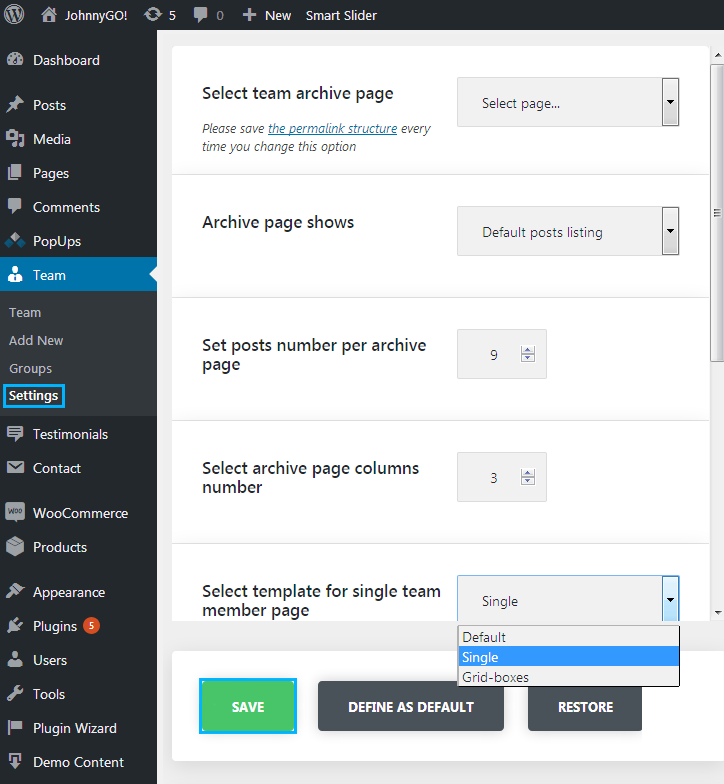
- When your new .tmpl file is ready you need to apply it to your Team Members pages. To do it, please, navigate to WordPress Dashboard. Here open Team > Settings tab.
- In the Select template for single team member page select the template to use for the single team member.
- Choose the necessary template from the templates list in the Select template for team listing page.
- Now click Save button to save the changes. You are welcome to view the results of your work on your site.
This tutorial is based on JohnnyGo Multipurpose Home Services WordPress theme.

