From this tutorial you’ll learn how to create your theme’s backup using JetImpex Dashboard plugin.

Creating Theme’s Backup
- To create theme’s backup log in to WordPress Dashboard. Navigate to JetImpex > Updates tab on the left.
- Locate Backup block. Here you can set a scheduled backup or create a fast backup.
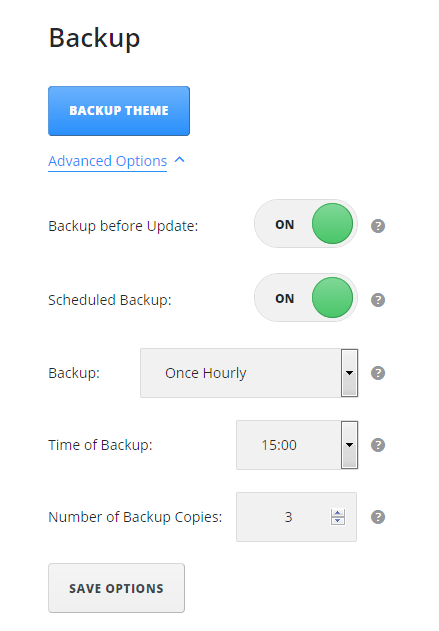
- To backup a theme simply click BACKUP THEME button. You’ll see it in the list of backups at the bottom of the page. Click on Download icon beside the backup version if you need to download it.
- Now let’s look closer at JetImpex Dashboard Backup options.
- Backup before update – enable this option if you want to update the theme, though you want to save the previous theme’s version just in the case.
- Scheduled backup – enable this option in order to create backups automatically.
- Backup – here you need to select the frequency of the backups (once hourly, twice daily, once daily, once weekly, once monthly, etc.).
- Time of backup – set the time when a backup should be made (every day, week, etc.)
- Number of backup copies – here you can define the number of automatically made backup copies to be preserved (though, you still can make as many manual backup copies, as you need to).
- Save option – after you’ve set the time and frequency for automatic backups, save the changes.
Backup List
- To view the list of existing backups scroll to the bottom of the page. You’ll see the list where you can view backup copies of your theme, made both automatically and manually.
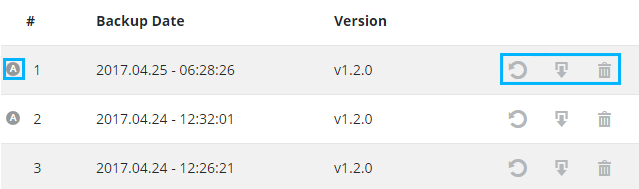
- The note A on the line with backup means that this backup was made automatically.
- Backup Date shows the date and time when the backup was made.
- Version shows the version of your theme backup.
- You can also restore, download and delete your backups.