


Cherry Sidebars is a useful plugin for creating and managing different custom sidebars. It is used to add dynamic sidebars whenever you can’t use a default widget area to deliver widgets to your template’s page.
A Sidebar is a special area for displaying widgets. You can create as many widget areas as you need, and use them on your website’s pages to make them more informative, and add extended functionality, filters, etc., in the form of widgets. First, you need to create a custom sidebar, add widgets to it, and add the sidebar to the page where you want the widgets to be displayed.

Creating a Custom Sidebar
Custom sidebars make your website’s content more diverse and vivid, so let’s learn how to use Cherry Sidebars right now!
- Now, when you have installed Cherry Sidebars plugin, go to Appearance tab in the left column of the Dashboard. Click on Widgets submenu.
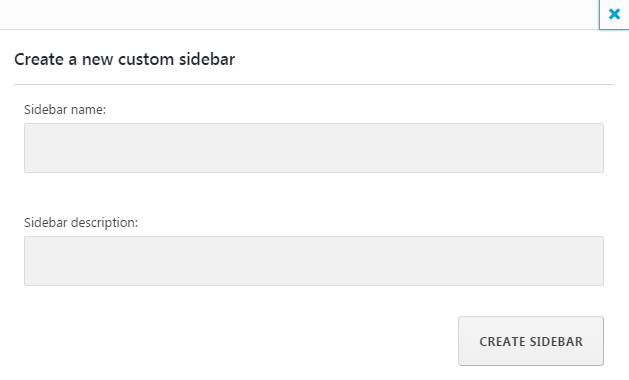
- We have to create a new sidebar. Click on Create new sidebar button to do it. A new form will appear, where you’ll have to enter your new sidebar’s name (input here its title) and sidebar description (here you can add a few words about sidebar’s purpose).
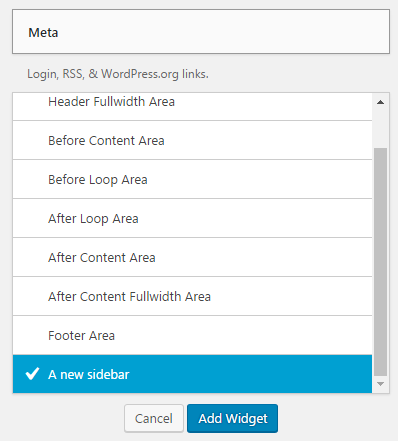
- Now you can add widgets to the sidebar. Click on one of the widgets from the list leftwards and choose a new sidebar from the list of available sidebars. Then click on Add Widget button.
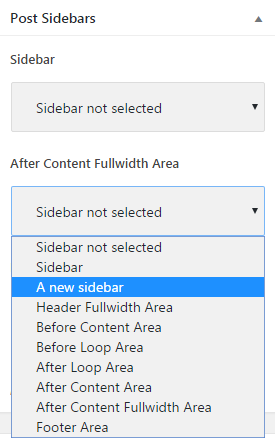
- Now that we’ve added widgets to the new custom sidebar, you can assign it to one of the pages. Go to Pages tab on the left of the Dashboard and assign a new sidebar to one of the sidebar areas in the Post Sidebars block. Then click on Publish button or save the changes as a draft.
- As a result, you can create and delete new sidebars depending on your needs, and make your website more vibrant and dynamic!
This tutorial is based on Emanuella Dance School Responsive WordPress theme.

