


Sometimes when you’ve imported a SQL dump to your WordPress database, nothing changes. In this case, you might need to change the database prefix.
From this tutorial you’ll learn how to change database prefix, and how to import SQL file to the database.

Changing Database Prefix
- Navigate to your hosting server’s file manager and find wp-config.php file in the WordPress root directory.
- Open the file and search for your table prefix. It may look like:
$table_prefix = ‘tm_’;
- Now you can copy this table prefix from the file (in our case it is ‘tm_’).
- Open your extracted template package on your hard drive.
- In the theme/manual install folder open the .sql file using any text editor which is convenient for you (Sublime, Notepad, etc.).
- Hit Ctrl+F hotkeys to open the search panel, and switch to Replace tab.
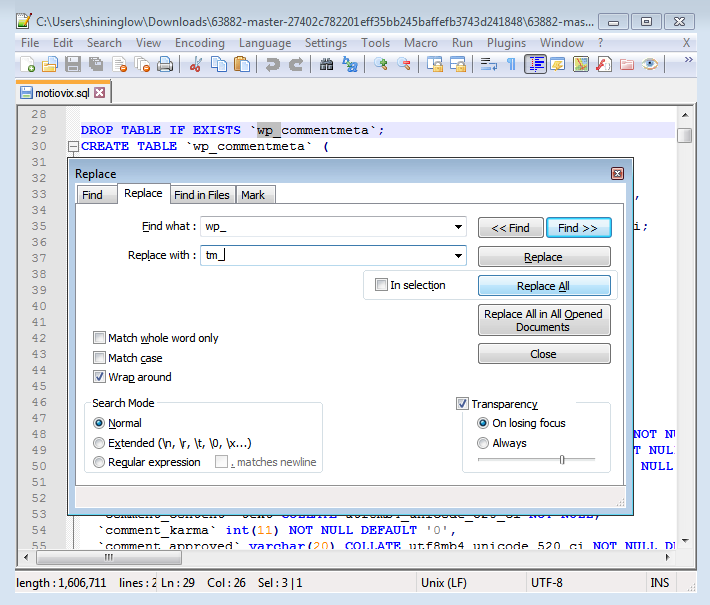
- Now you need to replace all wp_ standard prefixes with the prefix you have copied (‘tm_’).
- Click on Replace All button to replace all the instances.
- You need to replace the instances, where _tm is used, with your previous _wp . It is necessary to preserve wp instances in the cases where wp is not actually a database prefix.
- Click on Replace All button again.
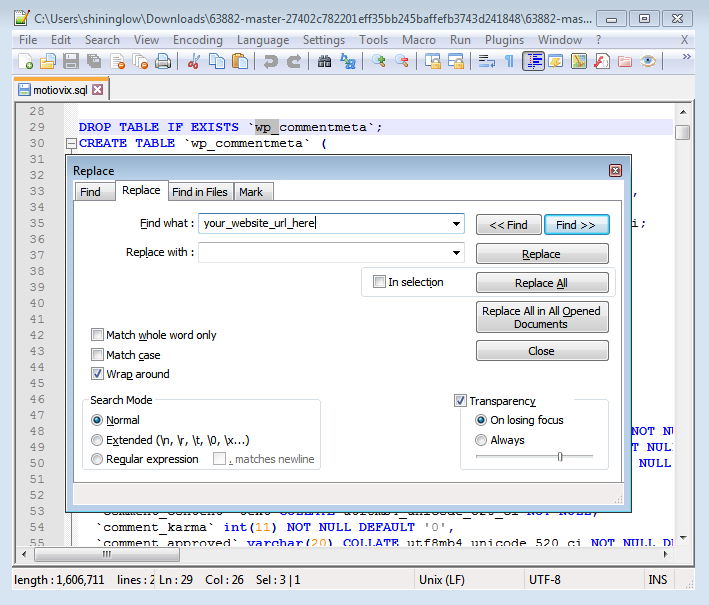
- Now you can replace your_website_url_here instances with your actual website’s URL, without slash sign in the end. You can find it in your browser’s address bar.
- You’ll need to import the edited .sql file to your database.
- Open phpMyAdmin tool and find the database you’ve used when installing WordPress, in the right column.
- Now open Import tab and browse the .sql file with the changes. Click on Go button to start import.

- When everything is done, you’ll see the information notice Import has been successfully finished.
- Now you need to refresh your website. It will look like the demo.

