From this tutorial you’ll learn how to change username using WordPress Dashboard, create and delete users.
Changing Username
- First, log in to WordPress Administration panel (Dashboard). There is no way you can change the username, so if you have a need to change it, you’ll have to create a new user with another username, and then delete the user with the previous username.

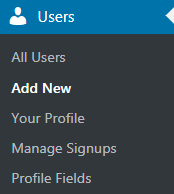
- Let’s create a new user. Locate Users tab in the left column of the Dashboard and click on Add New sub menu.

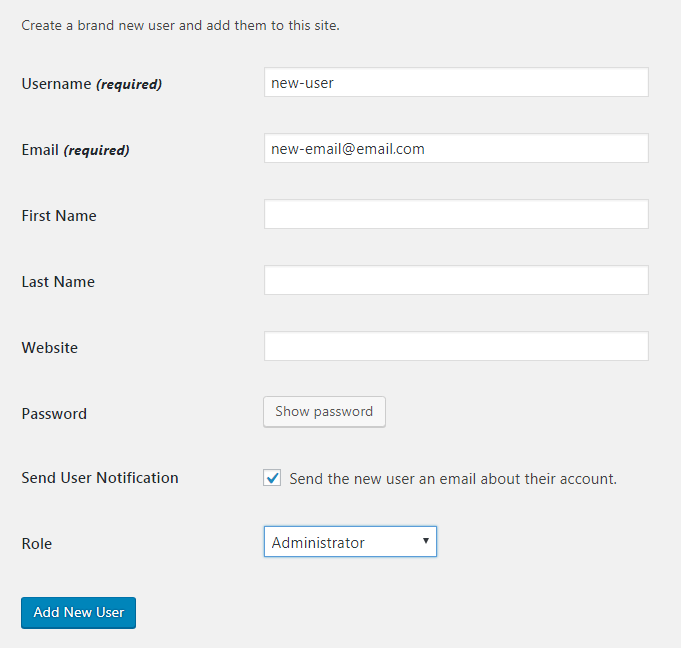
- A New User page will open. Here you’ll need to fill in these fields:
- username;
- email;
- first name (optional);
- last name (optional);
- website (optional).

- Then click on Password button to generate a new password for the user.
- Check Send the new user an email about their account to save the account information in the form of an email.
- In the Role block you need to assign the specific role for the new user (it can be the same as the previous user’s role, as well as a new one). If you want to learn more about user roles, please, proceed to reading Managing Users From Administration Panel tutorial.
- Save the changes.
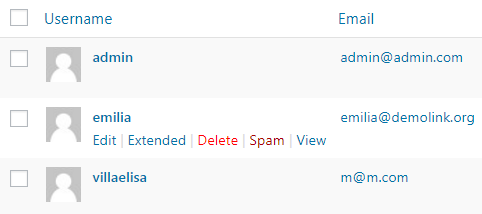
- Now you need to delete the existing user with the unsuitable username. Navigate to Users > All Users tab in the left column of the Dashboard.
- Click on Delete option under the line containing the previous user information. If there are posts created under the previous user’s account, you’ll be able to attribute all the content to the new user or delete it. Then click Confirm Deletion button.


- From now on you can log in to WordPress under the new username and password credentials.
This tutorial is based on Surfing Responsive WordPress theme.


