


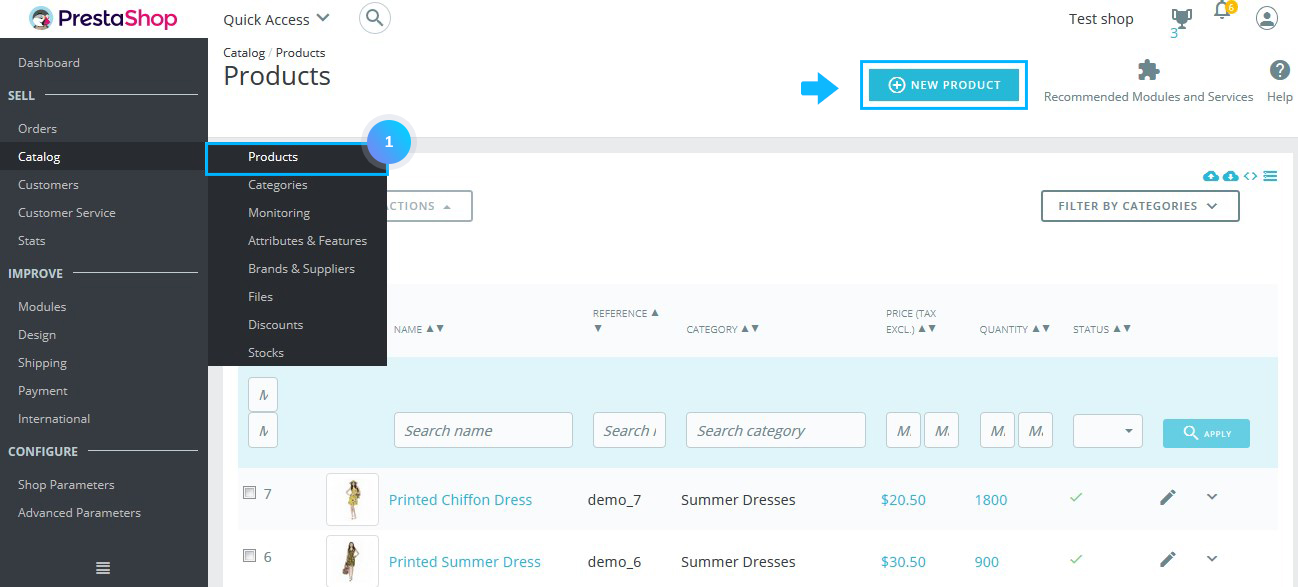
- In your PrestaShop admin panel go to Catalog -> Products section. Click New Product button at the top:
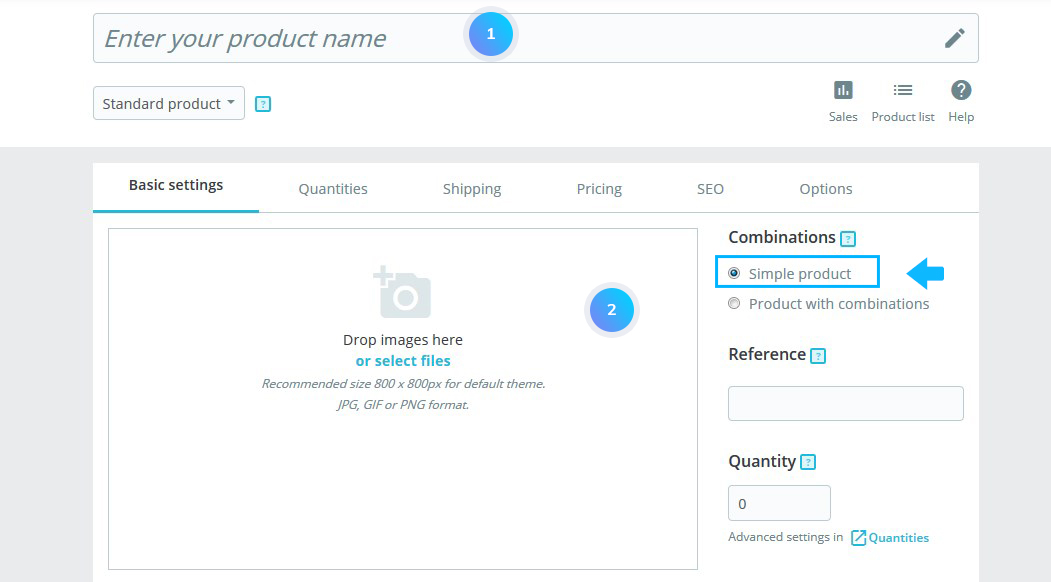
- You can see the tabs with options which you can set to your new product.
- Set the following options for the Basic settings:
- Product Name – the title of the product.
- Product’s Image – upload image to your product.
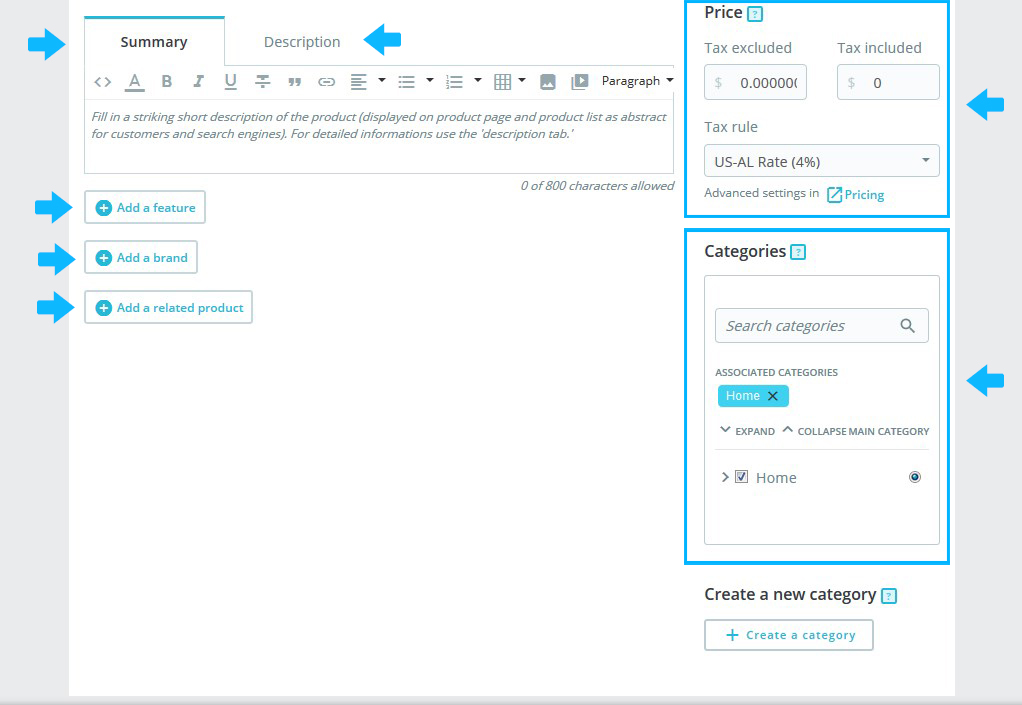
- Summary – short description of the product.
- Description – description of your product.
- Feature – add the optional product characteristics that provide more information.
- Brand – set the brand for your product.
- Related Product – choose related products to your newly created product.
- Price – set price and tax rules.
- Categories – choose the category your product will be assigned to.
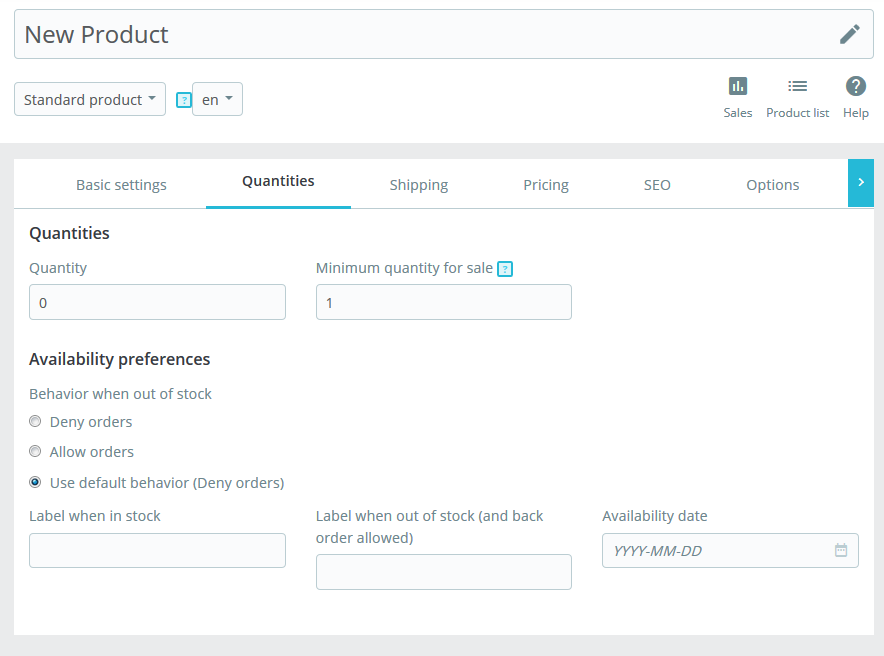
- In the Quantities tab you can set the following options:
- Quantities – set the quantity of the product.
- Minimum quantity for sale – set the minimum quantity required to buy this product.
- Availability preferences – the role of the product when it is out of stock.
- Label when in stock – set the name of the label when in stock.
- Label when out of stock – set the name of the label when out of stock.
- Availability date – set the date of product availability.
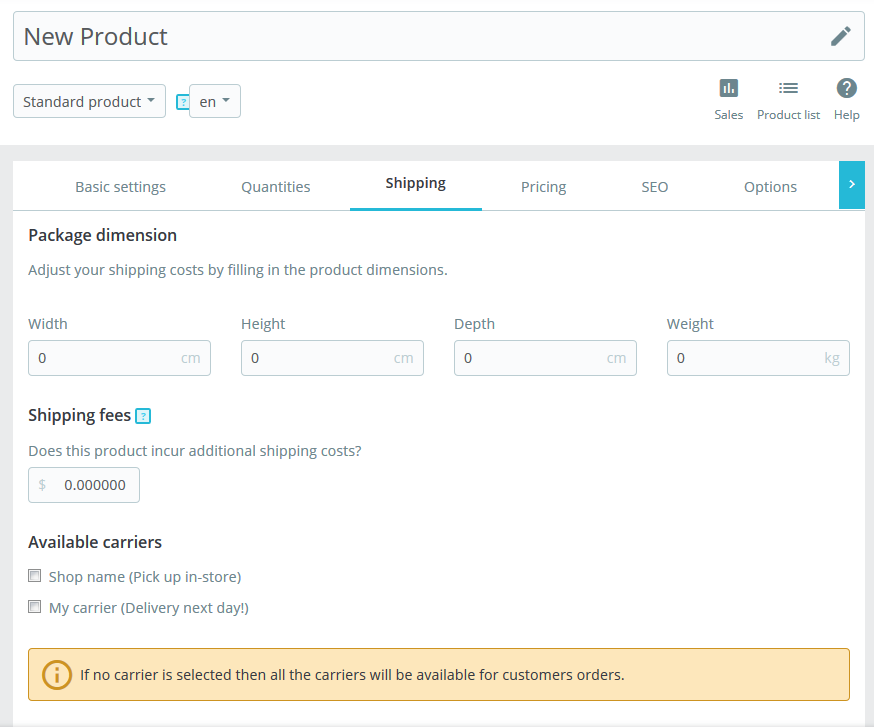
- In the Shipping tab, you can add the following:
- Package dimension – generate the shipping costs by filling in the product dimensions: width, height, depth, weight.
- Shipping fees – shipping fee will be added in case the carrier has a tax.
- Available carriers – choose the carriers.
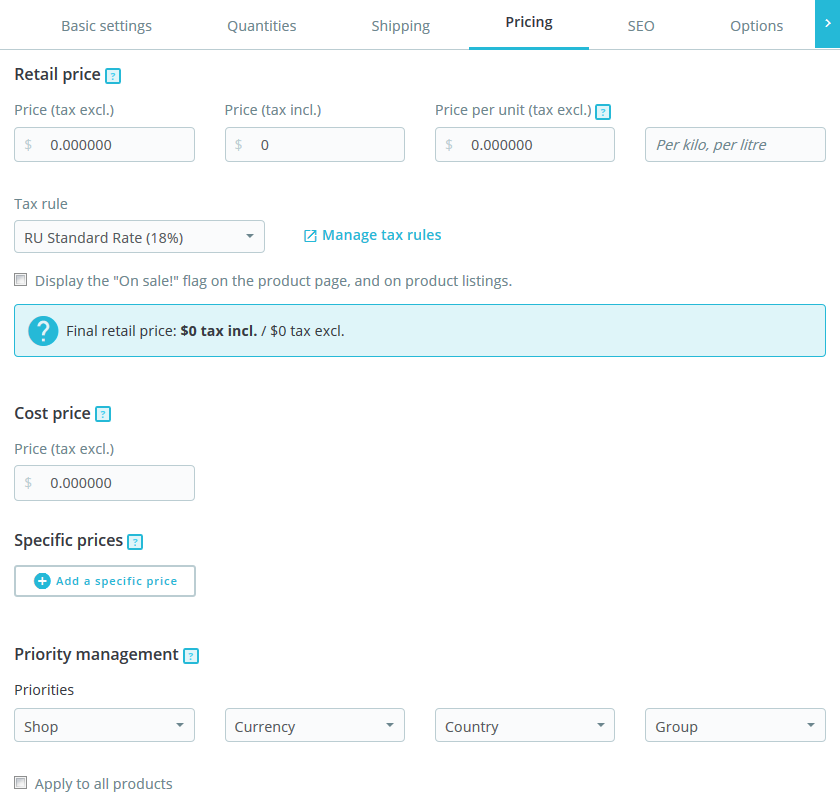
- In the Pricing tab you can fill in the following options:
- Retail price – set the price which you intend to sell your product.
- Cost price – the price you paid for the product.
- Specific price – you can set the specific price for your product according to the groups, countries, etc.
- Priority management – you may define which rules apply first.
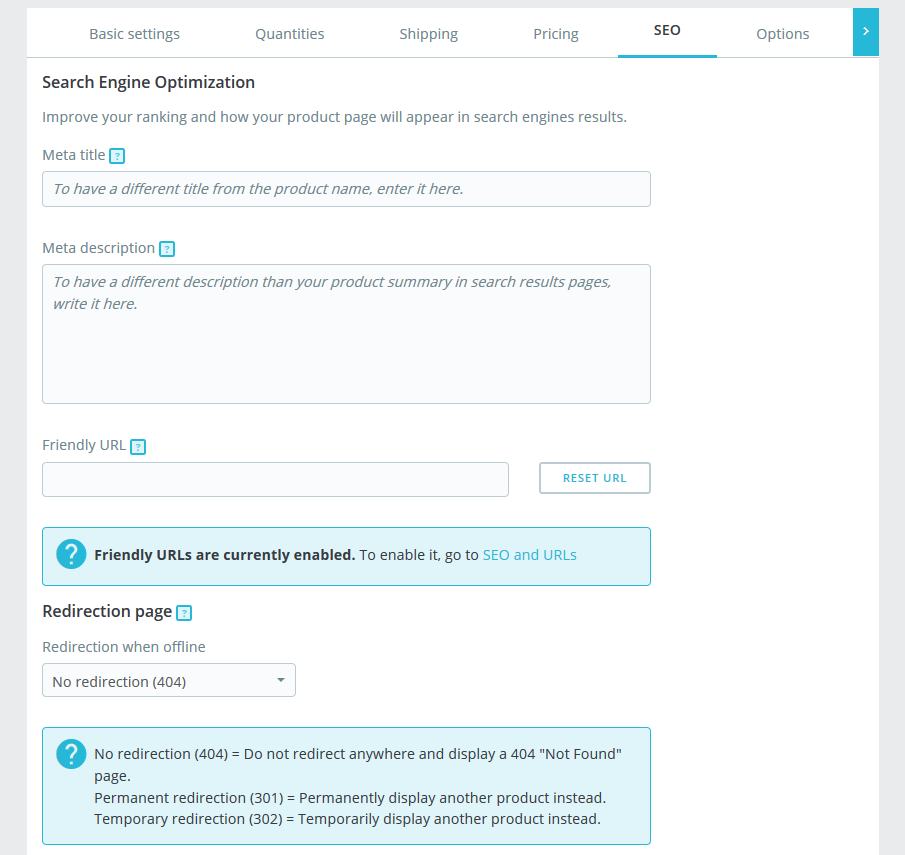
- In the SEO tab, you can add:
- Meta title – public title for the product’s page.
- Meta description – the description of the product that will appear in search engines.
- Friendly URL – the URL generated from the product’s name.
- Redirection page – when the product is disabled, you can choose to which page you would like to redirect the customers visiting its page:
- no redirection (404);
- permanent redirection (301);
- temporary redirection (302).
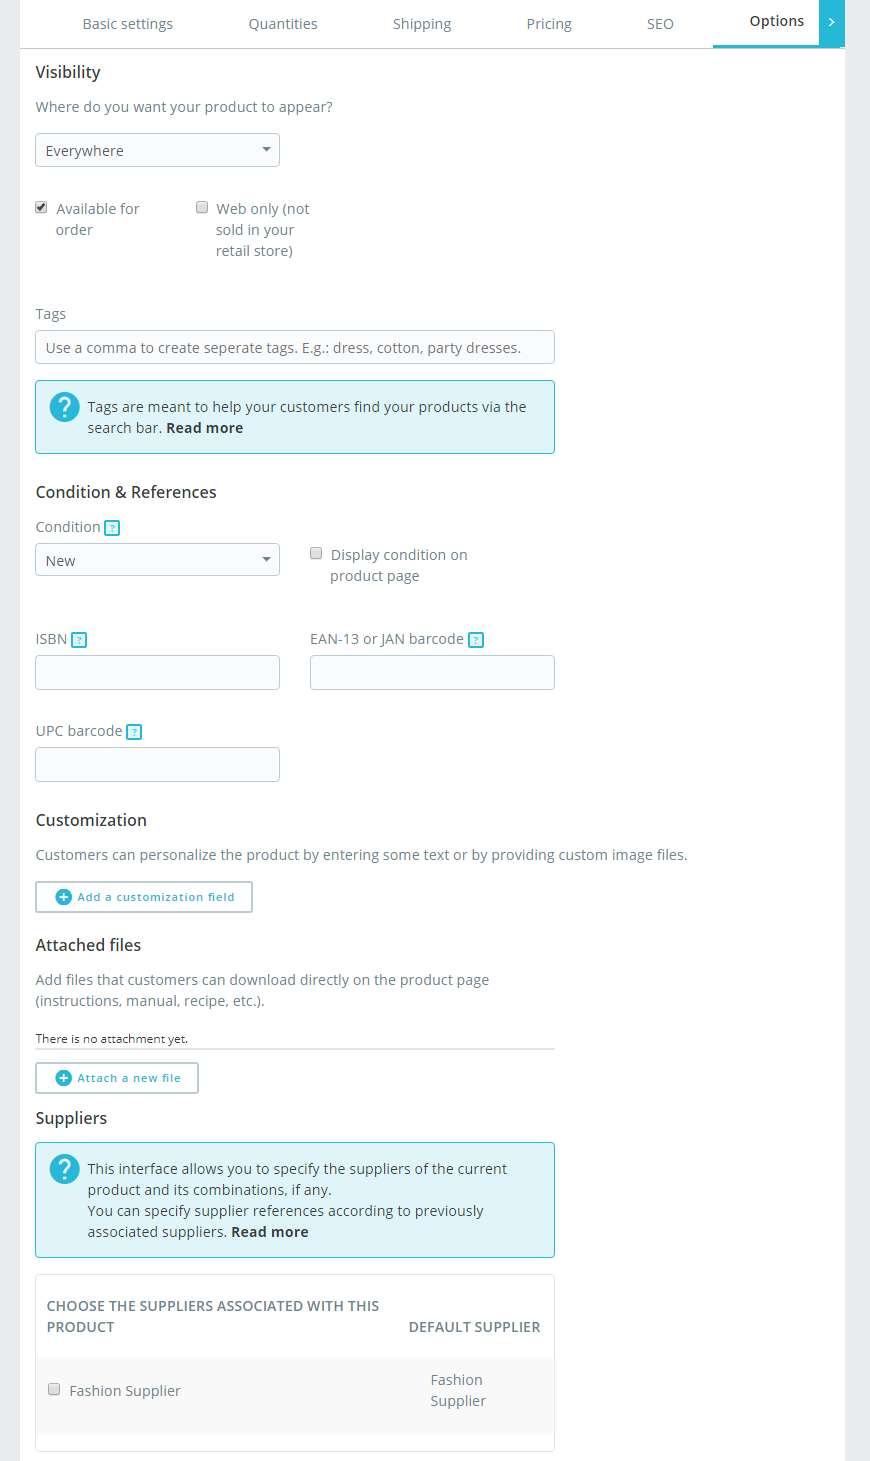
- In the Options tab, it is possible to set the following options:
- Visibility – your can choose where to display your product (everywhere, catalog only, search only, nowhere).
- Condition and References – option enables you to indicate the condition of the product:
- Condition – the state of the product may be new, used and refurbished.
- ISBN – identify books and their various editions internationally.
- EAN-13 or JAN barcode – the code is specific to Europe and Japan, but is widely used internationally.
- UPC barcode – the code is widely used in the United States, Canada, the United Kingdom, Australia, New Zealand and in other countries.
- Customization – the ability to add additional text and images to the product.
- Attached files – additional files that the customers can download directly from the product page.
- Suppliers – specify the suppliers of the current product and its combinations.
- Click the Save button. Refresh your page to check the product.
Hopefully, this tutorial was helpful for you.

