


Having products with different options like color, size, material, and others is the great opportunity to meet your customers’ needs and increase your sales.

Note: Attributes are the basis of product variations (or “combinations” in PrestaShop interface). You can create variations of the product only if at least one of its attributes changes. You should think of attributes as properties of a product that may change between variations, while still keeping the same product name: color, capacity, size, weight, etc. You can use anything that varies between versions of the same product, except the price.
You can check the following tutorial PrestaShop 1.6.x. How to add/manage product attributes.
Managing product combinations
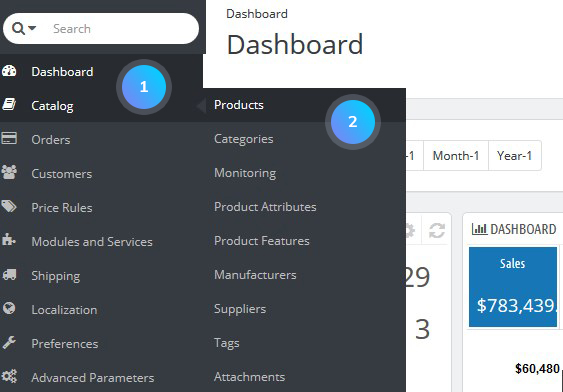
- In your PrestaShop admin panel go to Catalog -> Products section:
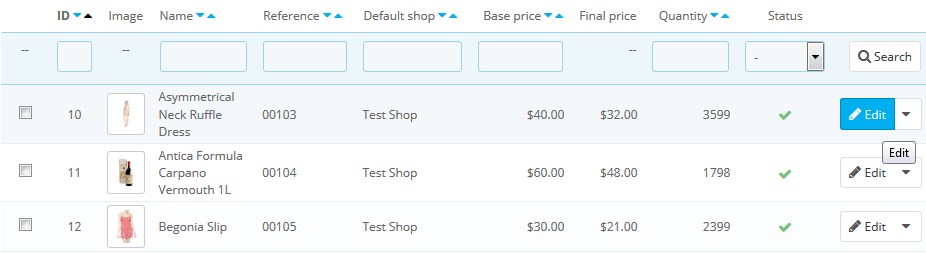
- Click the Edit button near the product you want to add the attribute to:
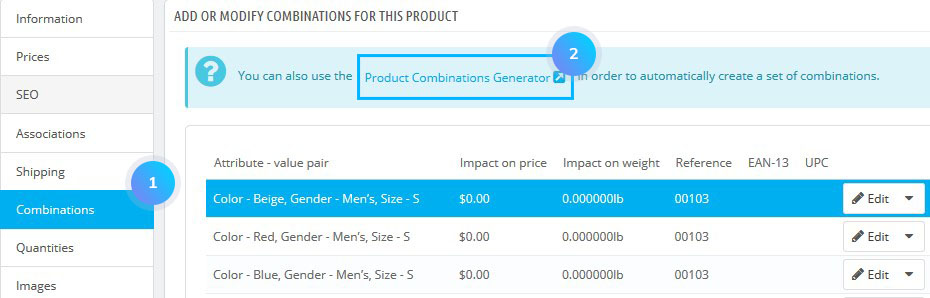
- Click on the Combinations tab on the left. To generate all of the combinations automatically, click Product Combinations Generator button:
- On the left side of the page, you will see a list of all the attribute groups with the attribute belonging to those groups.Note: The available attributes depend on what’s added from Catalog -> Product Attributes menu. There you can create and manage attributes.
- To add an attribute value to a combination, click on it (hold Ctrl to select more than one at a time, or hold Shift to select multiple values at a time).
- Click the Add button at the bottom to confirm the action.
- You can change the price/weight of the value for the selected combination. When it comes to the impact on the price there are a couple of fields: Tax Excluded and Tax Included.Note: It is usually more convenient to specify the impact on the price with the tax excluded. In the field of impact on the product price you can put the amount that’s added to the base price, don’t put the actual price.
- Select a default quantity (it is supposed to be the same for every combination). The quantity that you put in the Default Quantity field will be applied to all the combinations that are about to be created. If you want the different combinations to have a different quantity, after you create them you can set the quantity of each combination from the Quantities tab on the left.
- Select a default reference. If you want some reference code (only for internal use) to be applied to all combinations, type it in the field for Default Reference. After the combinations are created you can specify a different reference for each combination by editing that combination.
- Click the Generate These Combinations button at the bottom to save the changes.
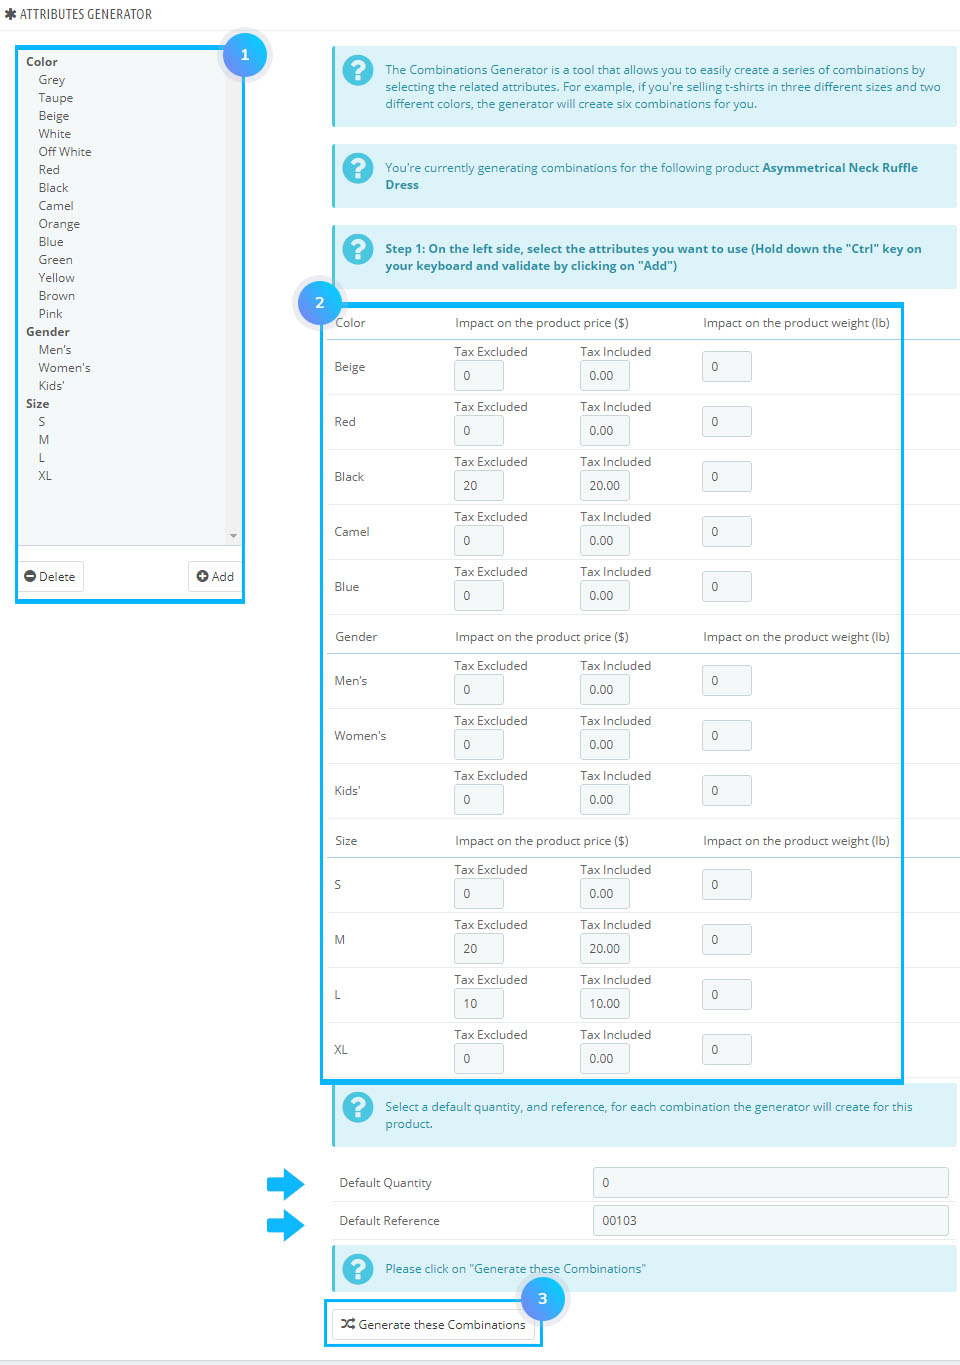
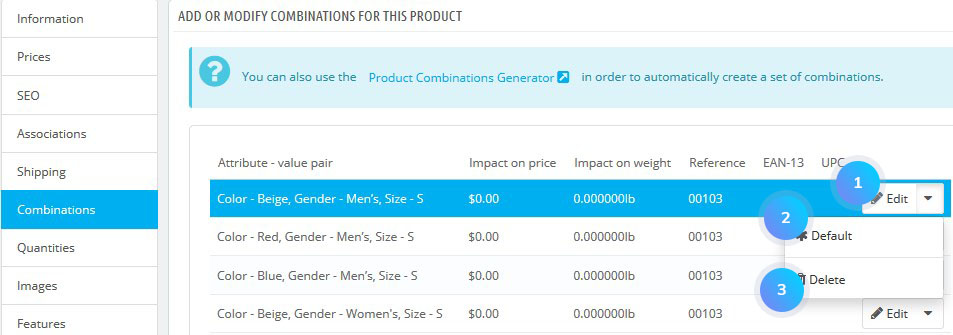
- To edit the automatically created product combination, click the Edit button and make the needed changes to it. To make one of the combinations default, select Default. To remove the generated combinations, select Delete:
Hopefully, this tutorial was helpful for you.
