This tutorial provides the detailed explanation on how to manage contact form in your Joomla template in case it’s added with the help of the “TM Ajax Contact Form” module.
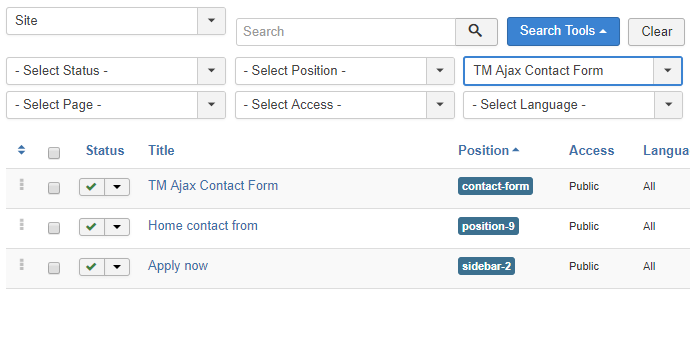
- First, visit the Extensions -> Modules section in your site admin panel and locate the “TM Ajax Contact Form” module among the list. You may use the Search Tools and filter modules by Type for the easier navigation between the modules.

- Next, open the module to configure it up to your needs. Select the pages for your module to appear on at the ‘Menu Assignments’ tab and specify its Bootstrap size at the ‘Advanced’ tab. Then proceed to the ‘Module Settings’ tab to define the contact form settings.
There are the following options to configure:
- Pretext – enter here some text to display above the contact form body.
- Fields – select the fields for your contact form, each one has a configurable label, name, type, title and bootstrap size so you can manage a layout of your form here. There are the text, email, tel, url, select, textarea, date and times field types. The ‘select’ type of a field has also the options setting available that allows entering a list of options to choose from.

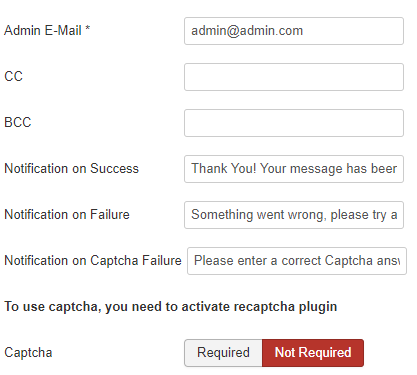
- Admin E-Mail * – this field is required, as it’s the main setting of a form. Enter here your email address to have the form messages sent to this email.
- CC, BCC – these fields are optional, you can set the additional recipients emails here if needed.
- Notification on Success, Notification on Failure, Notification on Captcha Failure – the following fields allow you to enter a custom message that the site visitor will see after completing the form. This allows you to personalize the form, we’re sure the site visitors will appreciate this.
- Captcha – the captcha trigger enables/disables the captcha protection for the form, this allows to avoid spam attacks. To use captcha, you need to activate and configure reCaptcha plugin.

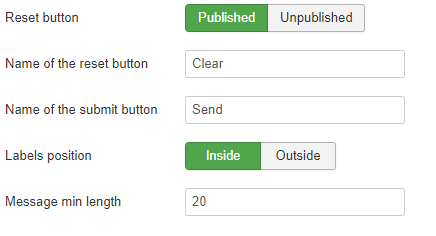
- Reset button – this setting provides you with an option to turn ON/OFF the display of a Reset button next to ‘Send’
- Name of the reset button, Name of the submit button – the following fields allow you to rename the form buttons easily.
- Labels position – this option defines if the form fields labels are inside or outside the fields.
- Message min length – this option allows you to enter the minimum required number of symbols for the ‘message’ field, increasing this parameter will encourage your site visitors to write more and explain their query in details.
- Time format – the last setting among the list allows you to define the time format for the ‘times’ type of the contact form field if you decide to use such field in your contact form.
That’s it, after specifying all of these settings form is ready to be used. Don’t forget to press the Save or Save & Close button at the top to apply your edits. Keep in touch with your site visitors using the “TM Ajax Contact Form” module!


