


The interactive widget provides a simple way to display your real Instagram photos on your WordPress site in genuine time. We will tell you how to do it.
You have an Instagram profile that contains a lot of information and pictures. And you want your site visitors to see this. It is quite real. In this case, the Instagram plugin widget will help you.
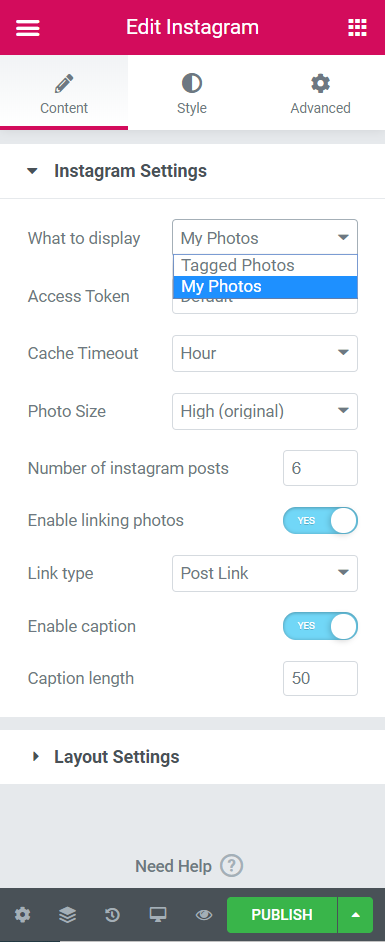
There are two ways to display photos that are supported by this widget. The first way is to display a photo with a specific tag. The second is to select the My Photos option, thereby you can pull out the photo from your account.
Because the display of photos from other accounts is limited by the Instagram policy, we will tell you how to get permission to display images on Instagram. In order to access your photos and confirm that you are the owner of your account and confirm permission to use photos and in general all content on your site, first, you need to set an Instagram Access Token.

What’s an Instagram Access Token and How to Display Photos From Instagram?
The Instagram Access Token is a set of characters that are unique to your account and that allow other applications to access your Instagram feed. Your site will not be able to connect to Instagram servers if you don’t have a token. The token provides the website with a safe way to request Instagram permission to access your profile and display its images.
And, if you like to showcase shoppable Instagram galleries on the Shopify store, you can just install the app by Growave and connect your business Facebook account.
How to Get My Instagram Access Token?
In order for you to successfully get your Instagram Access Token, follow this step-by-step guide and you will surely learn how to display photos from Instagram easily.
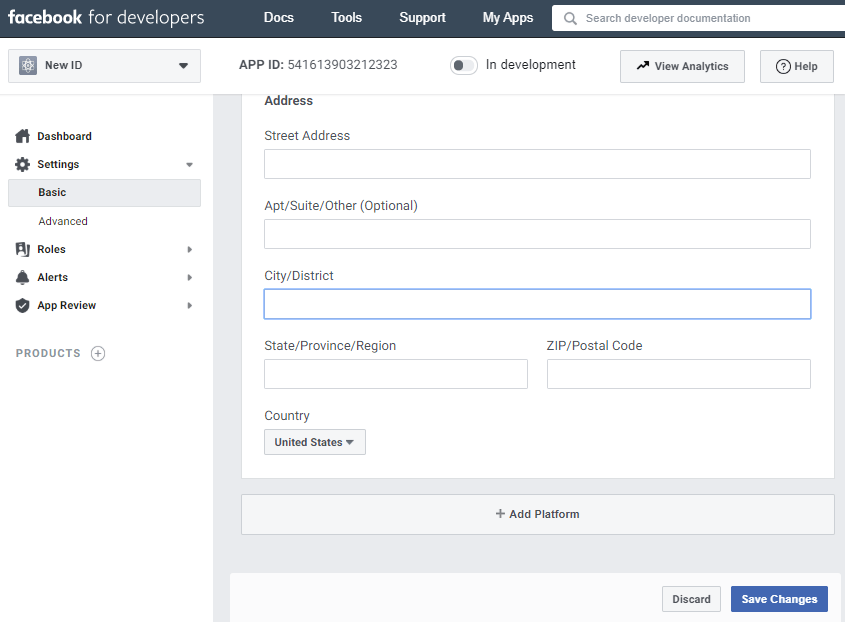
Step 1. Create a Facebook App
To do this, you need to go to developers.facebook.com, select My Apps, and create an app. When the panel of the App Dashboard, select Settings > Basic, scroll to the bottom of the page, and click Add Platform.
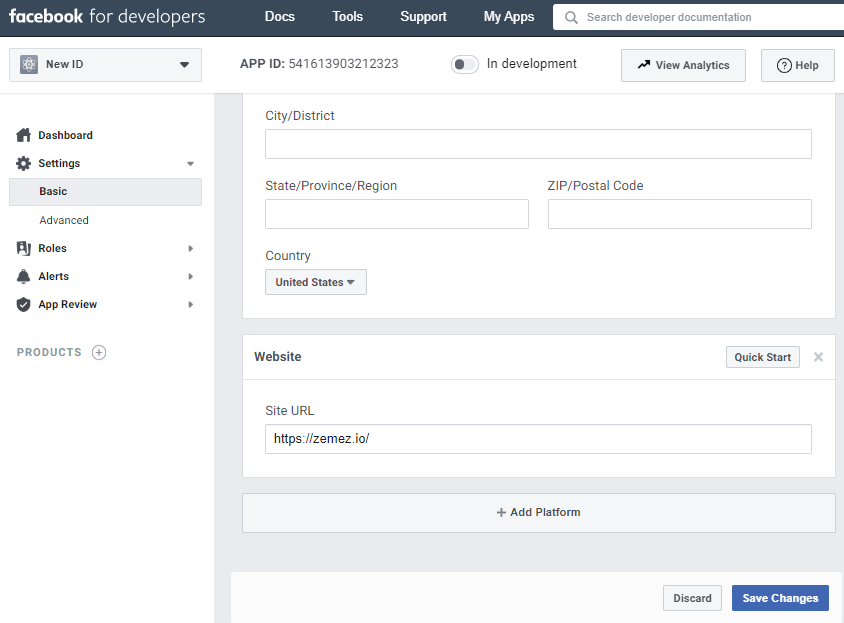
Next, choose the Website, enter the URL of your website, and save the changes. Here we will use the Website, but later you will be able to change the platform.
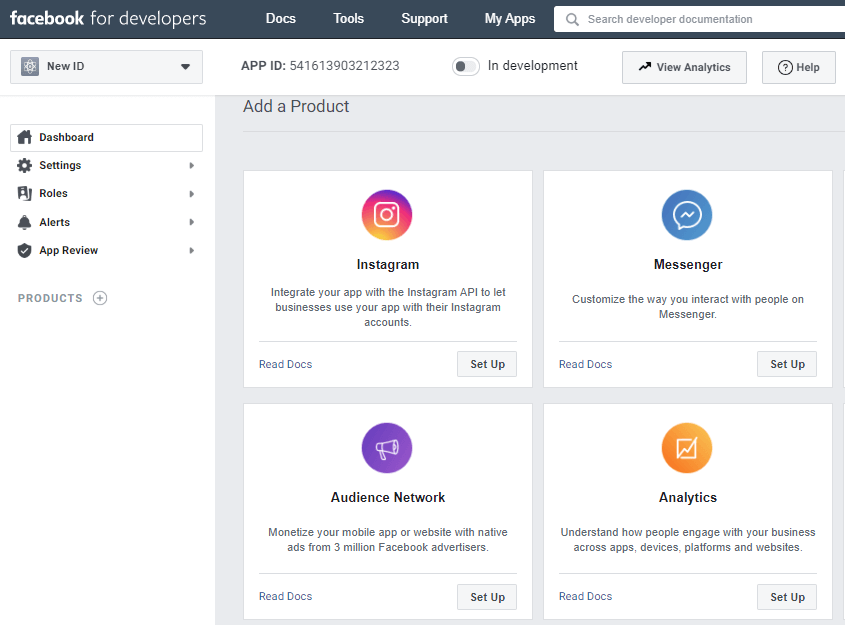
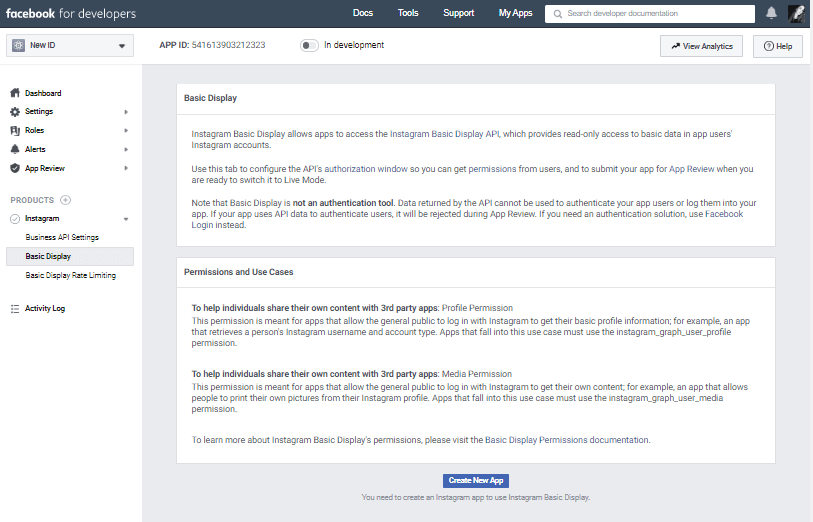
Step 2. Set Up a Basic Instagram View
So, click Products, find the Instagram product, and click on the Set Up add.
Click Basic Display, scroll to the bottom of the page, then click Create New App.
Fill out the form as described below.
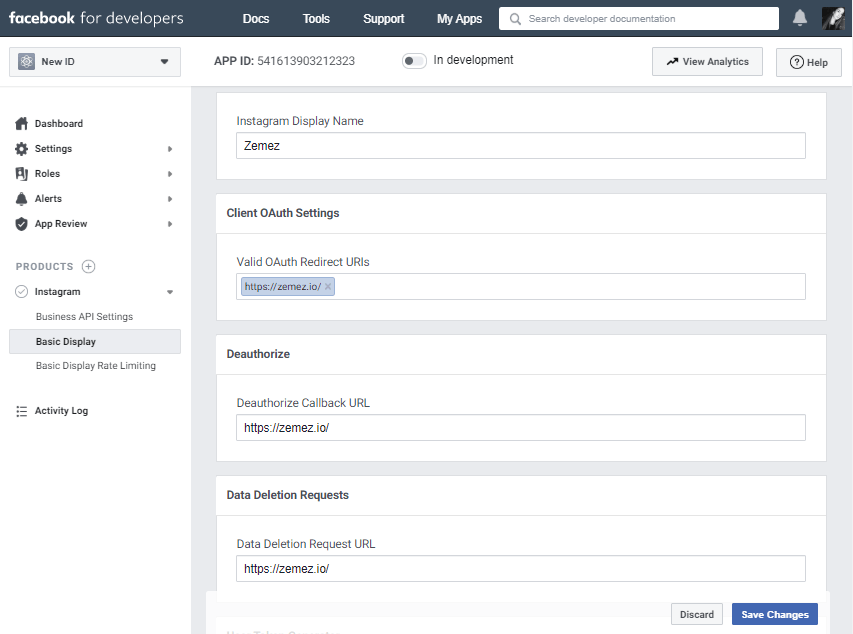
Display Name
Enter the name of the Facebook app you just created.
Valid URIs for OAuth Redirection
Enter the URL of your site. This field is intended for a special URI that registers redirection parameters, but in this example, we will use the URL of your site for convenience.
For example https://zemez.io/
After entering the URL, save the changes and check it again. Depending on the structure, a slash may be automatically added to the URL. Keep the full URL: you will need it to get authorization codes and access tokens.
Deauthorize Callback URL
Enter the URL of your site again. Then you will need to replace it with a URL to handle deauthorization notifications.
Data Deletion Request CallBack URL
Enter the URL of your site again. Then again, you will need to replace it with the corresponding URL to process data removal requests.
App Review
While skipping, we don’t need it yet.
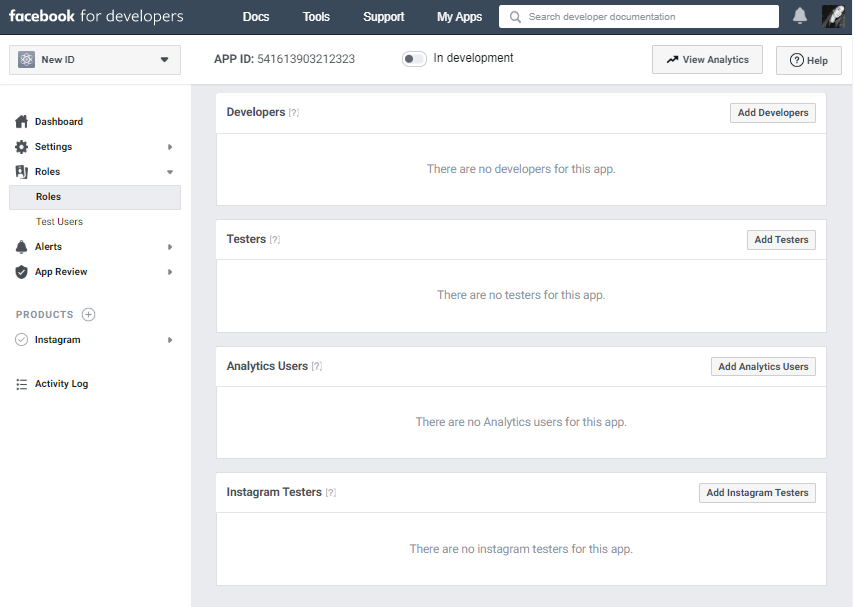
Step 3. Add Instagram Test User
Choose Roles > Roles and scroll to the Instagram Testers section. Click Add Instagram Testers, enter your Instagram username and send an invitation.
Open a new browser window, go to www.instagram.com and log in to your invited Instagram account. Select (Profile Icon) > Edit Profile > Applications and Sites> Tester Invites and accepts the invitation.
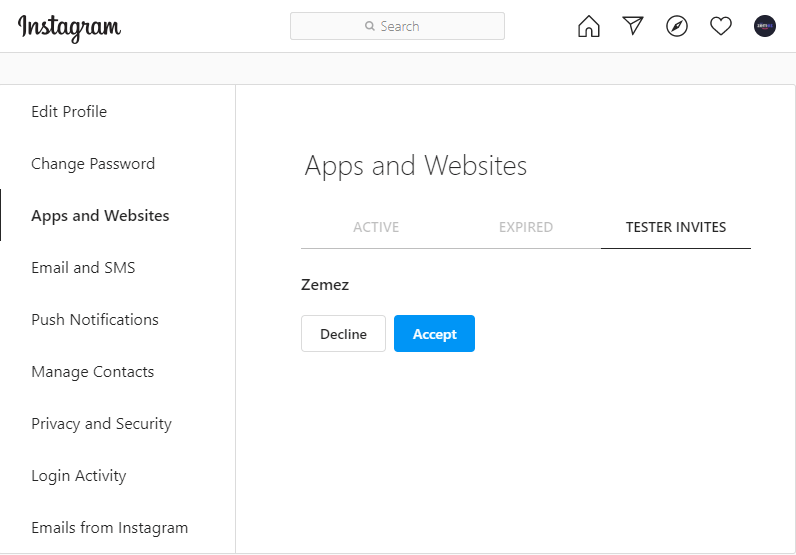
Now your Facebook application will have access to your Instagram account even in development mode.
Step 4. Log in the Test User to Display Photos From Instagram Fast
Construct the Authorization Window URL below, replacing {app-id} with your Instagram app’s ID (from the App Dashboard > Products > Instagram > Basic Display > Instagram App ID field) and {redirect-uri} with your website URL that you provided in Step 2 (“Valid OAuth Redirect URIs”). The URL must be exactly the same.

Open a new browser window and go to the resulting authorization window URL. The page should display the Instagram username, the name of the application, and a description of the permissions it requests.

Authorize the Instagram test user (that is, give the application access to your profile data). To do this, log in to your account in the authorization window and click Authorize. If successful, the page will redirect you to the URI specified in the previous step, adding an authorization code.
Please note: at the end of the redirect URI is the characters #_, but they are not included in the code. Copy this code (without the characters #_ portion): you will need it in the next step.
Step 5. Exchange the Code for a Token
Open a command-line tool or an application that supports cURL requests and send the API a POST request like this:
curl -X POST \ https://api.instagram.com/oauth/access_token \ -F client_id={app-id} \ -F client_secret={app-secret} \ -F grant_type=authorization_code \ -F redirect_uri={redirect-uri} \ -F code={code}
Substitute the {app-id} ID of your Instagram application, instead of {app-secret} – the secret of the Instagram application, instead of {redirect-uri} – the redirect URI, and the code received from us instead of {code}. Please note: the redirect URI must exactly match the one specified in the previous step, right up to the slash at the end (the application panel could automatically add it to the URI when setting up the Instagram application).
If successful, the API will return a JSON encoded object with a short-term Instagram user access token valid for one hour, and your Instagram test user ID.
Step 6. Request the User Node to Display Photos From Instagram
Using a command-line or application, send the cURL request to the User node shown below to get the user name and ID. Replace the {user-id} and {access-token} with the ID and access token obtained in the previous step, respectively.
curl -X GET \ ‘https://graph.instagram.com/{user-id}?fields=id, username&access_token={access-token}’
If successful, the API will display the Instagram username and ID.
Step 7. Add the Access Token to the Plugin Setting
Navigate to WordPress dashboard> JetPlugins> JetElements Settings. Go to the Integrations tab, find the Instagram section, and paste your token in the Access Token field, then click the Save button.
Done! Now, you can return to Elementor and use the Instagram widget to display photos from your account. As well, to bring more functionality to your website, try the ZeGuten plugin.