


From this simple and quick tutorial, you will learn how to create a WordPress subscription form for your website on the example of the Monstroid2 Noovazity skin. As an example, we took a Monstroid2 skin.
In case you are still hesitating, whether you need a subscription form, or not, this article is for you. This tool is one of the most important elements of the website that attracts the target audience for your email marketing. Especially, if you are planning to build a personal blog and promote it.
The possibility of gaining a wide audience increases with a beautiful and visible subscription form. One of the most important things is putting it in a prominent place, so the visitor doesn’t have to travel through the pages searching for it.
Adding a subscription form block
You can easily implement a subscription form on any page of your website with the help of the Elementor plugin and its multiple tools.
- Open any page of your website and click on the “Edit with Elementor” text, which is located above the page on the special horizontal dashboard.
- In the Elements search field type the “Subscribe” text.

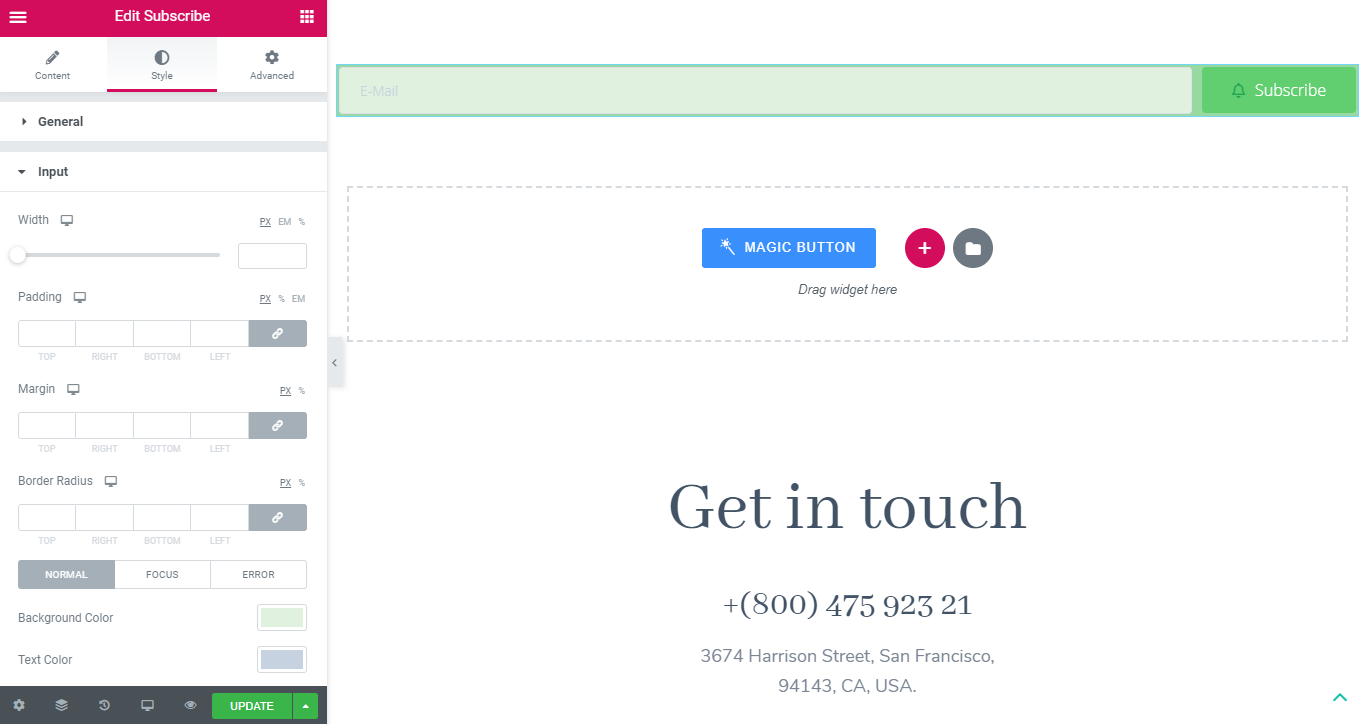
- Drag the found block and drop it into the empty section. After that, you are able to set all the options for the block, according to the content and style.
- Let’s add an icon to the button. You can choose it from the in-built icon library or upload your own in the SVG format.
- You can also visit the Style tab and set background color, spacing, and typography for the input field and button. Don’t forget to save the changes by clicking on the “Update” button.
Connecting the subscription form to Mailchimp
Building a subscription form and designing it is not enough yet. You will also need to see what messages worked for email and what worked for ads. The Mailchimp platform will free you from any hassles.
- First and foremost, you have to create a personal account on the Mailchimp website and verify it. If you are new on this website, you’ll need to go through a few steps, which will help the website understand your need better.
- When all the job is done, go to your account tab.
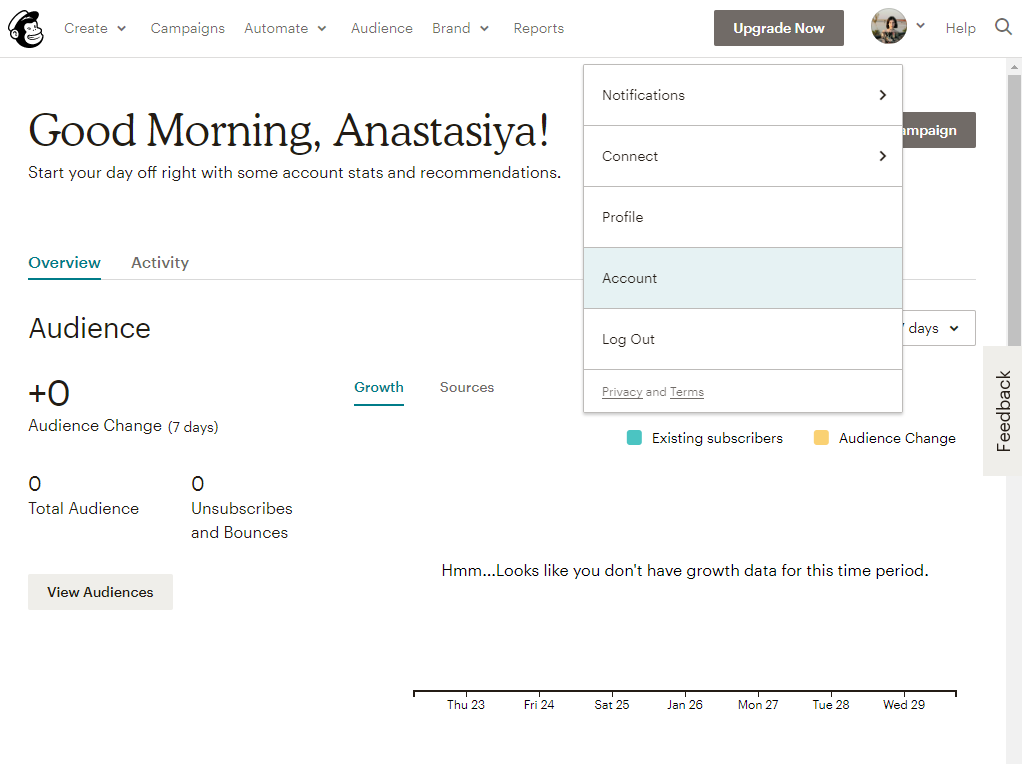
- Open the “Extras” dropdown and choose “API Keys” tab.
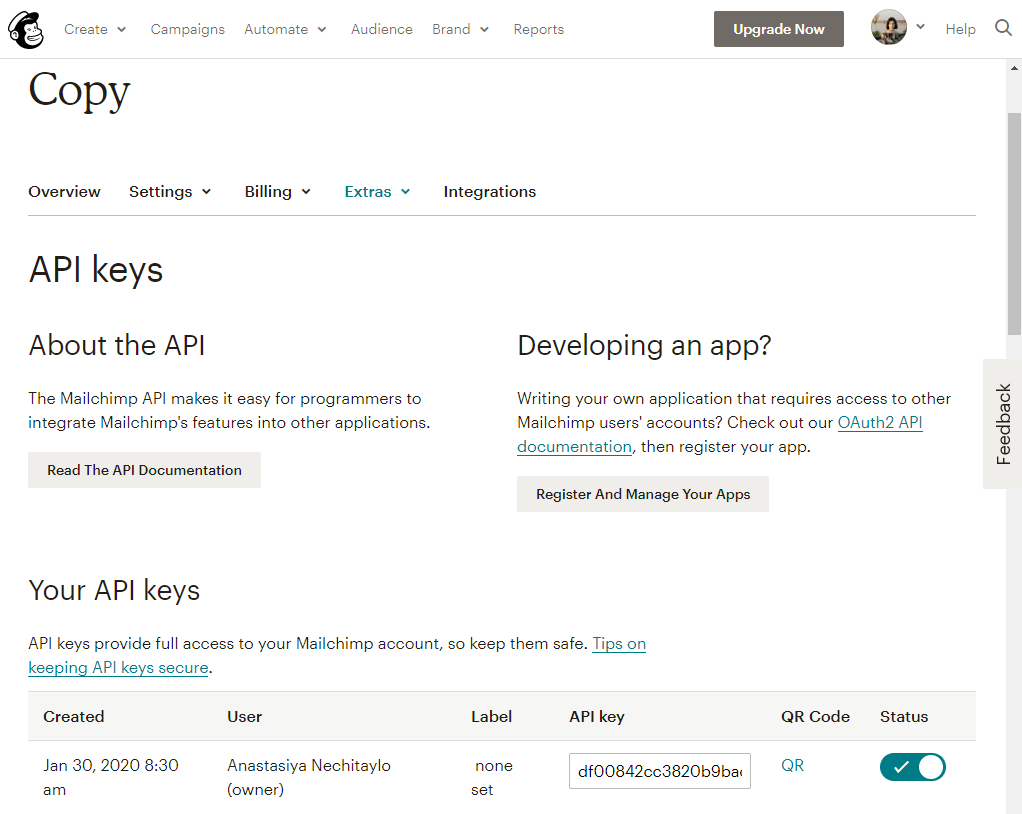
- Click on the “Create an API key” button, wait a few seconds and copy the key, that the website has generated for you.
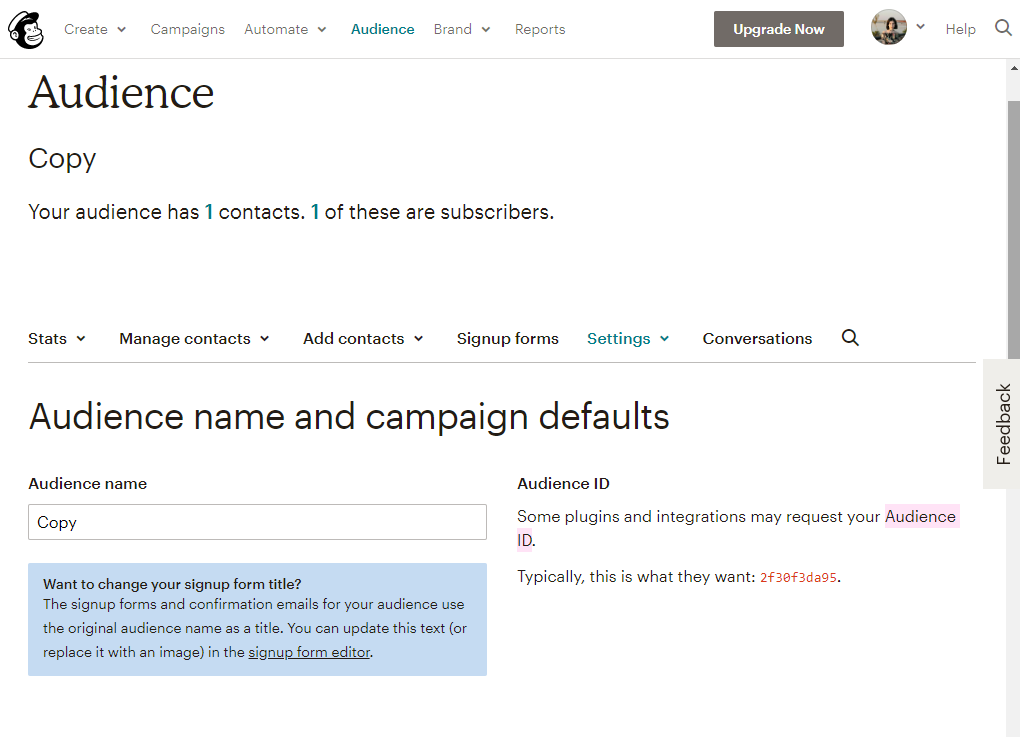
- As a next step, go to the “Audience” tab, which is located at the top of the page.
- Open the “Manage Audience” dropdown and choose “Settings” tab.
- Go to the “Audience name and campaign defaults” link and copy the Audience ID, which is pointed with a red color.
Final setting
Congratulations! We’re almost at the finish. As a last step, you need to go to the admin dashboard and paste API key and Audience ID.
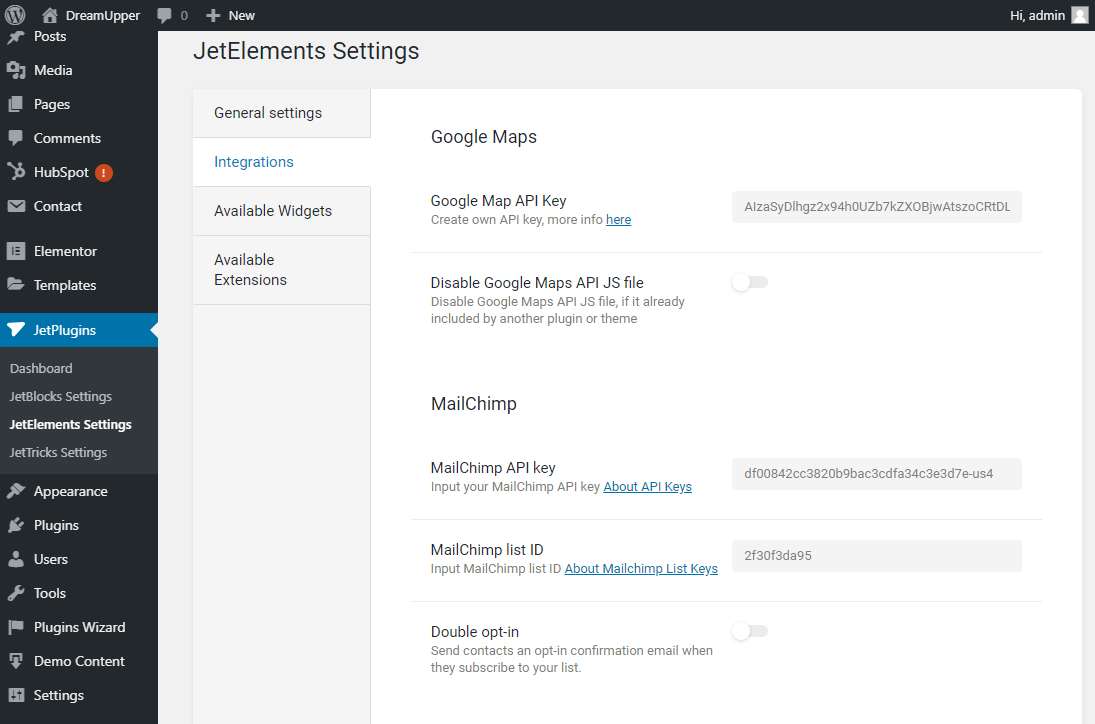
Go to the “JetPlugins > JetElements” and open the “Integrations” tab. Find the “MailChimp” area and paste API key and Audience ID in the proper fields.
We hope you like our simple and quick tutorial on how create a WordPress subscription form! Subscribe to our newsletters to find more useful tutorials and listings!
