Gutenberg is the latest WordPress editor. It is very simple in usage and has a comfortable interface thanks to its block structure. There you can find a diversity of the most necessary widgets to add them to your page.
Furthermore, some plugins can also add their own blocks. And as a result, people are lost in this variety and a large number of different blocks make them confused.
Although blocks help you to build your pages and make posts, their redundancy makes your writing interface be slower and complicated as well.
If you use Gutenberg editor only to publish blog post and articles, probably you don’t need a great amount of widgets to show, because you don’t use them. In this case, you are looking for a decision to disable Gutenberg blocks.
It is not such a difficult task as it seems for the first time. In this tutorial, we will show how to make it in several ways.
Disable with “More tools & options”
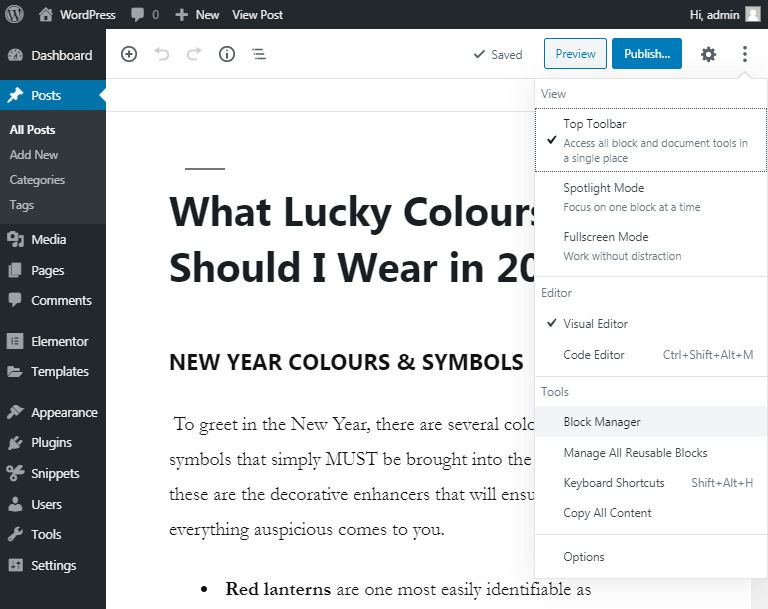
The simplest way to disable Gutenberg blocks is to do it with “More tools & options” button. To do that go to the “Posts” and press “Add new” or “edit” the existing one. The Gutenberg editor opens and then you tap on “ellipsis” (“More tools & options”) button. Choose “Block Manager” to make the next steps.
The “Block Manager” window will open and there you can choose the items you don’t need to see in your “add block” menu. Remove the mark from the boxes next to the unnecessary positions and you will achieve the goal.
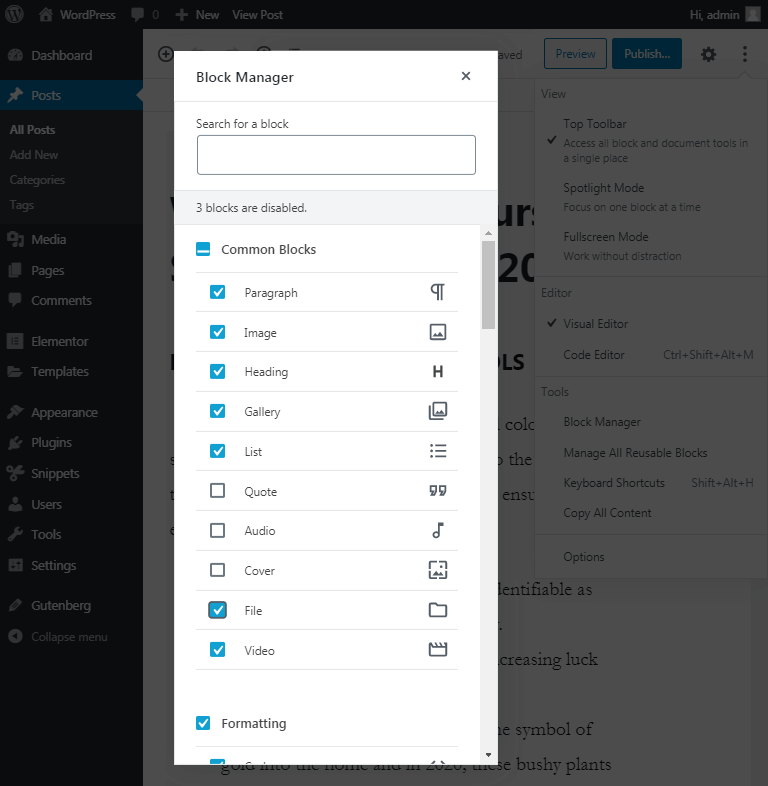
If you decide to return the hidden blocks you can do it in the same way. Put back the marks into boxes next to their names and they will appear in the “add block” tab.
“Disable Gutenberg Blocks” plugin
There is one more way to disable Gutenberg blocks. For this, you should install the “Disable Gutenberg Blocks” plugin. Go to Plugins on the left sidebar and click “Add new”. In the search field enter the name of plugin and press “Install now”.
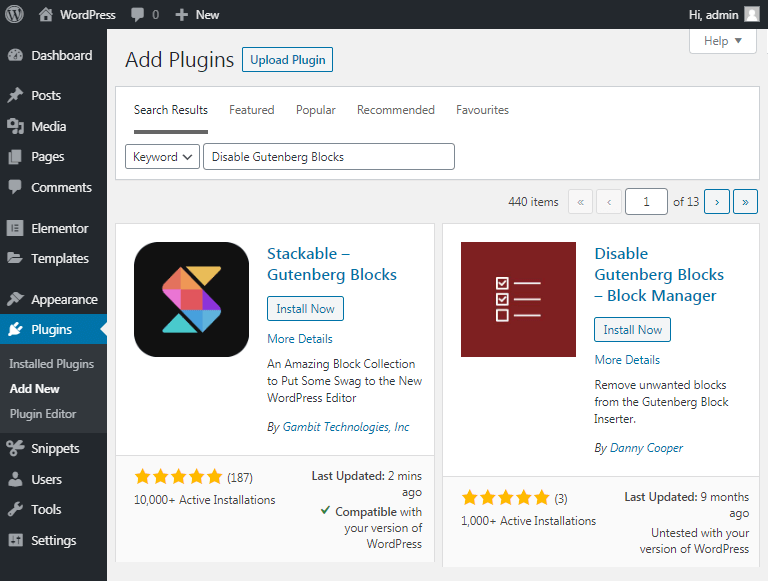
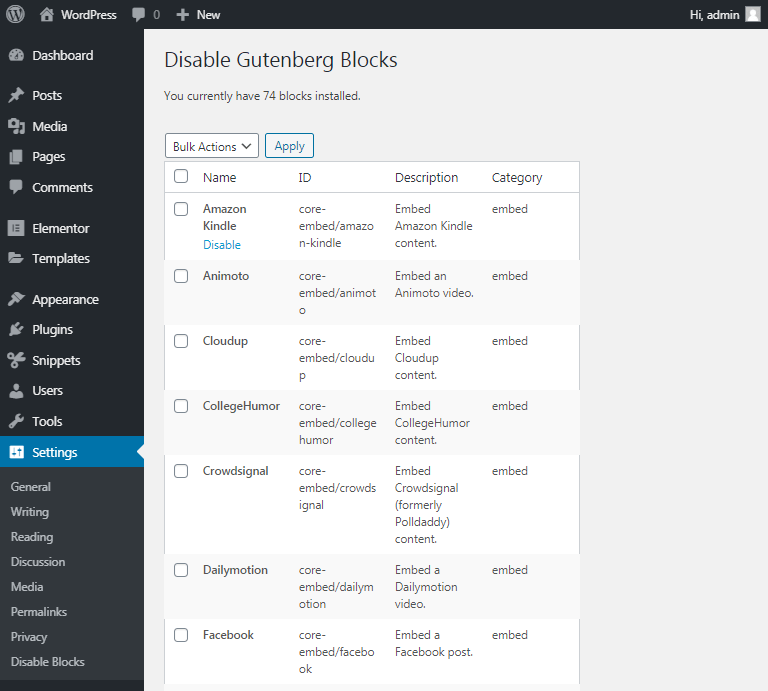
After you have installed and activated the plugin, the “Disable Blocks” function will appear in the “Settings”. Go there to start work with blocks.
This plugin also shows how many blocks you have installed. You can see the amount of your blocks in the top of the page.
To disable block you should only place the cursor on the block name and click the “Disable” button.
If you want to disable more than one blocks for the one time. Put the marks in the boxes next to the names of the necessary blocks. Choose “Disable” in the top field and press the “Apply” button.
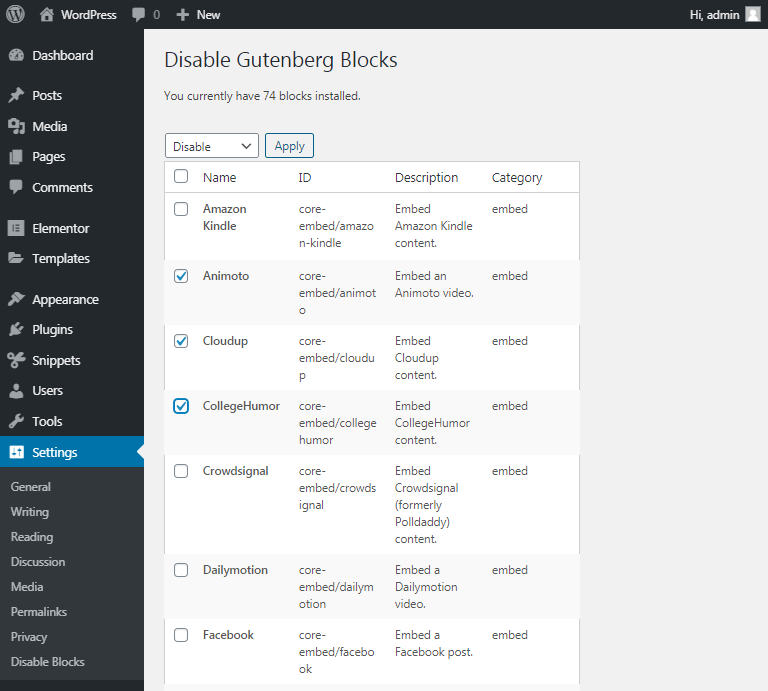
The blocks you have disabled will become grey, so you can recognize them from others. If you want to return the blocks you should mark the items you need and choose “Enable” into the top field instead of “Disable”. Tap “Apply” and the blocks will restore.
Final notes
There were simple ways to disable and enable the Gutenberg blocks. You can choose the one that more suits to you. But remember that using a lot of plugins slows down the website loading time.
Therefore, as Gutenberg offers you a way to disable blocks without excess plugins you better use the first method.


