Wondering about what the custom meta fields are? Then this article is for you. Here we will show you how to add custom meta field in WordPress to your post without using code lines and phpMyAdmin. Take these notes.
Our tutorial will be useful for those who have installed Elementor builder and JetBlog addition for WordPress. We have used the Smilene Monstroid2 template as an example, but any other Elementor-based theme by Zemez team will do.
What Are the Custom Fields?
Custom fields are the metadata. They are usually used to add extra information like title, date, author, and other to the post. It can make it visible when you add a post list to the page of your theme.
When you publish the post, you can notice that in WordPress it is divided into two parts. The first is the post body where the main content, such as paragraphs and media, is placed. In the second part, you will notice such information about this post as the title, status, author, date, etc. This part is confirmed as metadata.
Most commonly WordPress appends this metadata to each new-created post automatically. But it also allows you to set down their own metadata with the help of custom fields. So, let’s start adding these custom fields to your posts.
Install the Advanced Custom Fields Plugin
To add meta field to custom post type without codes and phpMyAdmin we need to install the Advanced Custom Fields plugin. It is free and simple in usage. Using it we can create custom fields within a few minutes. This plugin can be installed directly from WordPress.
Go to the Dashboard and find Plugins section. Click on Add New and in the search field enter the name of the necessary plugin. Thanks to the Install Now and Activate buttons you can start using this WordPress addition.


Create a New Field Group
To create a new field group open the Custom Fildes section that is appeared once you have installed the Advanced Custom Fields plugin. Click on Add New.

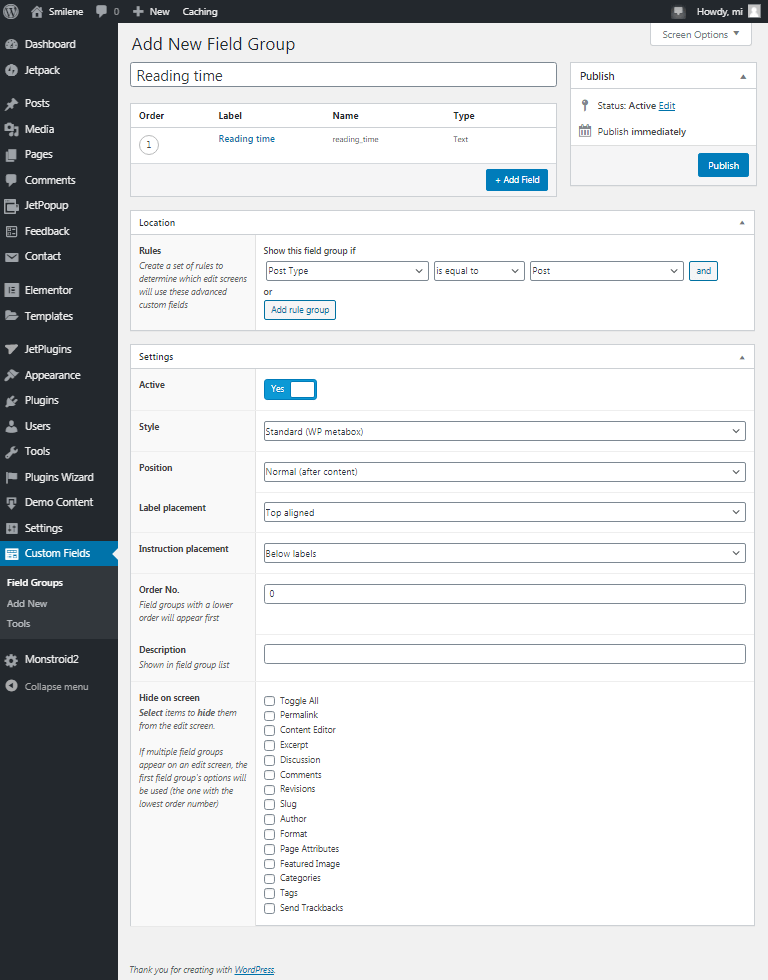
Start with the + Add Field button to create a new field group. Once you have clicked on this button you will see the settings appeared. Put the necessary values into the fields to finish this step.

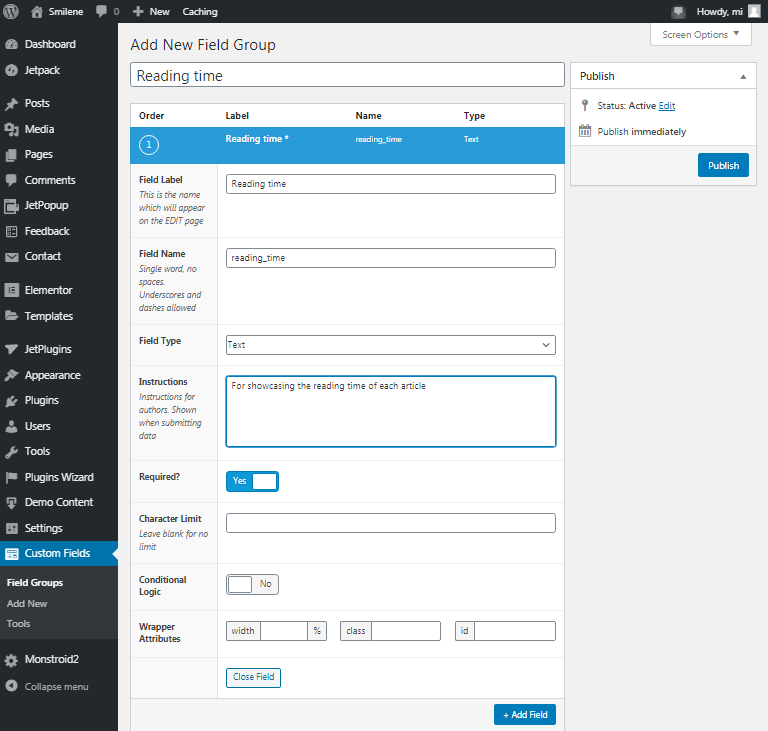
Then you need to find the table under the new-created field group and fill all necessary fields with your data like on the screenshot below.

Add Meta Field to Custom Post Type
To make these custom fields be visible on the pages of your theme we should go to the Posts section. Find the post where you need to add the metadata and click on the Edit button.

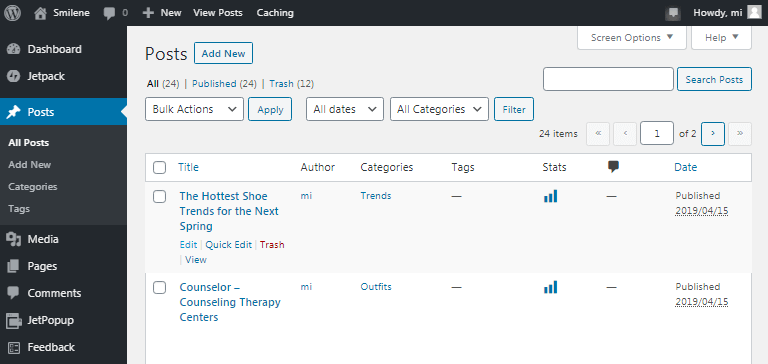
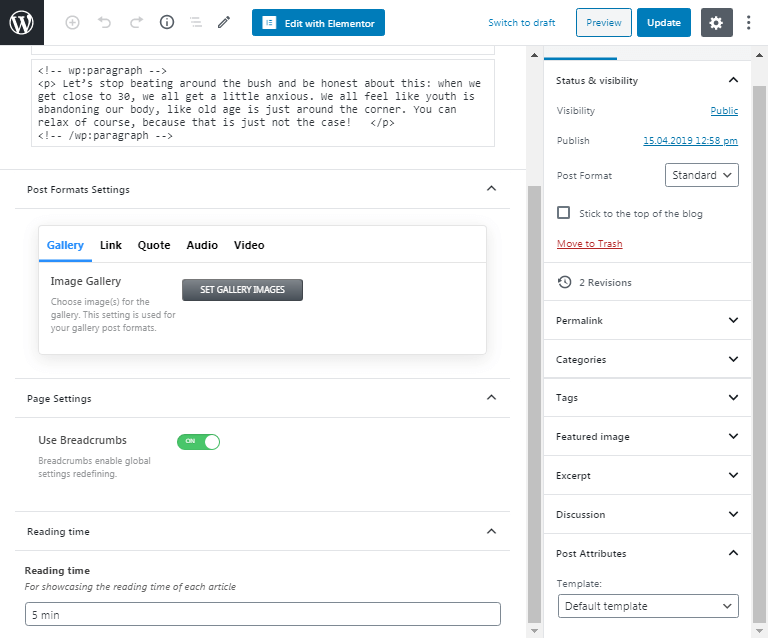
When the editor has opened, scroll down to the end of the page and find the section with our custom field. In our case, it is called Reading time. Put into the field the value that you need and click on Update in the top right corner.

Then open the page where your post list is located and click on Edit with Elementor.


Right-click on the needed post and click on Edit Posts. We should work with the Custom Fields section. Here you will see such option as:
- Show Meta Before/After Title – enable this option in order to show the custom meta information before or after the title.
- Meta Fields Position – here you can select the position of the custom meta information displayed in fields.
- Add Item – click Add Item button to add a new custom meta field.
- Show Meta Before/After Content – enable this option in order to show the custom meta information before or after the content.
- Meta Fields Position – here you can select the position of the custom meta information displayed in fields.
- Add Item – click Add Item button to add a new custom meta field.
Click Add Item and enter the meta key you’ve previously created with the help of plugin (in our case it is reading_time). In the Label and Value fields put the data that you want to be shown under the post title.


In the Style section of Elementor you can also find Custom Field setting. Stylize your metadata at your discretion. When you have finished click on the Update button at the bottom of the editor to save the changes.

You can also preview the results before saving the changes. To make this action click on the eye button in the bottom of Elementor and check the result.