
From this quick and simple tutorial, you will figure out how to build your own custom shop page from the beginning. This tutorial is based on the Monstroid2 skin called Marronis.
How to get started
In case you decided to create an online store and are at the development stage, first and foremost, you have to come up with a concept of your shop. Create a domain name for your website and register it. After that, select the products. Finally, you are ready to build a website!
In this tutorial, you will learn how to create your first custom shop page with the list of products, and design it. Remember, before starting to build a page interface, you have to add product items on the dashboard. Let’s get started!
- As a first step, open your admin dashboard and go to the “Pages” > “Add New”.
- You will be redirected tothe Elementer workspace.
- Because our totorial is based on the Monstroid2 skin, header and footer of the page are alredy presented.

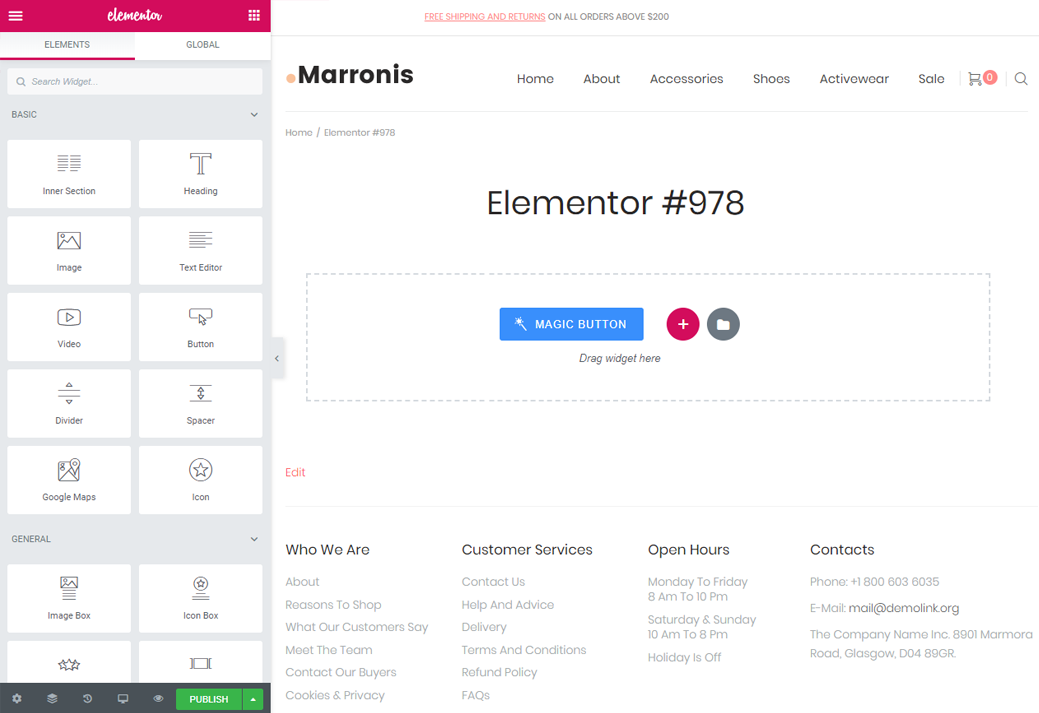
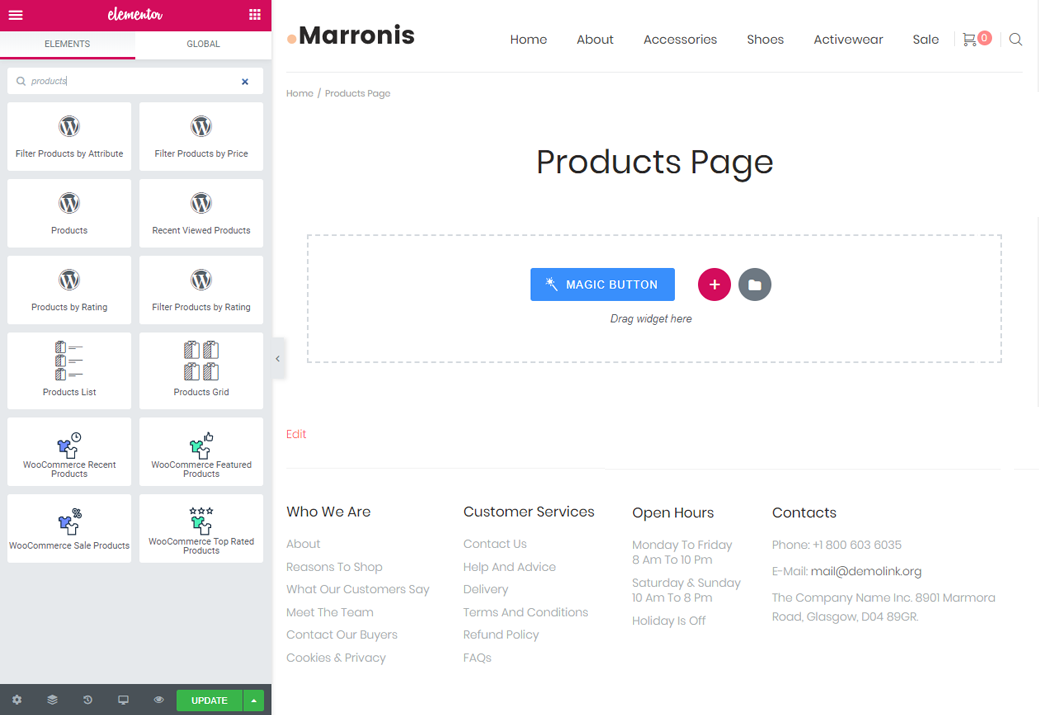
So, now you can see a “Magic button” tool at the center of your page. In case you have never been working with the Elementor page builder, this tool is aimed to help you add various sections on your page. However, firstly, let’s change the name of your age.
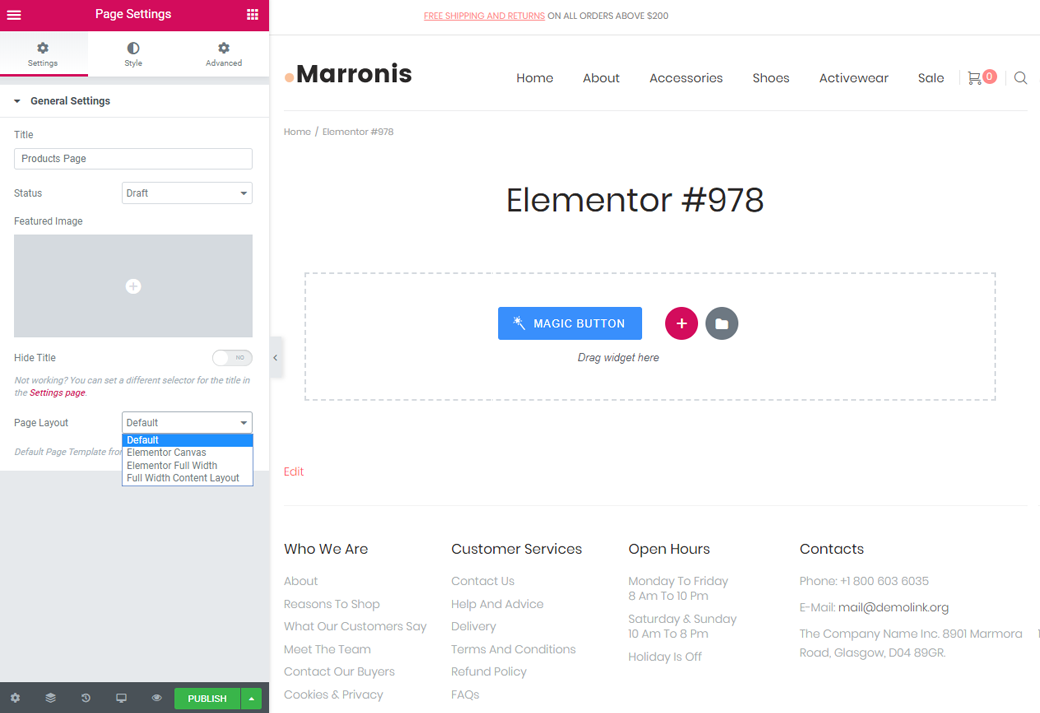
- Click on the “Settings” icon, which is located at the left bottom corner of the Elementor builder sidebar.
- Write down the name of your page at the “Title” field.
- Here you can also choose featured image, decide if you want to showcase the title and set the layout.
- Don’t forget to press the “Publish” button to save the changes.

Creating a section and block
Now we are going to create a products’ page. Let’s create three sections with products and separate them with banners. Keep in mind, that the tutorial is based on the Monstroid2 skin, so you have to make sure that you also have any special plugin for creating product layouts on board.
- Take a look at the Magic button one more time.
- Click on the “+” icon to add a new section.
- Choose the one with a single column.

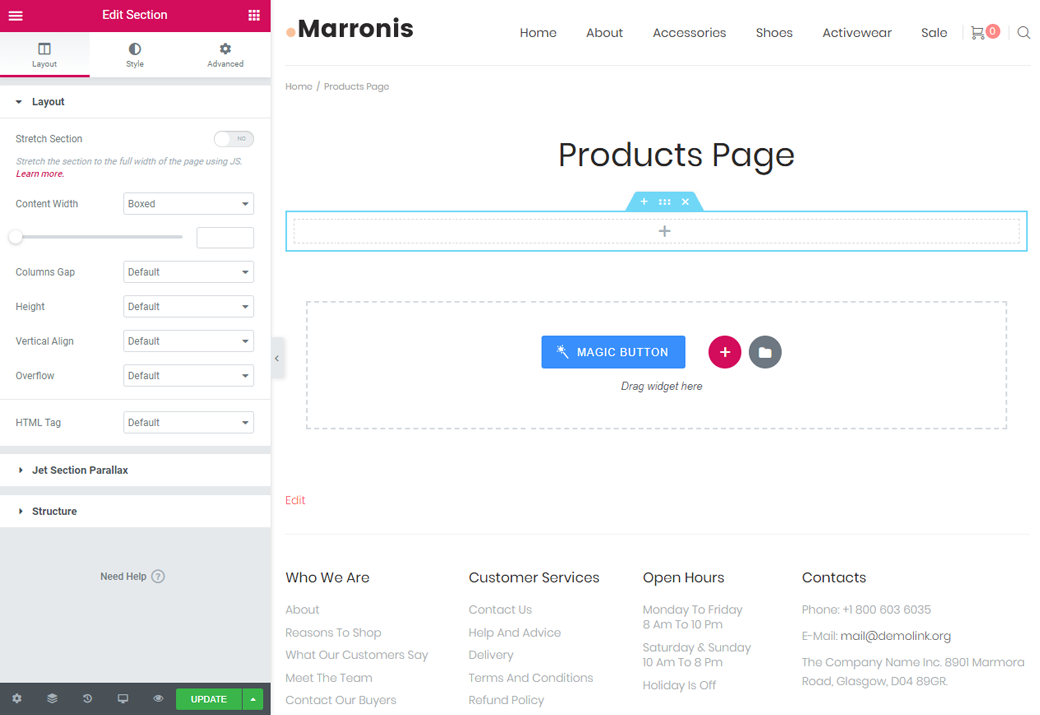
- Now that you have a newly created section, click on it to activate.
- Type the “products” text in the Elementor search field.
- You may have various blocks to use, including the recent, featured, sale products, etc.

- Drag and drop the needed block.
- Here you are able to set a dozen of various options according your content and design.
- Don’t forget to press the “Update” button to save changes.
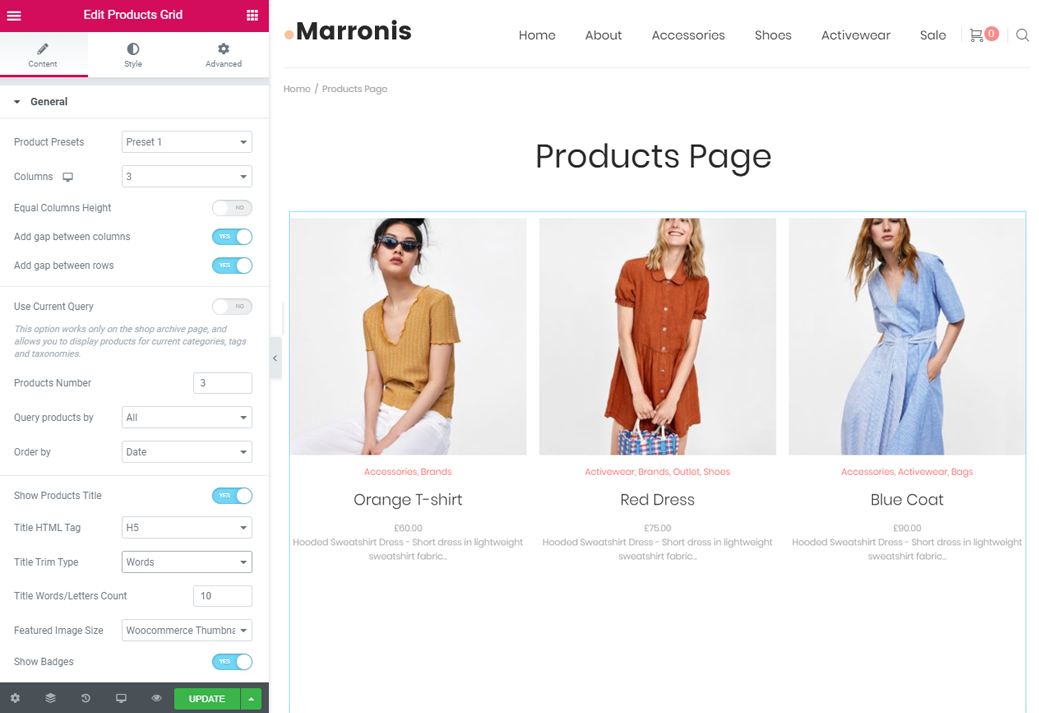
Congratulations! You’ve set the most important options for your shop page. As you can see, the process of creating a product’s layout is quite simple. You can also add various filters for the product items in a few clicks. Take a look at some of the general settings for your layout:
- set the number of columns, in some cases, you are also able to choose the preset;
- add a gap between columns ans rows;
- set the product number, decide by what you want to order them and choose the query;
- enable to show title, tags, categories, priceand various buttons.
We hope you like our simple express tutorial on how to create a custom shop page. Subscribe to our newsletters to find more useful tutorials and listings!

