


“JX Header Account” module displays login and registration forms on the website. The module allows to log in and register using such social networks as Facebook, Google+ and VK, which is convenient for the website users.
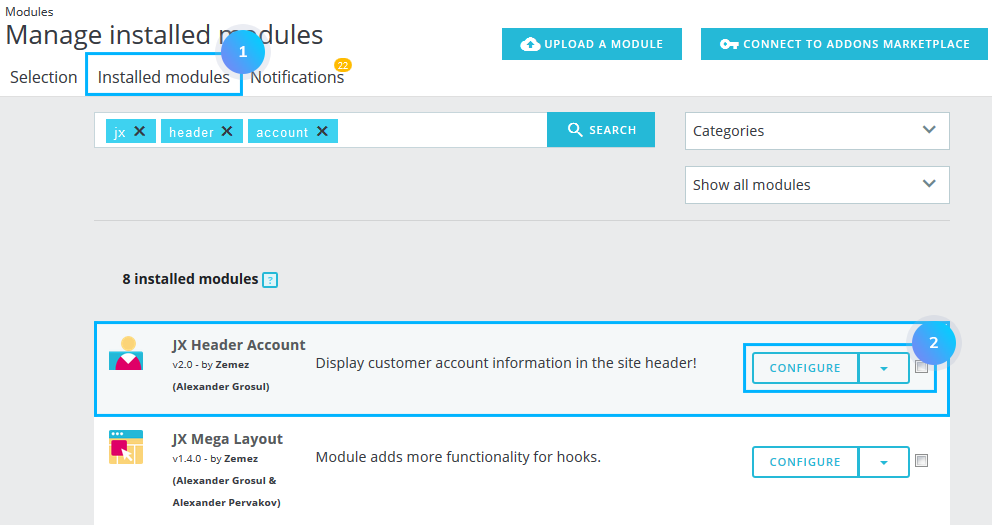
- In your PrestaShop admin panel go to Modules -> Modules and services section. Click Installed modules tab and in the search field type “JX Header Account” to find the module. Click the Configure button to manage it:
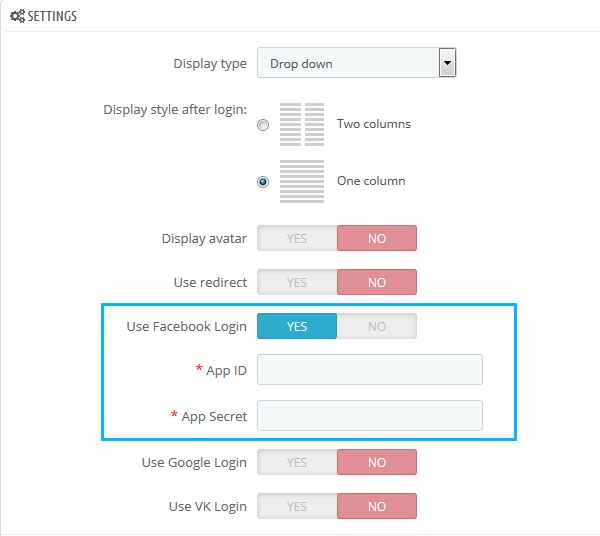
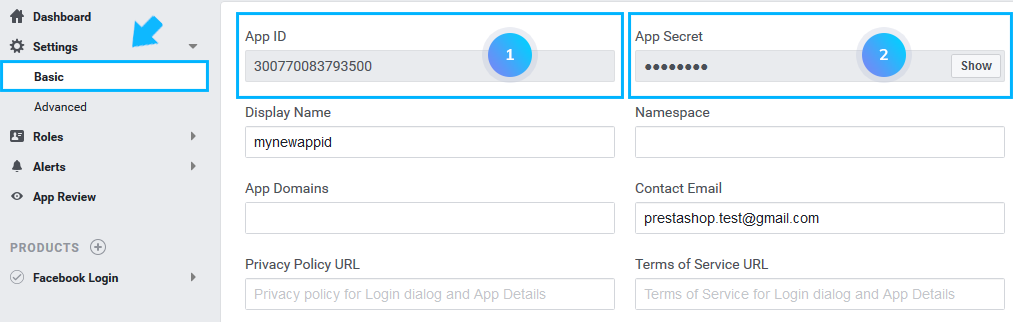
- Activate Facebook Login option. App ID and App Secret field will appear. You need to log into your Facebook in order to get App ID and App Secret values:
 [notice type=”warning”]Note: you’ll need the Facebook developer account to get started. If you don’t have one, upgrade your personal Facebook account to a Facebook Developer account.
 - Go to Facebook account for developers. At the top right corner click My Apps and choose Add New App.

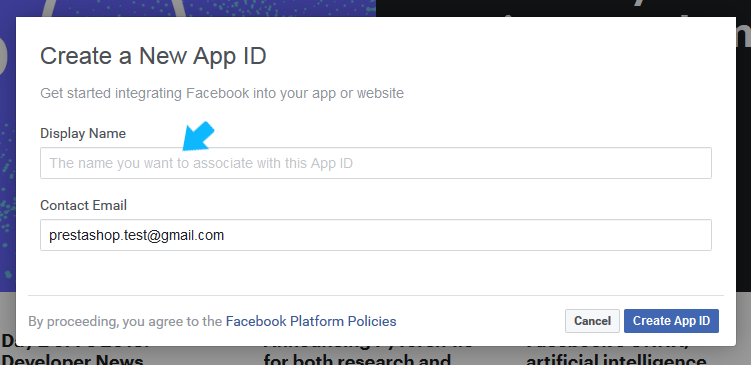
- In the appeared window, type your new App name and check your Contact Email below. Click Create App ID button at the bottom to confirm the action.
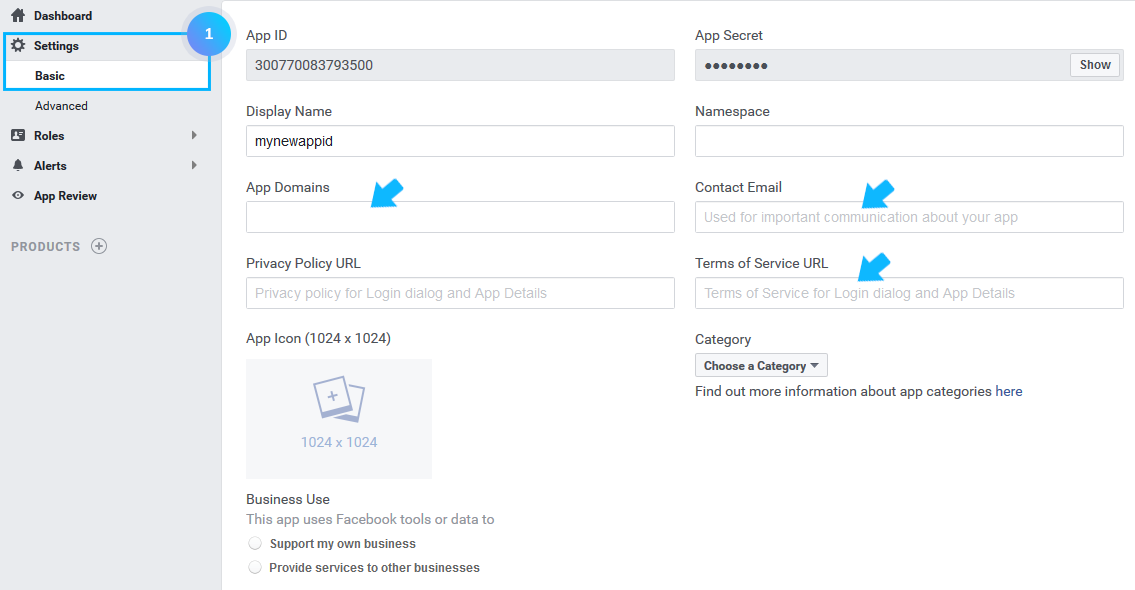
- Click Settings menu and add your App Domains, Contact Email and Site URL values.
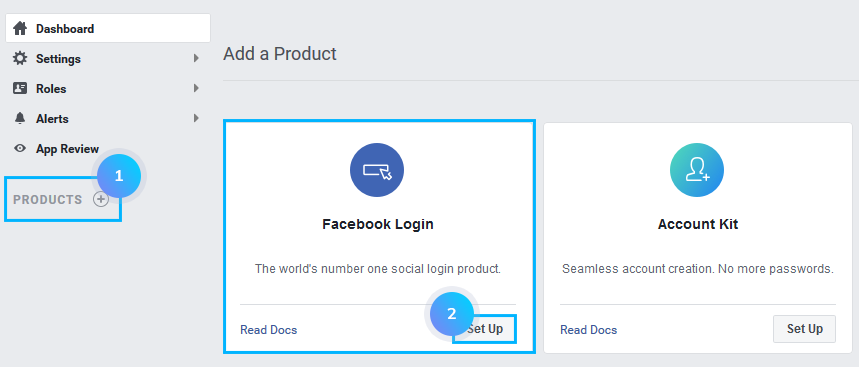
- Now, click Products at the bottom to add a product and choose Facebook Login there. Click Set up button.
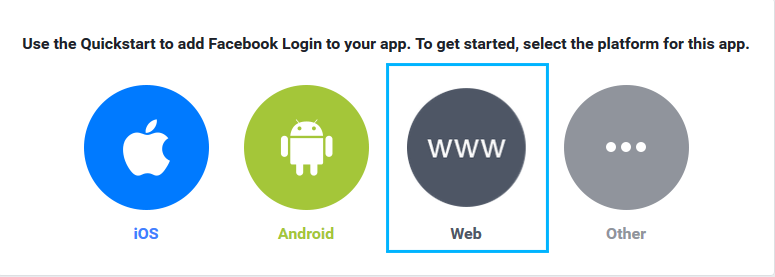
- Choose WWW (website) option.
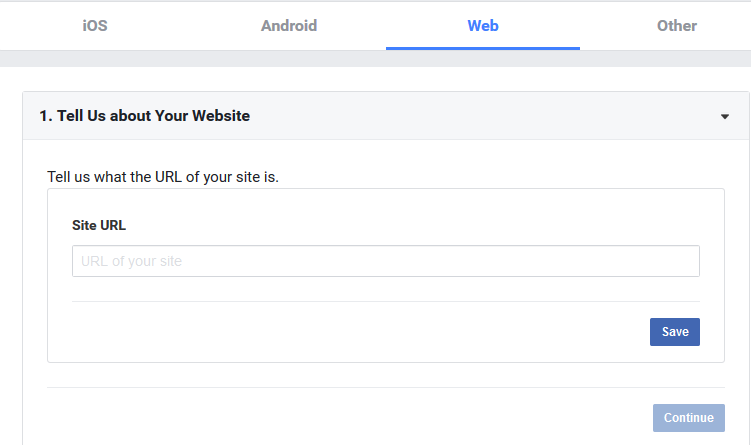
- Type in your website URL.
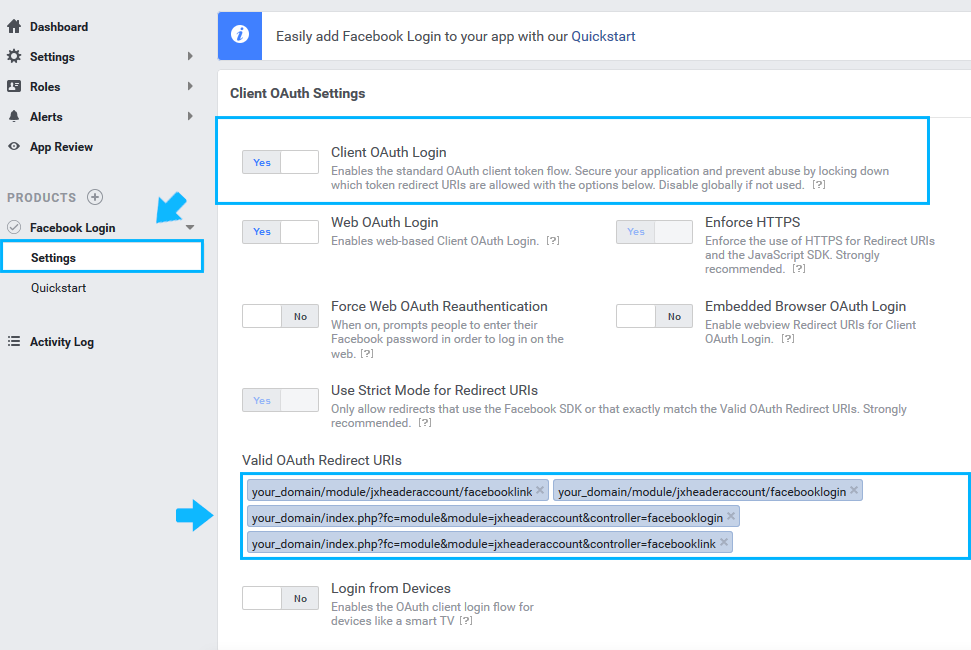
- Click Settings tab. Make sure that Client OAuth login is enabled. In the Valid OAuth Redirect URIs field type the following links:
- Friendly URLs:
- your_domain/module/jxheaderaccount/facebooklink (where your_domain is the name of your site domain);
- your_domain/module/jxheaderaccount/facebooklogin (where your_domain is the name of your site domain).
- Not Friendly URLs:
- your_domain/index.php?fc=module&module=jxheaderaccount&controller=facebooklogin (where your_domain is the name of your site domain);
- your_domain/index.php?fc=module&module=jxheaderaccount&controller=facebooklink (where your_domain is the name of your site domain).
- Friendly URLs:
[notice type=”warning”]Note: if you use more than one language in your online store, it is necessary to add the corresponding locale (-s) to each link.
For instance: your_domain/your_locale/module/jxheaderaccount/facebooklink (where your_locale (it may be en, de, es, it, fr etc.) – is the language you use).
- Go back to your Settings -> Basic section. At the top, you can see your App ID and App Secret values. Insert them in Use Facebook Login field in your PrestaShop admin panel.
- Click the Save button to save the changes.
Hopefully, this tutorial was helpful for you.

