


“JX Media Parallax” module allows adding a background image or video to some blocks on the site with multi-layered parallax effect.

- In your PrestaShop admin panel go to Modules -> Modules and Services section. Choose Installed modules tab and find there JX Media Parallax module. Click the Configure button:

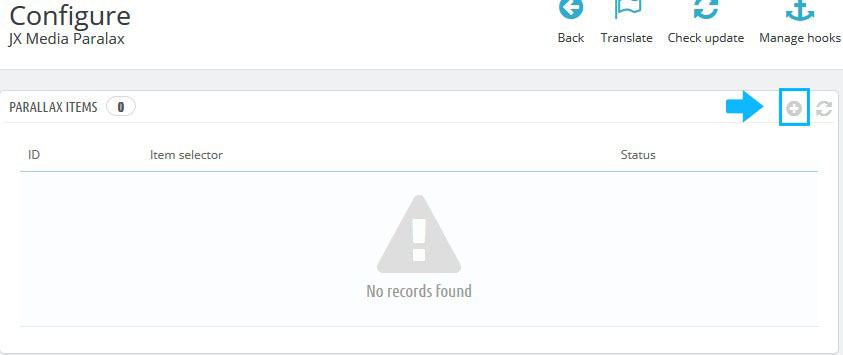
- You will see the main module panel. To create a new parallax item, click the ‘plus‘ icon:
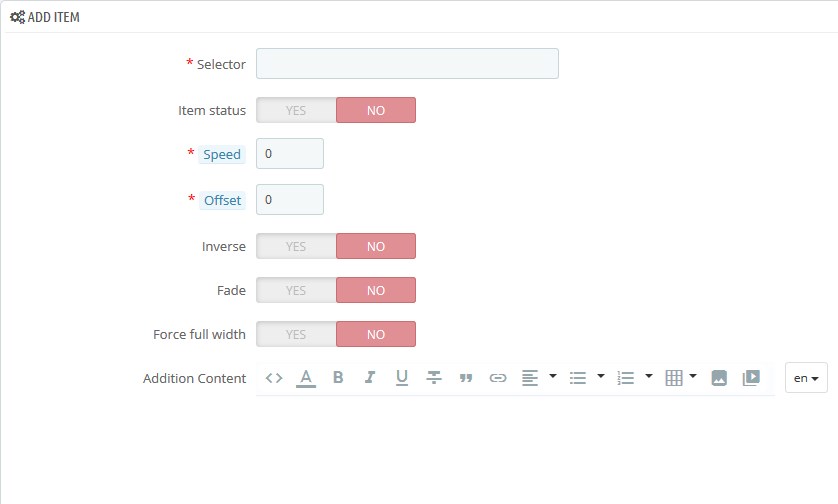
- Set the following options:
- Selector – css selector of the item;
- Item status – enable/disable the item;
- Speed – main parallax block speed;
- Offset – main layer indent on the Y axis;
- Inverse – parallax direction;
- Fade – option allows configuring main block fade-out on page scroll;
- Force full width – forced full width of the parallax block;
- Addition Content – addition text for the parallax item.
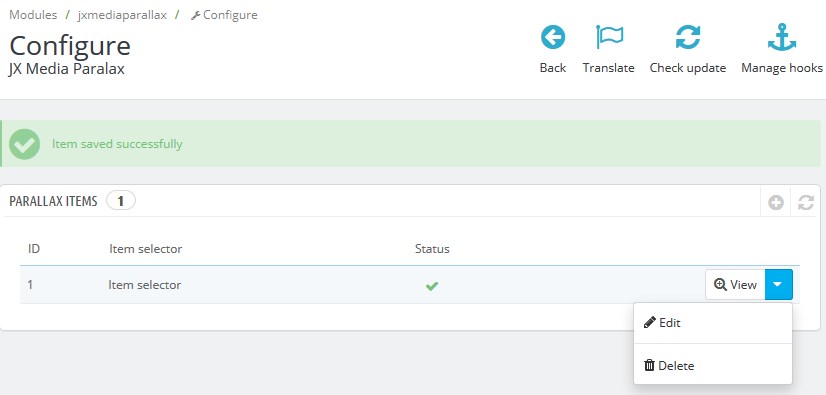
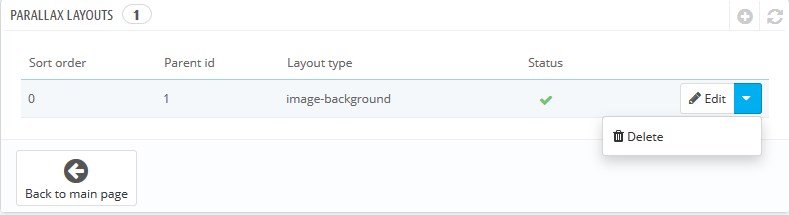
- You can view, edit or delete the item by clicking the corresponding button:
Add Parallax Layout
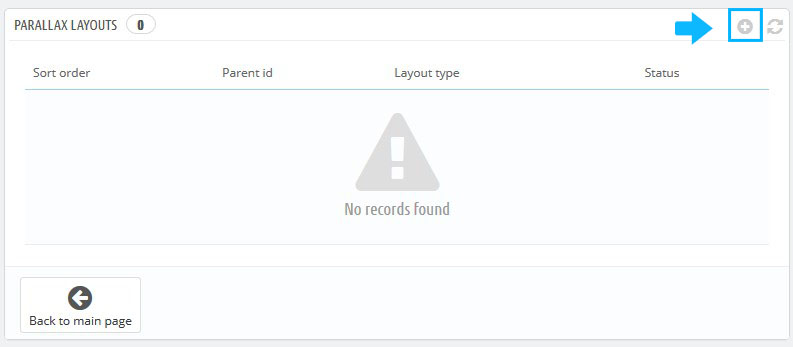
- Click the View button on the item. In this section, you can see Parallax layouts menu. Click ‘plus‘ icon to create a new layout:
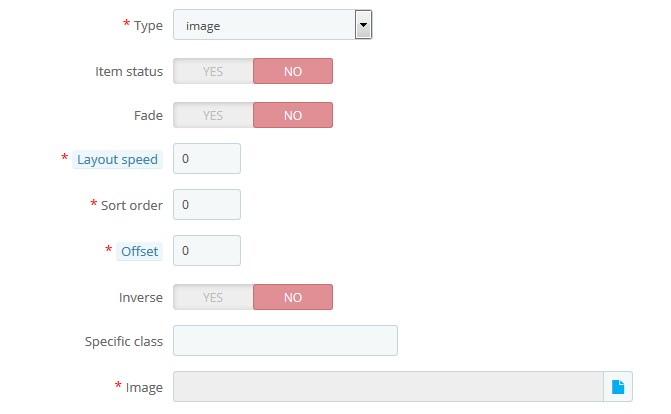
- Choose the type of the parallax layout from the drop-down list:
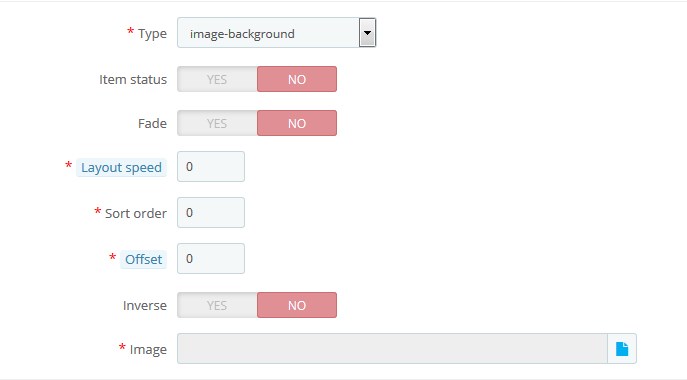
- image-background
- Item status – enable/disable the item status;
- Fade – this option allows configuring main block fade-out on page scroll;
- Layout speed – defines main parallax block speed;
- Sort order – layout position;
- Offset – main layer indent on the Y axis;
- Inverse – parallax direction;
- Image – an image, to which parallax effect will be applied.
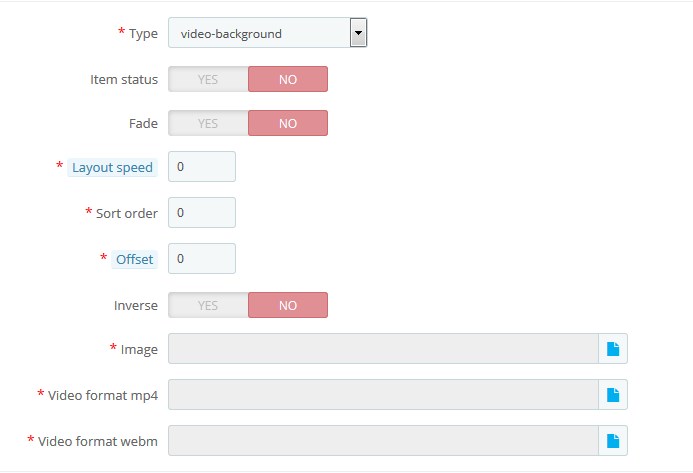
- video-background
- Item status – enable/disable the item status;
- Fade – this option allows configuring main block fade-out on page scroll;
- Layout speed – defines main parallax block speed;
- Sort order – layout position;
- Offset – main layer indent on the Y axis;
- Inverse – parallax direction;
- Image – additional image;
- Video format mp4 – video in mp4 format;
- Video format WebM – video in WebM format.
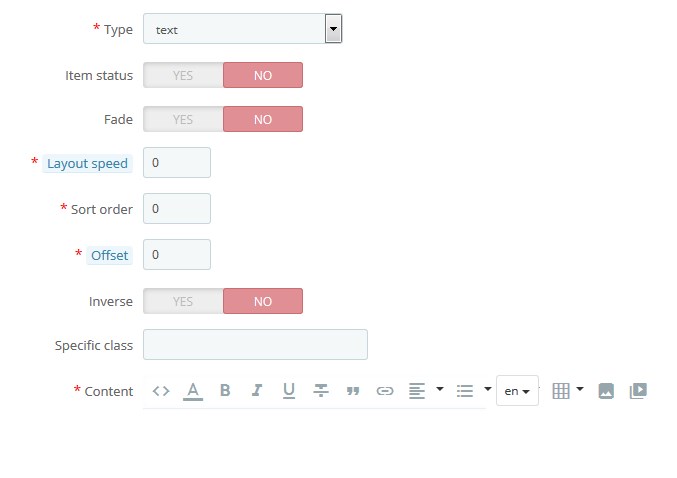
- text
- Item status – enable/disable the item status;
- Fade – this option allows configuring main block fade-out on page scroll;
- Layout speed – defines main parallax block speed;
- Sort order – layout position;
- Offset – main layer indent on the Y axis;
- Inverse – parallax direction;
- Specific class – custom css class;
- Content – additional text.
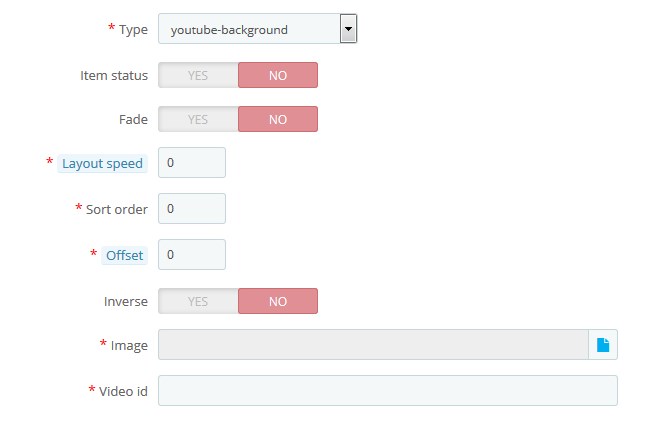
- youtube-background
- Item status – enable/disable the item status;
- Fade – this option allows configuring main block fade-out on page scroll;
- Layout speed – defines main parallax block speed;
- Sort order – layout position;
- Offset – main layer indent on the Y axis;
- Inverse – parallax direction;
- Image – additional image;
- Video id – youtube video id;
- image
- Item status – enable/disable the item status;
- Fade – this option allows configuring main block fade-out on page scroll;
- Layout speed – defines main parallax block speed;
- Sort order – layout position;
- Offset – main layer indent on the Y axis;
- Inverse – parallax direction;
- Specific class – custom css class;
- Image – additional image;
- image-background
- You can edit a layout by clicking the Edit button or remove it by clicking the Delete button:
 Hopefully, this tutorial was helpful for you.
