


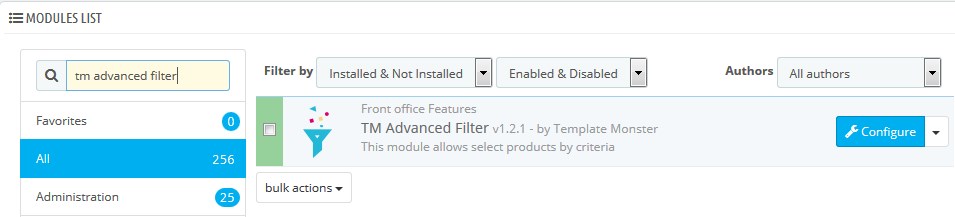
- In your PrestaShop admin panel go to Modules -> Modules and Services. Find “TM Advanced Filter” module and click the Configure button:
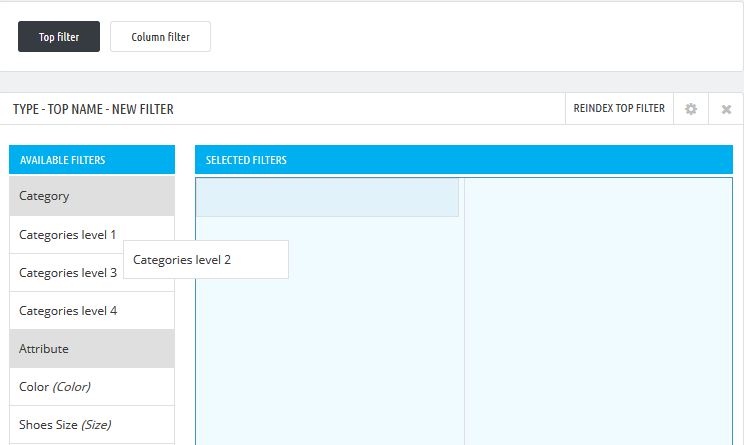
- First, you need to add the element to the filter. Select it in the panel of available elements (the left column) and drag it to the available area of the filter grid (it will light up after being selected).
- In the highlighted area select the column and the position of the new element and drop the element:
- The popup window will appear. Fill in the following fields:
- Name – the title of the element.
- Label – the label of the filter element.
- Description – the short description of the element.
- Parent filter – the filter parent element, after selecting which the element will be available.
- Filter field type – the way the element will be displayed on the frontend.
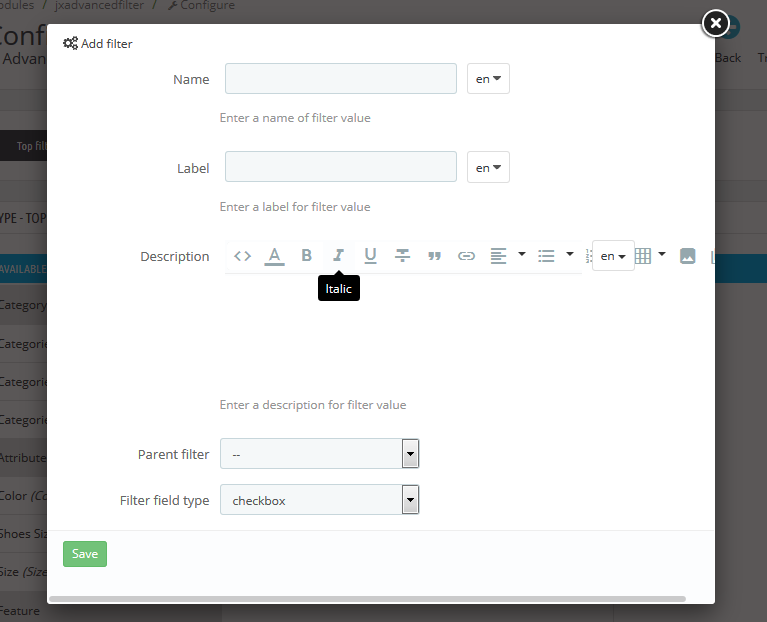
- Save the changes.
- Select more other attributes from the left column. Drag them to the right column and fill in the popups that appear:
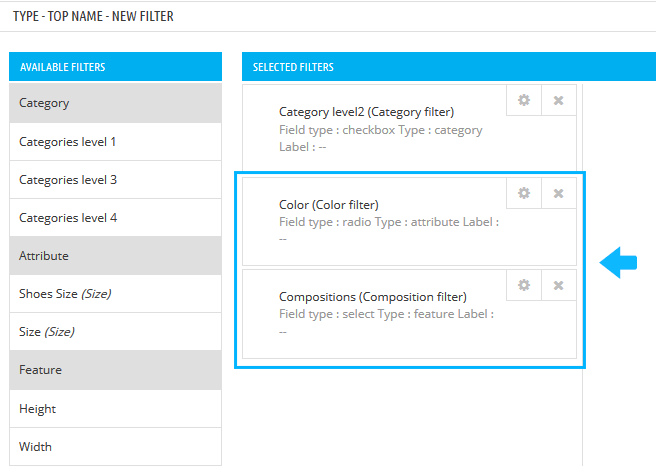
- After editing the element, the filter should be re-indexed, which is shown by the button in the filter menu top, marked with the red color:
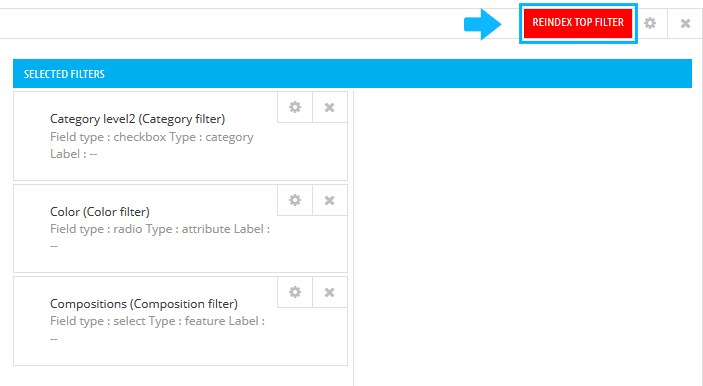 [notice type=”warning”]Note: Do not go for reindexing the filter after editing every element. You can do this after applying changes to all the needed elements.
 - If there is a tree of connected filters, you can add the new element as a related to this tree.
Hopefully, this tutorial was helpful for you.

