


TM Products Slider module allows you to show up products in your store slider.
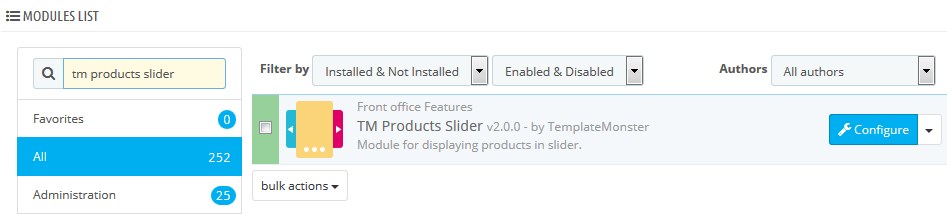
- In your PrestaShop admin panel go to Modules and Services -> Modules and Services. In the search field type “TM Products Slider” to find the module. Click the Configure button to manage it:
- In the Slider list section, you can see the products that were added to the module. You can set the status of the product (enable/disable) or remove it completely by clicking the Delete button. In case you would like to change slides order, simply drag and drop slides/products to needed position:

- You can set the following options in the lower part of the module:
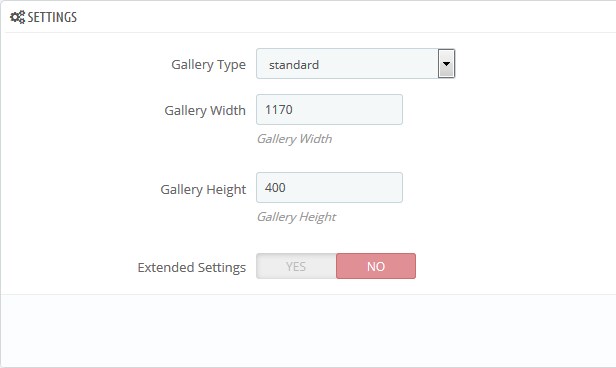
- Gallery Type – the type of your gallery. It can be: standard, grid, list, full width;
- Gallery Width – the width of the gallery;
- Gallery Height – the height of the gallery;
- Extended Settings (if the option is enabled):
- Slider Duration – allows to change the duration of the transition between two slides;
- Use navigation – enable/disable the navigation of the slides;
- Use Thumbnails – enable/disable the thumbnails of the slides;
- Use Pagination – enable/disable the pagination of the slides;
- Use Image Gallery – use the image gallery (if the option is enabled);
- Allow autoplay – option means whether your slides switch automatically or not;
- Allow Loop – enable/disable the loop.
- If you want to add a new product to the slider, you need to go to Catalog -> Products section. Select a product you want to add to the slider and click the Edit button. In the opened window click TM Products slider tab and check the “Display in TM Products Slider” option. Click the Save button to confirm the action:

Hopefully, this tutorial was helpful for you.

