


The installation process of PrestaShop engine is very simple. As soon as you have all files on your web server, you can start configuring your shop in no more than 5 minutes.
[notice type=”warning”]NOTE: Before you get started, make sure you have all the required software and hardware available: server space at a hosting provider, domain name, FTP client, text editor.

Preparation
- Download the PrestaShop engine from the official website.
- Extract the archive on your computer using a zip tool (WinZip for Windows OS or Stuffit Expander for MAC OS)
[notice type=”warning”]NOTE: Do not upload the downloaded prestashop_1.6.x.zip file directly to your web server. - Zip the content of prestashop_1.6.x/prestashop folder into an archive.
- Go to the FTP or cPanel File Manager to upload the new zipped file.
- Extract the file on your hosting server.
- When you are done with the files upload, you can start the PrestaShop engine installation. Open your web browser and type in the ‘domain name/path to your PrestaShop directory’ in the address bar, then reload the current page. You should see the welcome screen.
Installation
- Welcome page. This page is a quick introduction to the installation process. Here you can choose a language for the installer. Then, click the Next button.

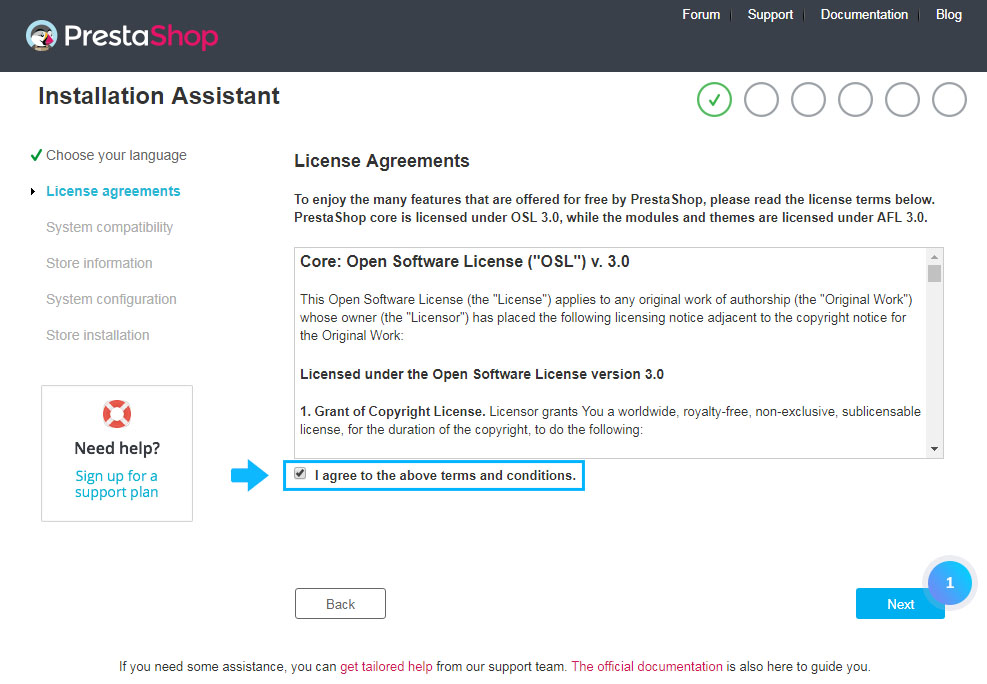
- PrestaShop’s licenses. PrestaShop is free and distributed under a certain set of open-source licenses. To use its software check the “I agree to the above terms and conditions” box, then click the Next button.
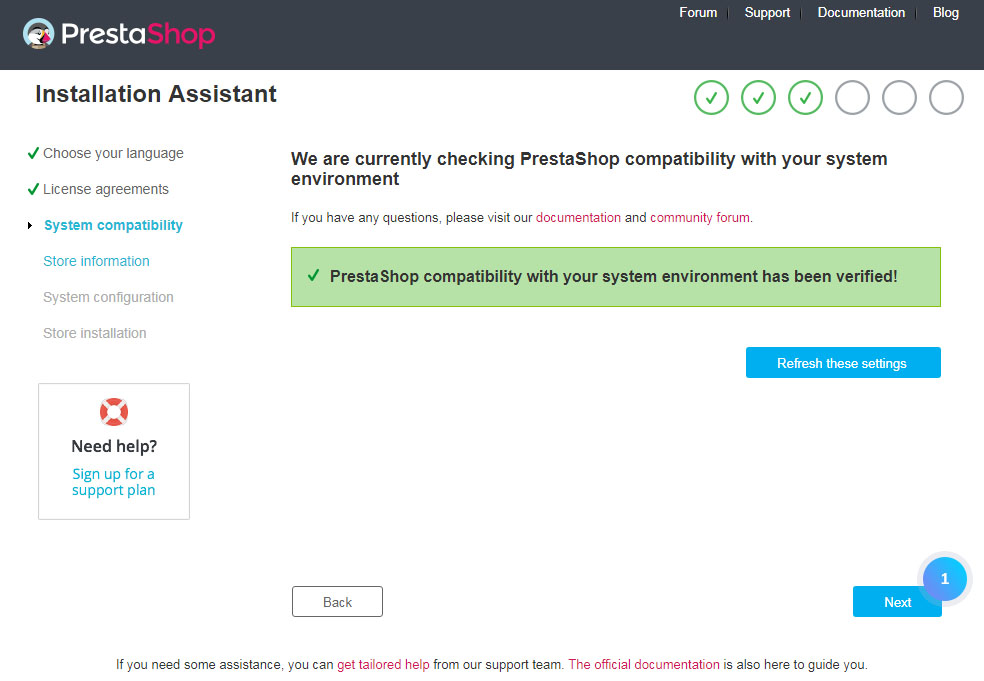
- System Compatibility. Here will be a quick check of all parameters on your host. If nothing wrong is found, you are taken directly to the next page.
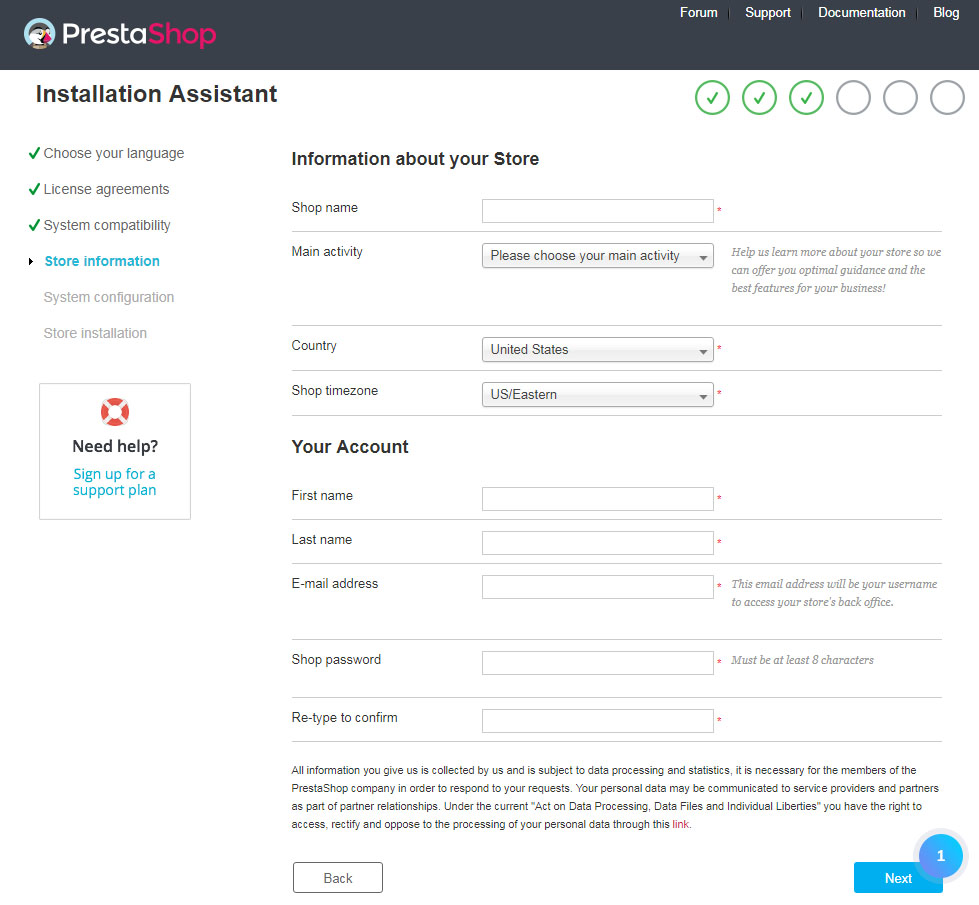
- Store information. On this page, you can start customizing your store. Indicate a shop name, its main activity and personal information of the shop owner.
- System configuration. Fill in all the fields with the database connection information.
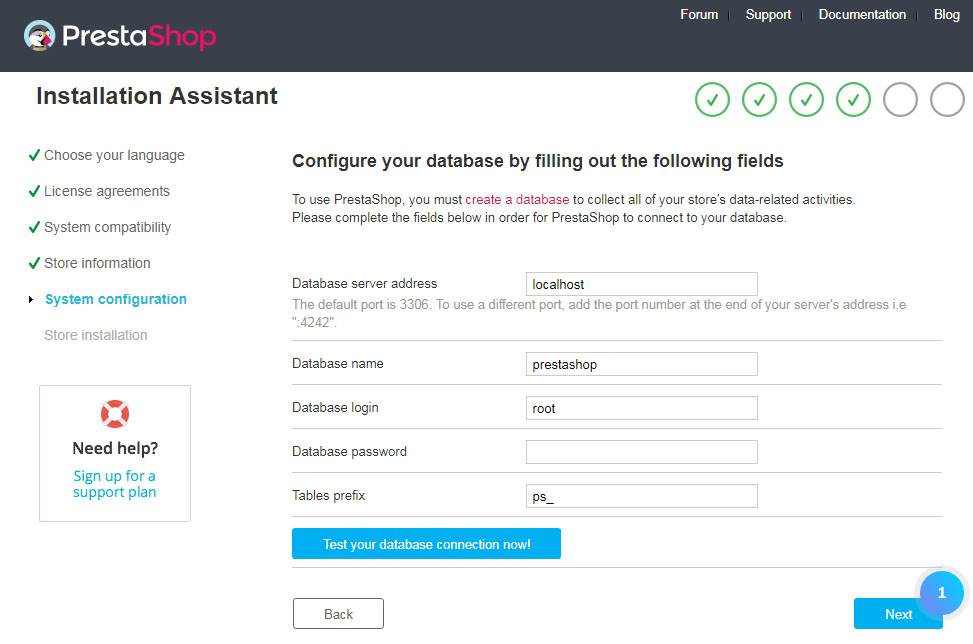
[notice type=”warning”]NOTE: You need to contact your hosting provider if you don’t have the database details or if you’re having difficulties creating a database.
[notice type=”warning”]NOTE: Do not change the default ps_ prefix if you would like to use template sample data (dump.sql file).
Click the “Test your database connection now!” button in order to check that you did use the correct server information.
Click the Next button to start configuring your store.
This might take a few minutes. Be patient and do not touch your browser! Once it is done, your shop is installed and ready to be configured!
- Once the installation is completed, open the PrestaShop directory and delete or rename the Install folder to improve your PrestaShop store security.
- Now, you can log into your PrestaShop back-office by going to your newly-renamed “admin” folder, and start modifying your store. You are also able to install new themes.
Hopefully, this tutorial was helpful for you.
